

- 16/05/2025
- Posted by: phucthien
- Category: Blog

Hairpiece attachment for beginners doesn’t have to be intimidating. This guide simplifies the process, showing you the easiest hair systems attachment techniques to confidently achieve your desired look. We’ll explore beginner-friendly hairpiece attachment tutorials, ensuring a secure and natural-looking fit. This article offers solutions for achieving a more confident you. Unlock your potential with the right attachment method.
Discover the art of hair enhancement with these proven techniques. Learn about hair integration, toupee application, and hair addition secrets.
Understanding Your Hairpiece Journey
Embarking on the path of non-surgical hair replacement is a significant step towards reclaiming your desired look and boosting self-assurance. Hairpieces, also known as hair systems or toupees, offer a versatile and effective solution for various forms of hair thinning or loss. For beginners, the initial phase often involves choosing the right hairpiece base material, hair type, and, crucially, deciding on the most suitable attachment method.
The method you choose impacts daily wear, maintenance routine, and the overall longevity of both the bond and the hair system itself. Understanding the fundamentals before you begin is key to avoiding common pitfalls and achieving results that look and feel completely natural. PhucthienToupee is dedicated to providing not just premium hair systems but also the knowledge you need for success.
✂️ Be unique — create your custom-made toupee today!
Why Choose a Hairpiece? The Benefits for Beginners
Before diving into attachment techniques, let’s briefly highlight why hairpieces are an excellent choice:
- Instant Results: Unlike treatments that take months, a hairpiece provides an immediate aesthetic transformation.
- Non-Invasive: It is a non-surgical solution, avoiding the risks, recovery time, and costs associated with transplants.
- Versatility: Modern hair systems allow for various styles, colours, and densities, matching your natural hair or creating a new look.
- Confidence Boost: Addressing hair loss can significantly improve self-esteem and social confidence.
- Reversible: If you decide it is not for you, or want to try a different approach, you can simply stop using it.

Easy application: Learn basic Hair System Attachment Methods and essential Secure Hairpiece Tips
Preparing for Hairpiece Attachment: The Crucial First Steps
Regardless of the attachment method you select, proper preparation is non-negotiable. A clean, well-prepped scalp ensures a stronger, longer-lasting bond and helps prevent skin irritation. This foundational step is emphasized across the hair replacement industry for optimal results.
Step 1: Scalp Cleaning
Your scalp must be completely free of oils, residues from previous adhesives, sweat, and dirt.
- Action: Use a specialized scalp cleanser or an oil-free shampoo. Wash your scalp thoroughly. If you have existing hair in the attachment area, ensure it is also clean and completely dry.
Step 2: Hair Removal (If Applicable)
For methods involving tape or liquid adhesive directly on the scalp (common with full poly or thin skin bases), the bonding area needs to be smooth.
- Action: Carefully shave the area where the hairpiece will sit. Use a sharp razor and shaving cream suitable for sensitive skin. Shave in the direction of hair growth initially, then against it for maximum smoothness if your skin tolerates it.
- Rationale: Hair stubble interferes with the adhesive making full contact with the scalp, leading to a weaker bond and potentially lifting edges.
Step 3: Applying Scalp Protector
This is a vital step, especially for sensitive skin or when using extended-wear adhesives.
- Product: Use a dedicated scalp protector product (often available as a spray or wipe). Phucthien recommends products like Walker Tape’s Scalp Protector™ or Max Hold Sport™.
- Action: Apply a thin, even layer to the entire bonding area. Allow it to dry completely according to the product instructions (usually 1-3 minutes). Some may require a second coat.
- Benefits:
- Creates a protective barrier between your skin and the adhesive.
- Helps prevent irritation and allergic reactions.
- Improves adhesion, especially in humid conditions or for oily skin types.
- Can extend the life of the bond.
Table: Scalp Preparation Essentials
| Step | Action | Key Benefit | Phucthien Recommendation |
| Scalp Cleaning | Wash with oil-free cleanser/shampoo | Removes oils/residue for better bond | Use specialized scalp cleanser; ensure complete dryness |
| Hair Removal | Shave bonding area (if needed) | Ensures smooth surface for adhesion | Use sharp razor, sensitive skin cream; shave carefully |
| Scalp Protection | Apply scalp protector, let dry completely | Protects skin, enhances bond strength | Use reputable brand (e.g., Walker Tape); follow drying times |
With your scalp perfectly prepped, you are ready to explore the four primary attachment methods suitable for beginners.
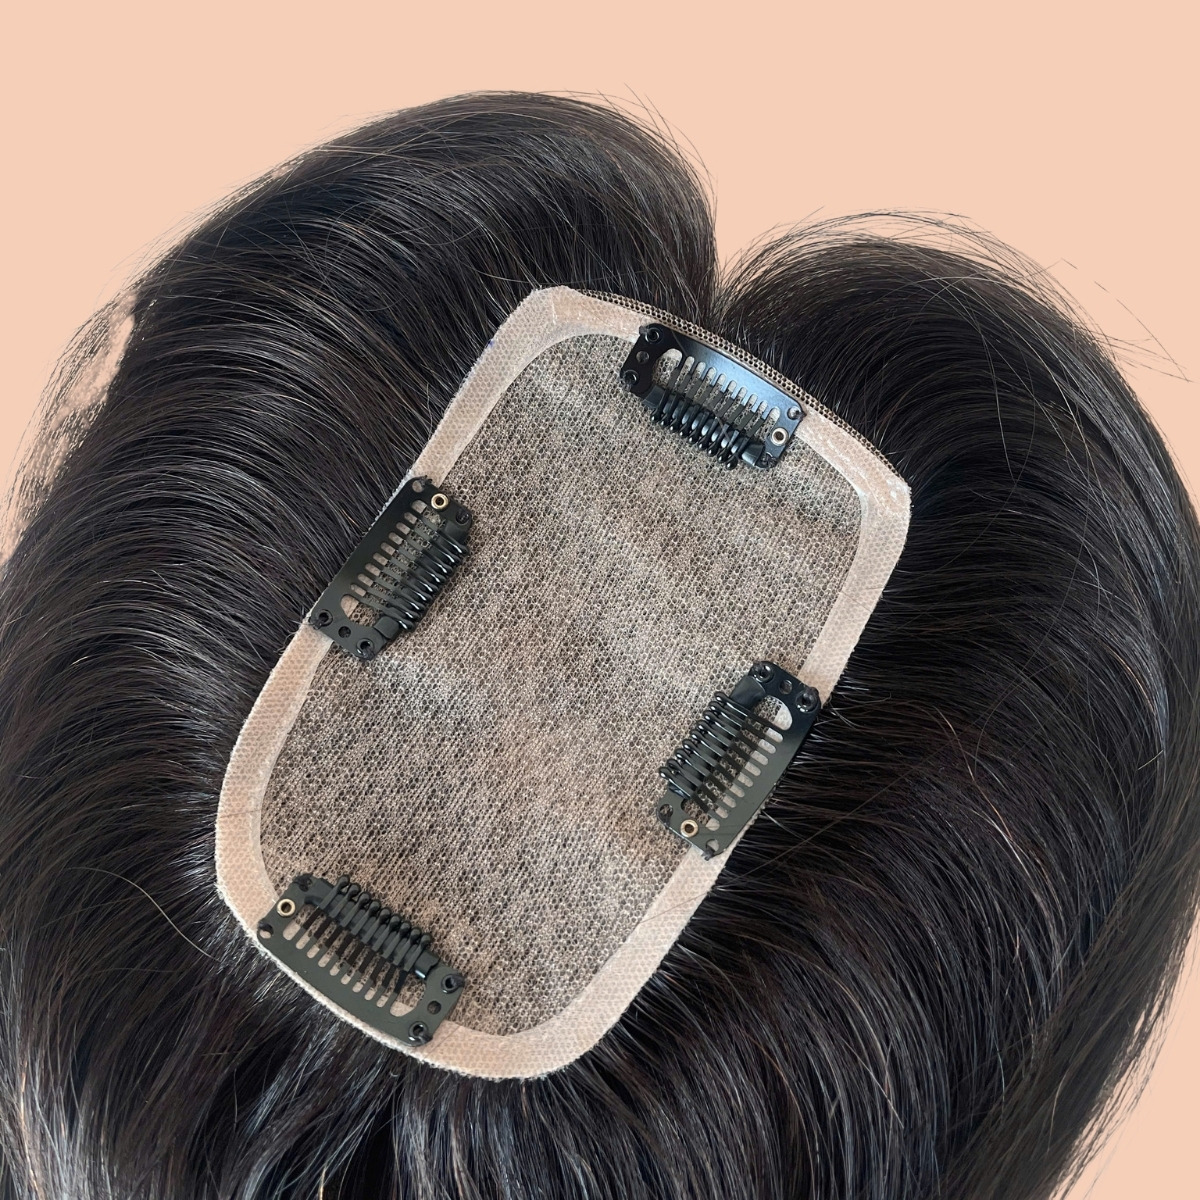
Method 1: Double-Sided Hairpiece Tape
Tape is often considered the most beginner-friendly hairpiece attachment technique due to its relative ease of application and cleanup. It involves using specially designed double-sided adhesive tapes to secure the hairpiece base to your scalp.
What is Hairpiece Tape?
Hairpiece tape comes in various forms, strengths, and contours. It is essentially a medical-grade adhesive coated onto a carrier material. Think of it like extremely strong, skin-safe double-sided sticky tape.
- Materials: Typically made with acrylic or silicone adhesives.
- Formats: Available in rolls (cut to size), pre-cut contours (shaped for front hairlines or specific base areas), and straight strips.
- Hold Times: Vary significantly, from daily wear (removed each night) to extended wear (lasting several days to multiple weeks).
Pros and Cons of Using Tape
Pros:
- Ease of Use: Generally easier for beginners to handle than liquid adhesives. Placement can often be adjusted slightly before pressing down firmly.
- Clean Application: Less messy during application compared to liquids.
- Controlled Placement: You know exactly where the adhesive is being applied.
- Variety: Wide range of hold strengths and contours available.
- Quicker Cleanup: Removal and cleanup of tape residue are often faster than removing liquid adhesive residue.
Cons:
- Potentially Less Natural Hairline: Achieving a perfectly invisible front hairline can be more challenging with tape compared to expertly applied liquid adhesive, especially with lace bases. Thicker tapes might create a slight edge.
- Hold Time Variability: Actual hold time depends heavily on tape type, body chemistry, climate, and activity level.
- Can Be Bulky: Some thicker tapes might feel slightly more noticeable under the base.
- Residue: While cleanup is generally easier, some tapes can leave sticky residue requiring specific solvents.
Types of Hairpiece Tapes for Beginners
| Tape Type | Typical Hold Time | Best For | Beginner Friendliness | Example Brands (Commonly Available) |
| Daily Wear | 1-3 days | Short-term use, trying out placement, very sensitive skin, frequent removal | High | Walker Tape No-Shine, Vapon Topstick |
| Extended Wear | 1-4 weeks | Longer hold, active lifestyles, less frequent maintenance | Moderate | Walker Tape Ultra Hold, Supertape |
| Lace Front Support | Varies (often EW) | Specifically designed for front hairlines, often thinner with a dull finish | Moderate | Walker Lace Front Tape, Blue Liner |
| Rolls | Varies | Customizing length and shape, economical for large areas | Moderate | Available in most types above |
| Contours/Strips | Varies | Pre-cut for specific areas (front, sides, back), convenience | High | Available in most types above |
Note: Hold times are estimates and vary per individual.
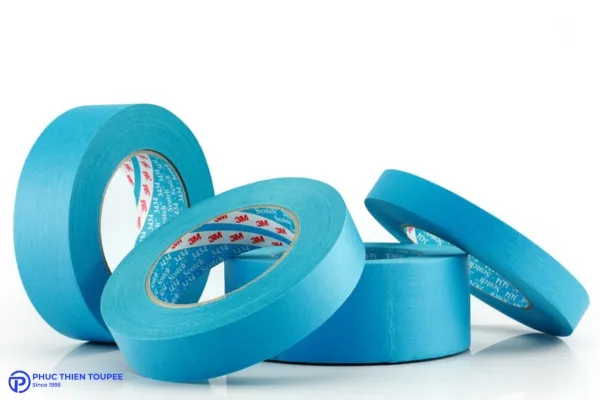
Step-by-Step Guide: Attaching with Tape
This guide assumes you have already prepped your scalp as described earlier.
- Prepare the Tapes: If using a roll, cut the tape into the desired lengths/shapes for the perimeter of your hairpiece base. If using contours, select the appropriate shapes.
- Apply Tape to the Hairpiece Base:
- Turn your hairpiece inside out, placing it on a clean stand or surface.
- Carefully peel off one side of the tape’s liner (usually the printed side). Avoid touching the adhesive with your fingers as much as possible (oils reduce tackiness).
- Apply the sticky side of the tape firmly to the designated attachment areas on the underside of the hairpiece base (typically the perimeter for polyurethane/skin bases, or designated PU strips on lace/mono bases).
- Press the tape down firmly onto the base material. Ensure there are no air bubbles trapped underneath.
- Phucthien Tip: For lace bases without a PU perimeter, use tape specifically designed for lace (like Lace Front Support Tape) and apply it carefully along the edge or designated reinforcement areas. Applying tape directly to delicate lace mesh requires care.
- Prepare for Placement: Leave the second liner (covering the side that sticks to your scalp) ON the tapes for now.
- Position the Hairpiece:
- Stand in front of a mirror. Identify your desired front hairline position. Many beginners find marking faint dots with an eyeliner pencil helpful initially (ensure it is washable).
- Hold the hairpiece by the front edge. Gently place the front edge onto your forehead, aligning it with your desired hairline mark, without pressing the taped areas onto the scalp yet.
- Secure the Front (If Applicable): If satisfied with the front placement, carefully peel back the liners from the front tapes only. Gently roll or press the front edge of the hairpiece onto your scalp, starting from the center and working outwards.
- Secure the Sides and Back: Once the front is lightly secured, carefully peel the liners from the remaining tapes (sides and back). Slowly roll the rest of the hairpiece down onto your scalp, ensuring it lies flat without wrinkles or tension.
- Apply Firm Pressure: Once the hairpiece is fully positioned, use your fingertips or a soft cloth to press down firmly along all taped areas for at least 30-60 seconds. This activates the pressure-sensitive adhesive and ensures a secure bond.
- Check the Edges: Run your finger along the perimeter to ensure all edges are securely adhered.
Tips for Beginners Using Tape
- Start with Daily Wear Tape: Get comfortable with the application and removal process before moving to extended-wear tapes.
- Handle Tape Edges: Try to handle tapes by their liners or edges to avoid transferring skin oils.
- Use Rubbing Alcohol: Lightly wiping the base attachment area (PU strips) with 99% isopropyl alcohol before applying tape can enhance adhesion. Ensure it evaporates completely first.
- Avoid Water/Sweat Initially: Most tapes require some time to fully cure. Avoid showering, swimming, or intense exercise for the first 12-24 hours after application if possible (check tape instructions).
- Removal: Use a designated adhesive remover (like C-22 Solvent or Walker Solvent) to release the tape bond gently. Never pull the hairpiece off forcefully.
Tape is a reliable and popular choice, offering a great starting point for your hairpiece attachment journey.
🎨 Your style, your hair — we make it exactly how you want
Method 2: Liquid Adhesives (Hairpiece Glue)
Liquid adhesives, often referred to as hairpiece glue or bonding adhesive, offer the potential for the strongest, longest-lasting holds and are favoured for achieving highly undetectable hairlines, especially with lace front systems. However, they typically require more skill and patience to apply and clean up compared to tapes.
What is Liquid Adhesive?
These are specially formulated bonding agents designed for prolonged skin contact. They come in various formulations, primarily silicone-based or acrylic-based, and some water-based options exist (often for shorter holds or specific base types).
- Formulations:
- Silicone-Based: Generally provide a strong, flexible, and waterproof bond. Can be more challenging to clean up. Examples: Walker Ultra Hold, Ghost Bond XL.
- Acrylic-Based: Also offer strong bonds, sometimes with slightly easier cleanup than silicone. Examples: Vapon No Tape.
- Water-Based: Often white when applied, drying clear. Typically offer shorter hold times (daily to weekly) and are easier to clean. May be less water-resistant initially. Examples: Ghost Bond Classic, Walker Great White.
- Application: Usually applied in thin layers to the scalp and/or the hairpiece base.
Pros and Cons of Using Liquid Adhesive
Pros:
- Strongest Hold: Generally offers the most secure and longest-lasting bonds available (can last 2-6 weeks depending on the product and individual factors).
- Undetectable Hairline: When applied correctly, especially with lace fronts, liquid adhesives can create a truly seamless transition from skin to hair.
- Waterproof (Most Formulations): High-quality liquid adhesives are typically very resistant to water, sweat, and humidity once fully cured.
- Conforms to Scalp: Liquid adhesive can fill tiny gaps and conform perfectly to the scalp’s contours.
Cons:
- Messier Application: Can be drippy and sticky, requiring careful handling.
- Learning Curve: Requires practice to apply thin, even layers and achieve correct placement without smearing. Curing times must be respected.
- Longer Application Time: Application and drying/curing time take longer than tape.
- More Difficult Cleanup: Removing liquid adhesive residue from both the scalp and the hairpiece base (especially lace) can be time-consuming and requires specific solvents.
- Potential for Irritation: Requires a patch test before full application, as some individuals may be sensitive to ingredients.
Importance of the Patch Test (YMYL Consideration)
This step is crucial and non-negotiable when using liquid adhesives for the first time. Your health and safety are paramount (YMYL – Your Money Your Life).
- Action: Apply a small amount of the adhesive to a discreet area of skin (like behind the ear or on the inner forearm).
- Cover: Cover with a small bandage.
- Wait: Leave it on for at least 24-48 hours (follow adhesive manufacturer’s recommendation).
- Check: Remove the bandage and check for any signs of redness, itching, burning, or irritation.
- Proceed: If no reaction occurs, the adhesive is likely safe for you to use on your scalp. If any irritation occurs, do not use that adhesive and try a different formulation (perhaps water-based or one designed for sensitive skin), performing a patch test again.
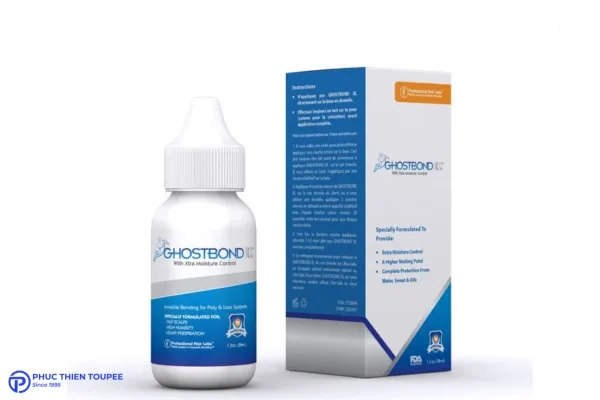
Step-by-Step Guide: Attaching with Liquid Adhesive
This guide assumes a full scalp bond application (common for poly/skin bases or full lace systems). Remember your scalp prep!
- Mark Your Hairline: Use a washable eyeliner pencil to faintly mark your desired front hairline position on your forehead.
- Apply Adhesive to Scalp:
- Using the applicator brush, a makeup sponge, or even your fingertip (wear gloves if preferred), apply a thin, even layer of liquid adhesive to the designated bonding area on your scalp. Start slightly behind your marked hairline to avoid seepage.
- Phucthien Critical Tip: Thin layers are key. Multiple thin layers are far better than one thick layer. Thick layers take longer to cure, can seep, and provide a weaker bond.
- Allow Curing Time (Crucial): Let the first layer of adhesive dry according to the manufacturer’s instructions. This often means waiting until it turns clear (for white glues) or becomes tacky (check instructions – usually 5-15 minutes depending on the product and climate). Proper curing is essential for bond strength. Some adhesives require multiple layers (e.g., 2-4), with curing time needed between each layer.
- Apply Adhesive to Base (Optional but Recommended for Some Bases): For polyurethane (PU) or thin skin bases, you can also apply a thin layer of adhesive directly to the base material, allowing it to cure simultaneously. This creates a stronger bond. Do not apply liquid adhesive directly to lace mesh – it will seep through and make a mess. For lace, adhesive is typically applied to the scalp only.
- Position the Hairpiece:
- Once the final layer of adhesive on your scalp is properly cured (tacky but not wet), carefully pick up the hairpiece.
- Align the front edge with your marked hairline. Gently place the front down first, trying to hit the correct spot accurately. Liquid adhesive offers less repositioning time than tape once contact is made.
- Slowly roll the hairpiece back, pressing it onto the scalp from front to back, smoothing it down to avoid air bubbles or wrinkles.
- Apply Firm Pressure: Once positioned, press down firmly all over the hairpiece, especially around the perimeter, for at least 60 seconds. Use a towel or cloth to help distribute pressure evenly.
- Curing Period: Avoid getting the hairpiece wet, excessive sweating, or applying styling products near the base for the recommended initial curing period (often 24 hours – check product details). This allows the bond to reach maximum strength.
Tips for Beginners Using Liquid Adhesive
- Less is More: Always start with very thin layers. You can always add another if needed (following curing instructions).
- Work in Sections: For large areas, you might apply adhesive to the front section first, position it, then apply to the back and secure it.
- Use a Mirror Setup: Having a multi-angle mirror setup (e.g., a tri-fold mirror) is extremely helpful for placement.
- Keep Solvent Handy: Have your adhesive remover and cotton swabs ready for minor cleanups around the edges immediately after application.
- Patience: Don’t rush the curing times. This is the most common beginner mistake leading to bond failure.
- Lace Systems: For lace front systems, applying adhesive just behind the hairline on the scalp and gently pressing the lace into it provides the most natural look. Avoid getting glue on the hairline edge itself.
Liquid adhesives offer unparalleled hold and realism but demand precision and patience, making them a skill to develop over time.
🔍 Looking for a specific size, base, or hair color? Order a fully personalized toupee now!
Method 3: Hairpiece Clips
Clip-in hairpieces or using clips as an attachment method is arguably the simplest and least committal option, ideal for beginners who want a non-adhesive solution or need to remove their hairpiece frequently.
What are Hairpiece Clips?
These are small, pressure-sensitive clips (similar to those found on clip-in hair extensions) that are either pre-attached to the hairpiece base or can be sewn onto it. They work by snapping shut onto your existing hair, securing the hairpiece in place.
- Mechanism: Clips have small combs that slide under your natural hair, and a flexible metal piece that snaps closed, trapping the hair securely.
- Attachment: Can be sewn along the perimeter or strategically placed across the base.
Pros and Cons of Using Clips
Pros:
- Easiest Application/Removal: Simply position the hairpiece and snap the clips shut. Removal takes seconds.
- No Adhesives: No need for tapes, glues, solvents, or extensive scalp prep (though a clean scalp is always good). Ideal for sensitive skin.
- Allows Scalp to Breathe: No adhesive barrier covering the scalp.
- Cost-Effective: No recurring cost for adhesives or removers.
- Good for Daily Wear: Perfect for those who prefer to remove their hairpiece at night.
Cons:
- Requires Sufficient Existing Hair: You need enough natural hair (of adequate length and density) for the clips to grip onto securely. Not suitable for areas of complete baldness.
- Less Secure than Adhesives: May not be suitable for very vigorous activities (e.g., swimming, contact sports) as clips can potentially slip or become dislodged under extreme force.
- Potential for Discomfort/Tension: If clips are placed poorly or pull too tightly, they can cause discomfort or even traction alopecia (hair loss due to prolonged tension) over time. Proper placement and rotation are important.
- Can Feel Bulkier: The clips themselves add some minor bulk under the base.
- Visible Edges Possible: Achieving a completely flat, invisible front hairline can be harder compared to adhesives, especially if your existing hairline is sparse.
Step-by-Step Guide: Attaching with Clips
- Prepare Your Hair: Ensure your natural hair is clean and dry. You might lightly backcomb or tease the hair very gently in the areas where the clips will attach to provide a more secure grip, but avoid excessive teasing which can cause damage.
- Open the Clips: Ensure all the clips attached to the hairpiece base are in the open position (bent outwards).
- Position the Hairpiece: Place the hairpiece on your head, aligning the front with your desired hairline or integration point.
- Secure the Front Clips: Slide the combs of the front clips under your natural hair near the hairline and press down firmly on the clip ends until they snap shut. Ensure they feel secure but not painfully tight.
- Secure the Side and Back Clips: Working your way around the perimeter (and any clips in the center), slide each clip into place under your natural hair and snap it shut. Ensure the hairpiece lies flat and feels evenly secured.
- Check for Security and Comfort: Gently tug the hairpiece to ensure it feels secure. Check that no clips are pulling uncomfortably. If a clip feels too tight or is causing pain, open it, reposition slightly, and re-clip.
- Blend: Style the hairpiece hair and your natural hair together for a seamless blend.
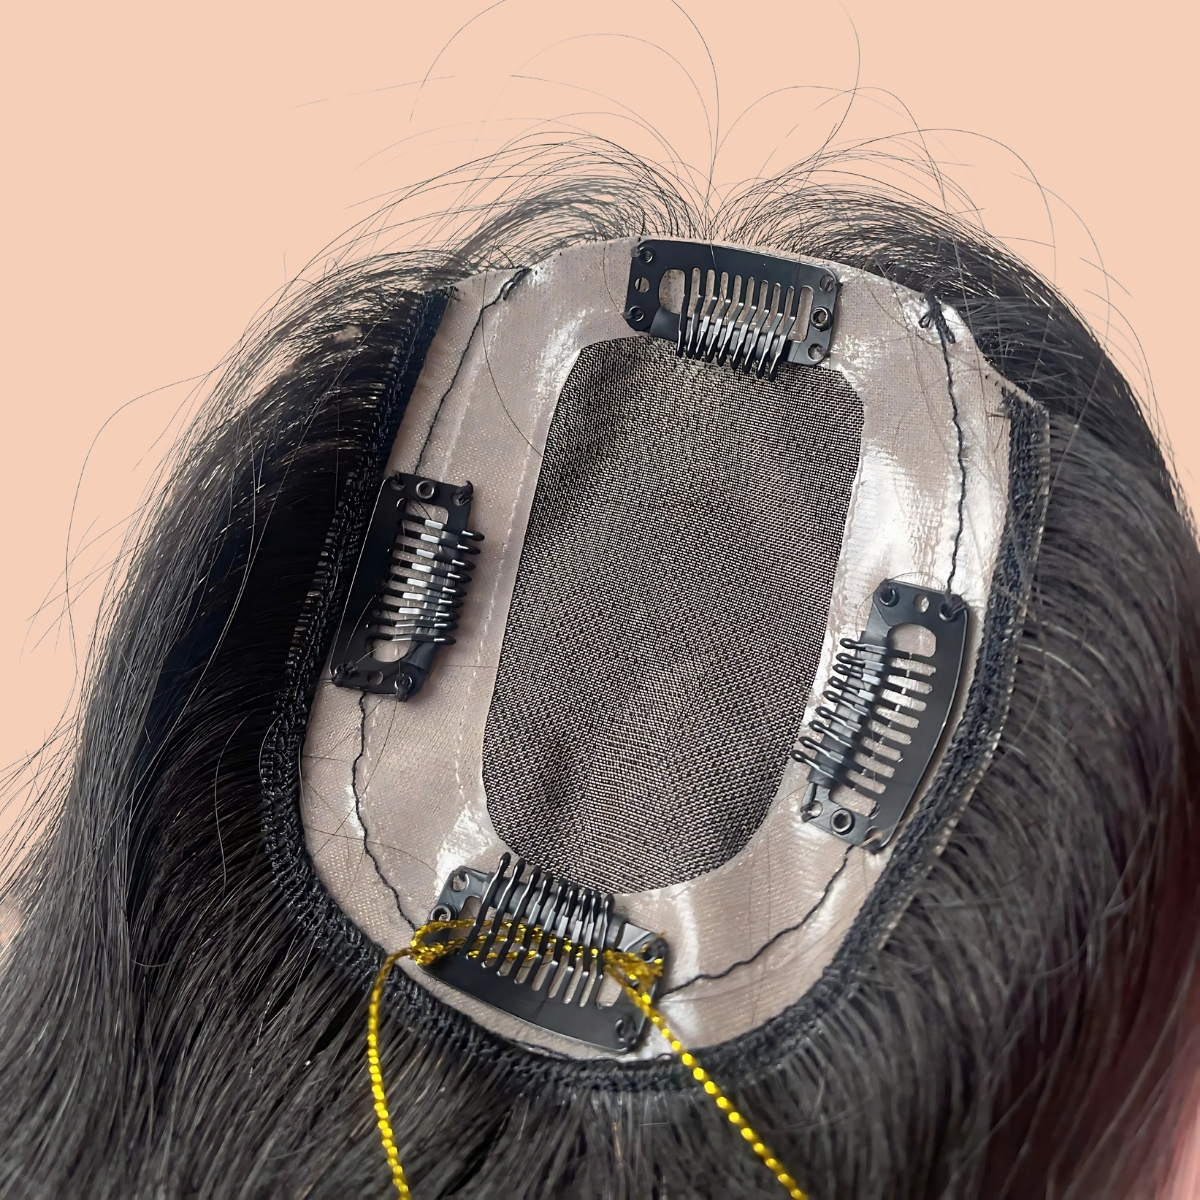
Tips for Beginners Using Clips
- Clip Placement is Key: Ensure clips are distributed evenly to balance the weight and avoid excessive tension in one area. If sewing clips on yourself, experiment with placement for optimal comfort and security.
- Vary Clip Positions: If you wear a clip-in piece daily, slightly vary the exact spot where you clip it each day to minimize constant stress on the same hair follicles.
- Choose Quality Clips: Ensure the clips are sturdy, snap securely, and ideally have a silicone strip for extra grip and comfort. PhucthienToupee uses high-quality clips on our ready-to-wear options.
- Consider Hair Density: If your hair is very fine, clips might slip more easily. Gentle backcombing can help, or consider combining clips with a small amount of tape at the very front for added hairline security if needed.
- Listen to Your Scalp: If you experience persistent discomfort or notice hair breakage around clip areas, adjust the placement or give your scalp a break.
Clips offer unparalleled convenience for temporary wear or for those with sufficient existing hair who prefer to avoid adhesives.
💼 Whether for personal use or salon business, custom orders are always welcome.
Method 4: Combination Methods (Hybrid Approach)
As you gain experience, you might find that combining different attachment methods offers the best balance of security, natural appearance, and ease of maintenance for your specific needs and hairpiece type. This is often referred to as a hybrid attachment.
What is a Combination Method?
This involves using two or more different attachment types on the same hairpiece application. A very common example is using liquid adhesive at the front hairline for maximum invisibility and tape around the sides and back for easier application and cleanup.
Common Combination Scenarios
- Lace Front Hairpiece: Liquid adhesive (like Ghost Bond) applied carefully to the scalp only along the front hairline (first 1/2 to 1 inch). Double-sided tape (like Extended Wear or No-Shine) used around the PU perimeter on the sides and back.
- Benefit: Achieves an undetectable front hairline with easier maintenance on the rest of the unit.
- Poly Base with Existing Hair: Tape or liquid adhesive around the perimeter of the bald area, combined with clips sewn onto the edges where the hairpiece meets existing hair.
- Benefit: Secure bond on the bald area while integrating smoothly with existing hair without needing to shave the entire head.
- Added Security: Using tape primarily, but adding a dab of liquid adhesive in specific spots prone to lifting (e.g., temples) for extra hold during demanding activities.
- Temporary Strong Hold: Using daily wear tape for easy removal but reinforcing the front with a stronger, short-term hold liquid adhesive for a special event.
Pros and Cons of Combination Methods
Pros:
- Customizable Security: Tailor the attachment to specific needs (e.g., strongest hold at the hairline).
- Balances Benefits: Can combine the natural look of glue with the easier cleanup of tape.
- Versatile: Adaptable to different base types and wear patterns.
- Problem Solving: Can address specific issues like lifting edges in certain areas.
Cons:
- More Complex Application: Requires proficiency with multiple methods.
- Potentially Longer Application Time: You are essentially doing two types of application.
- Coordinated Removal: Need to use appropriate removers for each type of adhesive used.
- Requires Planning: Need to decide which method goes where before starting.
Step-by-Step Considerations for Combination Methods
The exact steps depend heavily on the combination used. However, the general principles remain:
- Plan Your Zones: Clearly decide which areas of the scalp/base will receive which type of attachment.
- Prioritize Application Order: Often, applying the perimeter tape first (leaving liners on) and then applying the liquid adhesive to the front hairline area (allowing it to cure) before positioning the unit makes sense.
- Apply Each Method Carefully: Follow the specific application steps for tape and/or liquid adhesive in their designated zones. Ensure liquid adhesive cures properly before positioning.
- Secure Sequentially: Typically, secure the liquid adhesive area first (as it has less repositioning time), then remove tape liners and secure the rest.
- Press Firmly: Ensure all areas are pressed firmly to activate bonds.

Tips for Beginners Trying Combination Methods
- Master Individual Methods First: Become comfortable with tape and liquid adhesive separately before attempting to combine them.
- Start Simple: Try the classic Tape Perimeter / Glue Front combination first, as it’s the most common and well-documented.
- Use Compatible Products: Ensure the tapes and glues you use don’t negatively interact (most standard hairpiece adhesives are compatible, but it’s good practice).
- Map it Out: Mentally (or even lightly marking on the base underside if appropriate) map out where each adhesive type will go.
Combination methods offer advanced customization but are best approached once you have a solid understanding of the individual techniques.
Choosing the Right Hairpiece Attachment Method For You
Selecting the best method depends on several personal factors. There is no single ‘best’ method – only the best method for you. Consider the following:
Table: Factors Influencing Attachment Method Choice
| Factor | Tape Favored If… | Liquid Adhesive Favored If… | Clips Favored If… | Combination Favored If… |
| Desired Hold Time | Daily to several weeks (choose tape type accordingly) | Longest hold desired (2-6 weeks) | Daily wear, easy removal needed | Need varying hold strengths (e.g., max hold at front) |
| Lifestyle | Moderately active, less frequent water exposure | Very active, swimming, high humidity climates | Less active, prefer nightly removal | Active, but want easier partial cleanup |
| Hairpiece Base | PU perimeters, full PU/Skin (easier), Mono (PU strips) | Lace fronts (best hairline), full Skin/PU (strongest bond) | Any base with sufficient existing hair for clips to grip | Lace front (glue front/tape back), partial systems |
| Scalp Sensitivity | Good option, various hypoallergenic tapes available | Patch test essential, water-based may be gentler | Best option if sensitive to adhesives | Choose hypoallergenic options for tape/glue sections |
| Maintenance Effort | Lower effort for cleanup vs. liquid | Higher effort for application and especially cleanup (residue) | Lowest effort, virtually no cleanup | Moderate to high, depends on combo |
| Desired Appearance | Good to excellent; hairline may need careful technique | Potentially the most undetectable hairline (esp. lace) | Good, but hairline blending depends on existing hair | Excellent hairline possible (glue) with easier sides/back (tape) |
| Beginner Skill Level | Easiest starting point | Moderate to advanced; requires practice and patience | Very easy, minimal skill needed | Advanced; requires skill in multiple methods |
| Budget (Consumables) | Moderate recurring cost for tapes | Moderate recurring cost for adhesive & specialized remover | Minimal to no recurring cost (clip replacement infrequent) | Moderate to high recurring cost (tape + glue + remover) |
Phucthien Recommendation: Many beginners find starting with a high-quality, medium-hold tape (e.g., 1-2 week wear) provides a good balance of security and manageability. As you gain confidence, you can experiment with longer-wear tapes or explore liquid adhesives, particularly for the front hairline if using a lace system. Clips are excellent if you have enough existing hair and prioritize ease of daily removal over maximum bond strength.
✨ A toupee shouldn’t just hide hair loss — make it a style statement!
Common Beginner Mistakes and How to Avoid Them
Learning takes practice. Here are some common hurdles beginners face and how Phucthien suggests overcoming them:
- Rushing the Process:
- Mistake: Trying to apply the hairpiece too quickly, especially with liquid adhesive, not allowing proper curing time.
- Solution: Allocate ample, uninterrupted time for application, especially initially. Follow curing instructions meticulously. Patience pays off.
- Improper Scalp Prep:
- Mistake: Leaving oil, sweat, or adhesive residue on the scalp.
- Solution: Be thorough with cleaning. Use a dedicated scalp cleanser and ensure the scalp is bone dry. Use scalp protector.
- Using Too Much Adhesive:
- Mistake: Applying thick layers of liquid adhesive, thinking more is stronger.
- Solution: Remember: thin, even layers. Multiple thin layers cure better and bond stronger than one thick, goopy layer. This also minimizes seepage.
- Incorrect Placement:
- Mistake: Placing the hairline too low, too high, or crooked.
- Solution: Use a washable marker for guidance. Stand back from the mirror periodically during placement to check symmetry. Start by lightly placing the front before pressing firmly.
- Touching Adhesive Surfaces:
- Mistake: Getting skin oils on tape or cured liquid adhesive.
- Solution: Handle tapes by the liner edges. Avoid touching cured adhesive on the scalp before placement. Consider wearing thin nitrile gloves.
- Forceful Removal:
- Mistake: Pulling or ripping the hairpiece off without proper solvent use.
- Solution: Never do this. Always use a designated adhesive remover. Apply generously, allow time for it to break down the bond (minutes, not seconds), and gently lift the unit. Forceful removal can damage the base and irritate your scalp.
- Neglecting Patch Tests:
- Mistake: Skipping the patch test for new liquid adhesives.
- Solution: Prioritize safety. Always perform a 24-48 hour patch test to rule out allergic reactions.
Learning from these common errors will accelerate your mastery of hairpiece attachment. Don’t be discouraged by initial imperfections; practice leads to proficiency.
Essential Maintenance and Removal Considerations
Secure attachment is only half the equation. Proper maintenance and safe removal are vital for the longevity of your hair system and the health of your scalp.
- Regular Cleaning: Depending on your attachment method and lifestyle, you will need to remove your hairpiece for thorough cleaning of both the unit and your scalp (typically every 1-4 weeks for extended wear, daily for daily wear methods).
- Adhesive Removal: Use the correct solvent for the type of adhesive used.
- Tape Removal: Apply solvent (like C-22 Citrus Solvent or Walker Solvent) around the edges. Allow it to seep underneath and break down the bond. Gently lift. Apply more solvent to remove residue from the scalp and base.
- Liquid Adhesive Removal: Requires more solvent and patience. Saturate the bond area, wait, gently lift. Significant residue removal from lace bases requires soaking in solvent and careful rubbing/scraping (use plastic tools, not sharp metal).
- Hairpiece Washing: Use sulphate-free shampoos and conditioners specifically designed for hair systems. Handle gently, avoid scrubbing the base aggressively.
- Scalp Care: Keep your scalp clean and moisturized between applications. Address any irritation promptly.
PhucthienToupee offers detailed guides and products for hair system maintenance and care. Proper upkeep ensures your investment looks its best and lasts longer.

Why Trust PhucthienToupee for Your Hairpiece Journey?
Navigating the world of hair replacement solutions can be overwhelming, but you do not have to do it alone. At PhucthienToupee (or simply Phucthien), we combine years of Experience and Expertise with a commitment to Authoritativeness and Trustworthiness (E-E-A-T).
- Premium Quality Systems: We offer meticulously crafted hairpieces using high-quality human hair and durable, realistic base materials designed for comfort and undetectable wear.
- Expert Guidance: Our team understands the nuances of different hair loss types, base designs, and attachment methods. We provide personalized consultations to help you choose the perfect system and attachment strategy.
- Comprehensive Support: From selection and fitting to attachment tutorials and maintenance advice, Phucthien provides ongoing support to ensure your success and satisfaction.
- Focus on Natural Results: Our goal is to provide solutions that look, feel, and move like your own natural hair, empowering you with confidence.
- Understanding Your Needs: We cater to a diverse clientele, understanding the unique aesthetic preferences and hair characteristics common among various ethnicities, including Caucasian and Asian individuals, with particular experience serving clients of Korean descent seeking natural density and hairlines.
Choosing Phucthien means investing in quality, expertise, and a partner dedicated to your hair restoration success.
Get started now: Discover Beginner Topper Application and find the best Hairpiece Adhesives for a secure fit
Conclusion: Hairpiece Attachment For Beginners
Mastering hairpiece attachment for beginners is a journey of learning and refinement. By understanding the four primary methods – Tape, Liquid Adhesive, Clips, and Combination approaches – and carefully following the preparation and application steps, you can achieve a secure, comfortable, and incredibly natural-looking result.
Remember to prioritize scalp health, always perform patch tests for liquid adhesives, and choose the method that best aligns with your lifestyle, hairpiece type, and desired maintenance level. Start simple, be patient with yourself, and don’t hesitate to seek expert advice.
PhucthienToupee is here to support you every step of the way. Explore our range of high-quality hair systems and attachment products, or contact us for a personalized consultation. Take control of your appearance and step out with renewed confidence today. Your ideal non-surgical hair replacement solution awaits.
Phuc Thien Toupee Co., Ltd
Design Brand: Royal Hair Vietnam
Office Address:
🏢 Room A909, Decapella Building, 116 Luong Dinh Cua Street, An Khanh Ward, Thu Duc City, Ho Chi Minh City 700000, Vietnam
Factory Address:
🏭 No. 26/9, Street 57, Thuong Hamlet, Tan Thong Hoi Ward, Cu Chi District, Ho Chi Minh City 700000, Vietnam
Email: ✉️ phucthientoupeevn@gmail.com
Phone / WhatsApp: 📞 +84 933 901 196
Websites: 🌐 phucthientoupee.com – 🌐 royalhair.shop