

- 05/06/2025
- Posted by: phucthien
- Category: Blog
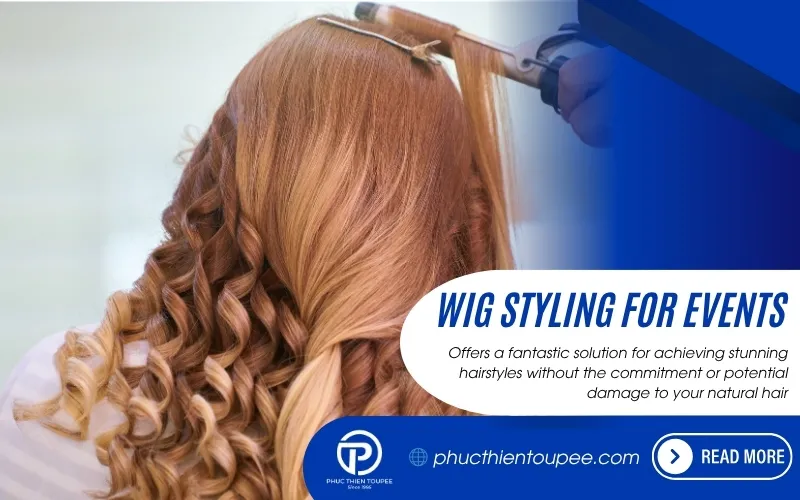
Wig styling for events offers a fantastic solution for achieving stunning hairstyles without the commitment or potential damage to your natural hair. Imagine effortlessly transforming your look for that upcoming wedding, prom, or special occasion.
Phuc Thien Toupee is here to guide you through creating flawless, head-turning styles with human hair wigs, ensuring you feel confident and radiant. Explore options from elegant updos to glamorous waves. Benefit from hairpiece styling, celebration hairstyles, event hair solutions, and party hair transformations.
Essential Tools and Products for Wig Styling
Success in wig styling hinges on having the right tools and products. Consider this your essential wig styling toolkit.
- Wig Stand: A wig stand is crucial for storing and styling your wig when it’s not being worn. A canvas block head is ideal for styling, as you can pin into it.
- T-Pins: Use T-pins to secure your wig to the wig stand while styling.
- Wide-Tooth Comb and Wig Brush: A wide-tooth comb is gentle on the hair fibers and prevents tangling. A wig brush with looped bristles is designed specifically for wigs and won’t snag the hair.
- Heat Protectant Spray: Protect your human hair wig from heat damage when using styling tools.
- Hair Spray: Choose a hair spray with a flexible hold to keep your style in place without stiffness.
- Curling Iron or Wand: For creating curls or waves. Select a barrel size appropriate for the desired curl size.
- Flat Iron: For straightening or smoothing the hair.
- Hair Clips: Use hair clips to section the hair while styling.
- Wig Shampoo and Conditioner: Use products specifically designed for wigs to keep the hair clean and hydrated.
- Wig Glue or Tape: For securing the wig to your head. Choose a product that is safe for your skin and easy to remove.
- Scissors: For trimming any stray hairs or bangs.
Expert Tip from Phuc Thien Toupee: Always use heat protectant spray before using any heat styling tools on your human hair wig. This will help to prevent damage and keep the hair looking healthy.

Glam up your look: Use the best Wig Styling Tools and follow Wig Styling Tutorials for stunning hair
Preparing Your Human Hair Wig for Styling
Think of your human hair wig like premium fabric – it requires specific care to maintain its beauty and integrity. Here’s a detailed breakdown of how to prepare your wig for styling:
Gentle Cleansing: Washing and Conditioning Your Wig
Clean hair is manageable hair. Product buildup, oils, and environmental debris can weigh down the hair, making it difficult to style and potentially causing dullness.
- Gather Your Supplies: You’ll need a high-quality, sulfate-free wig shampoo and conditioner specifically formulated for human hair wigs, a basin or sink, cool water, and clean towels. Avoid regular hair care products, as they can contain harsh detergents that strip the hair or ingredients that damage the cap construction.
- Detangle (Pre-Wash): Crucially, gently detangle the dry wig before washing using a wide-tooth comb or a specialized wig brush. Start from the ends and patiently work your way up towards the roots (the base of the wig cap). Hold sections of hair firmly near the base as you comb to prevent putting tension on the knots or wefts. Removing tangles now prevents them from worsening when wet.
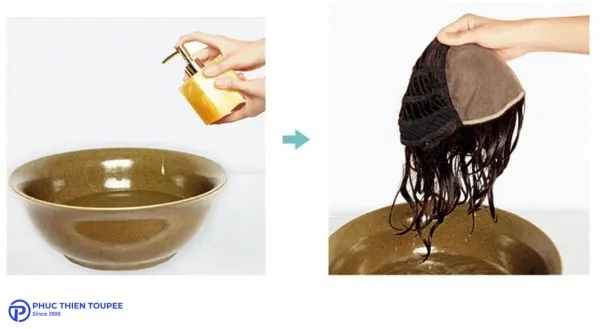
- Prepare the Water: Fill a basin or clean sink with cool to lukewarm water. Never use hot water, as it can damage the hair fibers, affect the color, and potentially loosen the knots securing the hair to the cap.
- Add Shampoo: Pour a small amount (usually a capful, follow product instructions) of wig shampoo into the water and gently swish to distribute it evenly.
- Immerse and Wash: Submerge the wig fully in the water. Gently cup the hair in your hands and swish it back and forth. You can also gently squeeze the water through the hair. Do not rub, scrub, twist, or wring the hair, as this will cause severe tangling and potential shedding. Focus on cleansing the fibers, not agitating them. Let it soak for 5-10 minutes.
- Rinse Thoroughly: Lift the wig from the soapy water (support its weight) and rinse it under cool, running water. Ensure the water flows in the natural direction of the hair (from base to ends) to prevent tangling. Continue rinsing until all traces of shampoo are gone. Squeeze gently to remove excess water.
- Apply Conditioner: Apply a small amount of wig conditioner, concentrating on the mid-lengths and ends. Avoid applying conditioner directly to the roots or the base of the cap, as this can loosen the hand-tied knots or affect the integrity of the wefts, leading to shedding.
- Condition and Rinse Again: Allow the conditioner to sit for the time specified on the product label (usually 2-5 minutes). Then, rinse thoroughly under cool, running water, again ensuring the water flows from base to ends.
Careful Detangling (Post-Wash)
Wet hair is more fragile than dry hair, so detangling after washing requires extra care.
- Remove Excess Water: Gently squeeze excess water from the wig – again, no wringing. Lay the wig flat on a clean, absorbent towel and blot it gently to remove more moisture.
- Apply Leave-In Conditioner/Detangler (Optional but Recommended): Lightly misting a wig-specific leave-in conditioner or detangling spray can make this process smoother and add moisture.
- Use the Right Tool: Stick with your wide-tooth comb or wig brush.
- Section and Comb: Place the damp wig on a sturdy wig stand or hold it securely. Start combing gently from the very ends, working upwards in small sections. If you encounter a tangle, patiently work it out with the comb or your fingers. Never force the comb through knots.
🎨 Your style, your hair — we make it exactly how you want.
Proper Drying Techniques: Preserving Wig Integrity
How you dry your wig significantly impacts its lifespan and styling potential.
- Air Drying (Preferred Method): This is the gentlest method. Place the detangled, damp wig on a tall, sturdy wig stand (wire or plastic stands that allow airflow are ideal). Ensure the hair hangs freely. Keep it out of direct sunlight (which can fade color) and away from direct heat sources. Allow it to dry completely naturally. This can take several hours or overnight, depending on the wig’s length and density, and the ambient humidity. Patience here prevents heat damage.
- Blow Drying (Use Sparingly and Correctly): If you must blow dry, always apply a heat protectant spray designed for human hair wigs first.
- Use a blow dryer with adjustable heat and speed settings.
- Select the lowest heat setting and a medium airflow. A “cool shot” button is excellent for finishing.
- Keep the dryer moving constantly and hold it at least 6-8 inches away from the hair.
- Dry the hair in sections, pointing the airflow downwards from the roots to the ends to smooth the cuticle and minimize frizz.
- Avoid concentrating heat on any one area, especially the cap.
- Stop when the hair is almost dry, allowing the last bit of moisture to evaporate naturally on the stand. Over-drying can make hair brittle.

Securing the Wig for Styling: Creating a Stable Base
You can’t style effectively if the wig keeps shifting.
- Choose Your Stand: A canvas block head form that is close to your head size is the ideal tool for styling. It provides a firm, pinnable surface. Styrofoam heads are less stable and can break down over time.
- Position the Wig: Place the completely dry wig onto the canvas block head, ensuring the hairline and part align naturally as you would wear it. Adjust the ear tabs so they sit evenly.
- Pin Securely: Use T-pins (rust-proof ones are best) to secure the wig to the block head. Insert pins through the ear tabs, the nape area, and potentially a few along the perimeter if needed for intricate styling. Ensure the wig is secure but not stretched unnaturally, as this could distort the cap or the final style.
Now your human hair wig is perfectly prepped and ready for you to create your desired special event hairstyle!
🔍 Looking for a specific size, base, or hair color? Order a fully personalized toupee now!
Top 8 Wig Styling Ideas for Weddings and Special Events
Here are eight stunning wig styling ideas perfect for weddings, proms, galas, and other special events. We’ll break down each style with step-by-step instructions.
The Classic Chignon: The Epitome of Formal Elegance
A chignon is a low bun coiled at the nape of the neck. It’s eternally chic, sophisticated, and works beautifully for bridesmaids, wedding guests, or any black-tie affair. It keeps hair neatly off the neck and face, highlighting your features and neckline.
- Best For: Formal weddings, galas, sophisticated dinners. Complements classic, elegant attire. Suitable for most face shapes.
- Tools Needed: Wig brush, fine-tooth comb (for smoothing), elastic band (matching wig color), bobby pins (matching wig color), U-shaped hairpins (optional, for extra security), flexible hold hairspray, smoothing serum (optional).
- Detailed Steps:
- Smooth and Gather: Ensure the wig hair is completely smooth and tangle-free. Using a wig brush or a smoothing brush, gather all the hair neatly at the nape of the neck, creating a low ponytail. Ensure there are no bumps on the surface.
- Secure the Ponytail: Secure the ponytail firmly, but not uncomfortably tight, with an elastic band. Choose an elastic close to the wig’s hair color for better concealment.
- Prepare the Ponytail: Apply a tiny amount of smoothing serum to the ponytail if desired, to tame flyaways.
- Twist or Braid (Optional): For a classic chignon, twist the ponytail tightly into a rope. Alternatively, you could create a simple three-strand braid for added texture.
- Coil the Bun: Carefully wrap the twisted (or braided) ponytail around the base of the elastic, forming a neat, circular bun. Tuck the ends underneath the bun.
- Secure with Pins: This is the crucial step. Insert bobby pins vertically and horizontally around the base of the bun, catching hair from the coil and anchoring it to the base hair underneath, close to the elastic. U-shaped pins can be helpful for securing larger sections without leaving visible marks. Ensure the bun feels secure and pins are hidden within the hair. Check from all angles in a mirror.
- Refine and Finish: Gently smooth any stray hairs around the hairline or bun using your fingertips or a touch of hairspray on a comb. Mist the entire style lightly with a flexible hold hairspray to set it without stiffness.
- Accessorize: Tuck in delicate pearl pins, a jeweled comb above the bun, or fresh baby’s breath for a wedding touch.
Hollywood Waves: Timeless Red Carpet Glamour
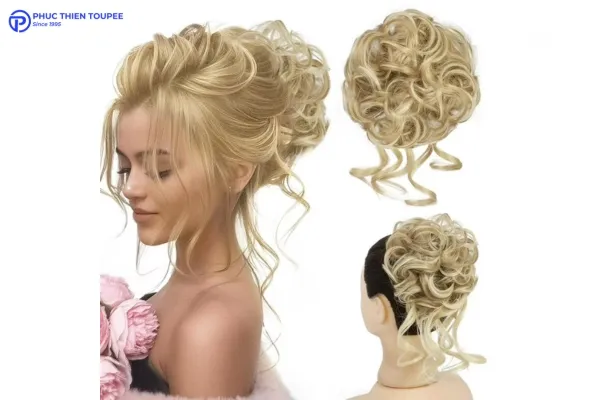
These are structured, uniform waves that cascade elegantly. This style exudes vintage glamour and sophistication, perfect for making a statement at any special event.
- Best For: Formal events, proms, weddings (especially for the bride or glamorous guests). Works well with off-the-shoulder or strapless dresses. Flattering on most face shapes.
- Tools Needed: Wide-tooth comb, sectioning clips, heat protectant spray, curling iron (1.25-inch to 1.5-inch barrel recommended), long hair clips (duckbill clips), boar bristle brush or smoothing brush, strong hold hairspray, shine serum (optional).
- Detailed Steps:
- Apply Heat Protectant: Thoroughly spray the dry wig with heat protectant, section by section.
- Section the Hair: Divide the wig hair horizontally into manageable sections, starting from the bottom nape area. Clip the upper sections out of the way. Work with sections about 1-2 inches wide.
- Curl Uniformly: Take the first section. Hold the curling iron vertically or slightly angled. Wrap the hair flat around the barrel, starting a few inches from the root. Crucially, curl all sections in the same direction (e.g., all away from the face, or all towards the face, depending on your preference for the final wave pattern). Hold for 10-15 seconds (adjust based on your iron and wig hair), then release the curl into your palm.
- Set the Curls: While the curl is still hot, gently roll it back up following the curl pattern and secure it flat against the head using a long hair clip (duckbill clip). This step is essential for creating the defined, lasting wave structure. Repeat this process for all sections, working your way up the head.
- Cool Completely: Allow the pinned curls to cool down completely. This can take 30 minutes or longer. Do not rush this step. Cooling sets the wave pattern.
- Release and Brush: Carefully remove all the clips. The hair will look like tight ringlets. Now, take your boar bristle brush or smoothing brush and gently brush through the curls from roots to ends. The curls will merge together to form the characteristic S-shaped Hollywood waves. Be patient and brush continuously until the desired smooth wave pattern emerges.
- Refine and Finish: Use your fingers or the brush to position the waves perfectly around the face. Apply a shine serum sparingly for extra gloss. Lock the style in place with a generous mist of strong hold hairspray.
- Accessorize: A sparkling barrette pinning one side back enhances the vintage feel.
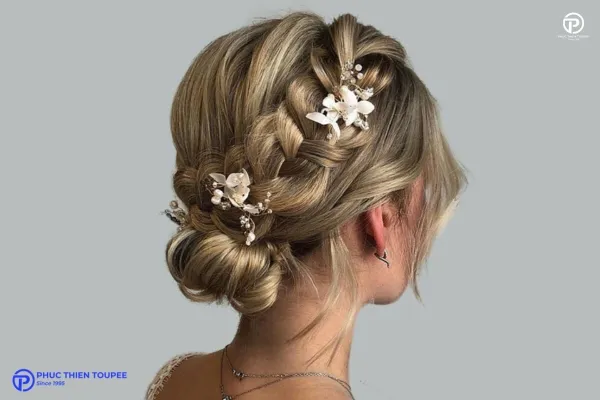
Braided Updo: Romantic Texture and Intricacy
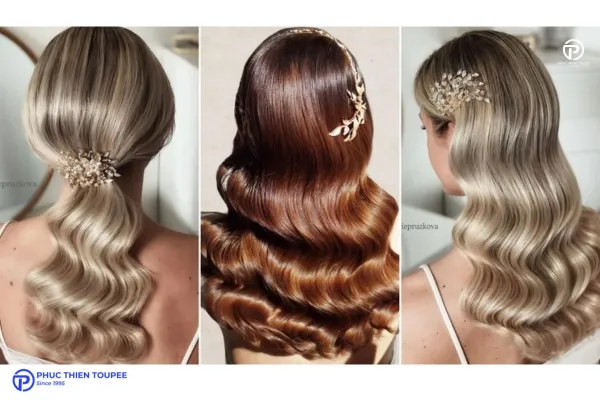
Braids add beautiful texture and detail to updos, ranging from simple and sweet to intricate and bohemian. Perfect for outdoor weddings, proms, or when you want a softer, more romantic feel.
- Best For: Garden weddings, bohemian themes, proms, summer events. Can be adapted for various levels of formality.
- Tools Needed: Wig brush/comb, sectioning clips, small clear elastics (optional), bobby pins, U-shaped pins, texturizing spray (optional), flexible hold hairspray.
- Detailed Steps (Example: Crown Braid Updo):
- Prepare Texture (Optional): If your wig is very straight, you might lightly mist with texturizing spray or create subtle waves with a large barrel curling iron first to give the braid more grip and volume. Let cool.
- Section for the Braid: Create a deep side part. Starting near the part on the heavier side, take a section of hair along the hairline (about 2-3 inches wide).
- Begin Braiding: Start a Dutch braid (inside-out braid, where you cross strands under the middle strand) or a French braid (crossing strands over the middle strand). A Dutch braid will sit more prominently on top.
- Continue Braiding: Continue the braid along the hairline, incorporating small sections of hair from the wig as you go, working your way around the head towards the opposite ear, then down towards the nape.
- Finish the Braid: Once you run out of hair to add, continue the braid down the remaining length and secure the end with a small, clear elastic (optional, helps control ends).
- Pancake the Braid (Optional): Gently pull on the outer edges of the braid loops to make it appear fuller and softer. This “pancaking” technique adds volume and a more relaxed feel.
- Pin the Braid: Carefully wrap the end of the braid up and tuck it under the beginning of the braid or coil it into a small bun at the nape. Secure the entire braid structure firmly against the head using bobby pins and U-pins, ensuring pins are hidden.
- Style Remaining Hair (If Any): If you only braided a portion (like a crown braid), style the remaining loose hair (e.g., curl it, pin it into a low bun beneath the braid). For a full updo, ensure all hair is incorporated or secured.
- Finish: Mist with flexible hold hairspray.
- Accessorize: Small flowers, delicate vines, or pearl pins woven into the braid look stunning.
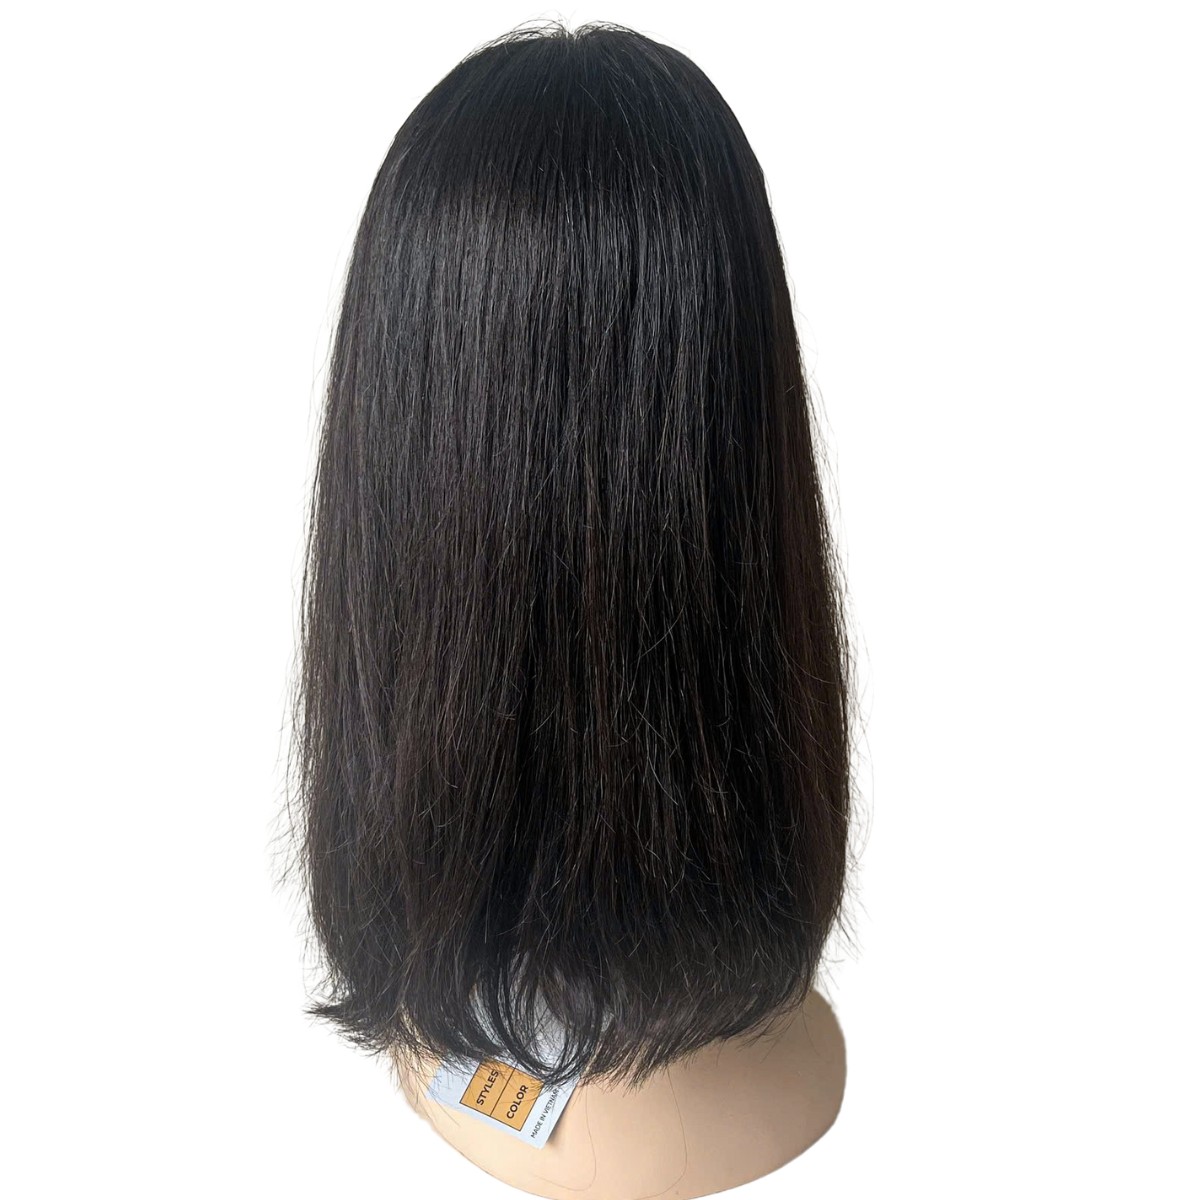
Sleek and Straight: Modern Sophistication
Sometimes, the simplest statement is the most powerful. Perfectly straight, glossy hair is undeniably chic, modern, and polished. Ideal for showcasing a stunning wig color or cut.
- Best For: Contemporary weddings, cocktail parties, corporate events, gallery openings. Pairs well with modern, minimalist, or architectural outfits.
- Tools Needed: Wide-tooth comb, heat protectant spray, high-quality flat iron (with adjustable temperature), fine-tooth comb (for precision), shine serum or spray, anti-frizz spray/hairspray.
- Detailed Steps:
- Protect and Section: Ensure the wig is completely dry. Apply heat protectant spray thoroughly. Section the hair horizontally, clipping the top layers away. Start with the bottom section at the nape.
- Straighten Methodically: Set your flat iron to the appropriate temperature for human hair wigs (start low, around 250-300°F or 120-150°C, and increase slightly only if necessary – always test on an inconspicuous strand first). Take a small subsection (about 1 inch wide).
- Chase Method: Place a fine-tooth comb just above the flat iron plates. Clamp the flat iron over the hair section near the roots. Glide both the comb and the flat iron down the hair shaft smoothly and steadily towards the ends. The comb leads the way, ensuring even tension and smoothness. Use one, maximum two, passes per section to minimize heat exposure.
- Repeat: Continue this process, section by section, working your way up the wig until all hair is perfectly straight. Pay extra attention to smoothing the hairline and part area.
- Add Shine: Once cool, apply a few drops of shine serum (rub between palms first) or a light mist of shine spray, focusing on mid-lengths and ends. Avoid the roots to prevent a greasy look.
- Finish: Use a light mist of anti-frizz hairspray if needed, or a very light hold spray to tame any minor flyaways without compromising movement.
- Accessorize: This style often looks best unadorned, but a single, minimalist metallic barrette could add a touch of interest.
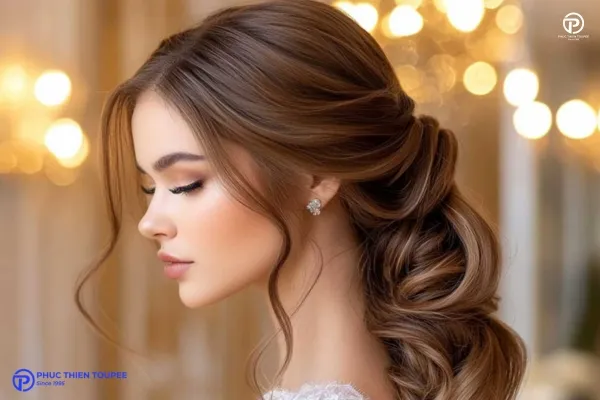
High Ponytail: Playful Elegance and Drama
A high ponytail isn’t just casual; styled correctly, it can be incredibly glamorous and event-ready. It lifts the face and adds a touch of youthful energy or high-fashion drama.
- Best For: Proms, parties, modern weddings (especially with a dramatic dress), birthday celebrations.
- Tools Needed: Smoothing brush, strong hold elastic, bobby pins, fine-tooth comb, hairspray (strong hold), optional: teasing comb, flat iron or curling iron for the tail.
- Detailed Steps:
- Smooth Upwards: Tilt the wig head (or your head, if wearing) slightly forward. Using a smoothing brush, gather all the hair towards the desired high point on the crown or slightly back from the crown. Brush repeatedly to ensure the base is completely smooth and bump-free. Getting this base sleek is critical.
- Secure Tightly: Once smooth, secure the ponytail very tightly with a strong elastic band. The ponytail should feel secure and sit high on the head without sagging.
- Conceal the Elastic: Take a small strand of hair (about half an inch wide) from the underside of the ponytail. Wrap this strand neatly around the elastic band until it’s completely covered. Secure the end of the wrapped strand by tucking it under the elastic or using a bobby pin inserted upwards into the base.
- Style the Tail: Now, focus on the ponytail itself. You can:
- Keep it Sleek: Flat iron the ponytail for a super smooth, glossy finish.
- Add Waves/Curls: Use a curling iron to add bouncy curls or soft waves to the tail for more volume and movement.
- Tease for Volume: Gently backcomb the underside of the ponytail near the base for extra height and drama. Smooth the top layer over the teased section.
- Finish: Smooth any flyaways around the hairline with hairspray on your fingertips or a comb. Mist the entire style with a strong hold hairspray, paying extra attention to the base and the tail.
- Accessorize: Wrap the base with a velvet ribbon, add a decorative ponytail cuff, or use jeweled pins along the wrapped base.
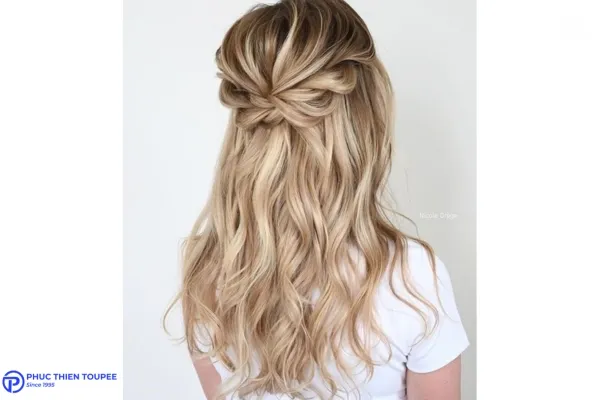
Half-Up, Half-Down: The Best of Both Worlds
This versatile style keeps hair away from the face while showcasing length and texture. It can be adapted from casual elegance to formal sophistication.
- Best For: Virtually any event – weddings (guest or bridesmaid), parties, date nights, semi-formal gatherings. Extremely versatile and flattering.
- Tools Needed: Wig brush/comb, sectioning clip, clear elastic or bobby pins, curling iron/wand (optional), hairspray, decorative clip/barrette (optional).
- Detailed Steps (Example: Simple Twist Back):
- Decide on Texture: Determine if you want the “down” section straight, wavy, or curly. Style this section first using a flat iron or curling iron (don’t forget heat protectant!). Let it cool.
- Section the Top: Create a horizontal part from ear to ear, or slightly higher, depending on how much hair you want up. Clip the bottom section out of the way temporarily.
- Gather the Top: Gather the top section smoothly towards the back center of the head.
- Style the Top Section: You have many options here:
- Simple Twist: Twist the section loosely or tightly and secure it at the back with crossed bobby pins.
- Small Bun/Knot: Twist the section into a small bun or knot and pin securely.
- Braided Accent: Create one or two small braids within the top section before pulling it back and securing.
- Volume Boost: Gently tease the roots of the top section before smoothing it back for added height at the crown.
- Secure: Use bobby pins that match the wig color, or secure with a clear elastic first and then cover with a decorative barrette or clip. Ensure the secured section feels stable.
- Blend and Finish: Release the bottom section. Ensure the transition between the up and down sections looks seamless. Arrange the loose hair nicely over the shoulders. Mist lightly with hairspray.
- Accessorize: The securing point is perfect for a statement barrette, a floral clip, or jeweled pins.
Voluminous Curls: Bouncy, Full, and Festive
Big, bouncy curls create a look full of life, glamour, and celebration. This style is about maximizing volume and movement.
- Best For: Parties, proms, festive gatherings, weddings where a more glamorous, less formal look is desired.
- Tools Needed: Heat protectant spray, sectioning clips, curling iron or wand (barrel size determines curl tightness – 1-inch for tighter, 1.25-inch+ for looser), wide-tooth comb or fingers, volumizing mousse or spray (optional), hairspray.
- Detailed Steps:
- Prep for Volume: Apply heat protectant. Optionally, apply a lightweight volumizing mousse to damp hair before drying, or a volumizing spray to dry hair roots before curling.
- Section Thoroughly: Divide the wig hair into small, manageable sections (around 1 inch). Smaller sections generally yield more volume.
- Curl Direction: You can curl all sections in the same direction for a more uniform look, or alternate directions (one section away from the face, the next towards) for a more tousled, separated effect. Wrap hair around the barrel, hold, and release. Consider pinning each curl to cool for maximum longevity, though it’s not strictly necessary for this softer style.
- Curl Entire Wig: Work systematically through all sections until the entire wig is curled.
- Cool and Separate: Let the curls cool completely. Then, gently shake the wig or run your fingers through the curls from underneath to break them up and blend them. Avoid over-brushing, which can loosen the curls too much; use a wide-tooth comb sparingly only if needed to detangle.
- Boost Root Volume: Gently lift sections at the crown and mist the roots lightly with hairspray or a root-lifting spray for extra height. You can also very gently backcomb underneath the top layer at the crown.
- Finish: Arrange the curls around the face and shoulders. Mist generously with a flexible or medium hold hairspray to maintain bounce without stiffness.
- Accessorize: A sparkling headband pushed back into the curls or a few decorative pins placed asymmetrically can enhance the festive feel.
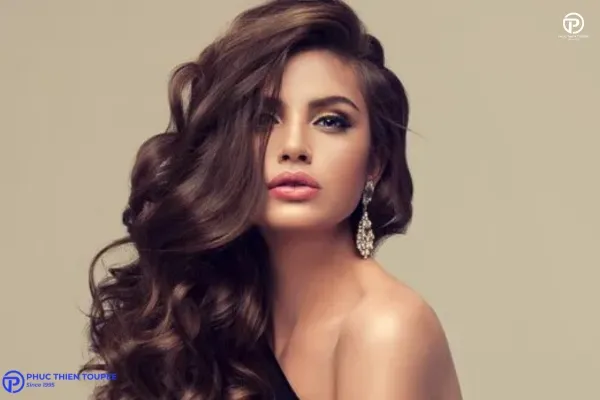
Accessorized Styles: Elevating Any Look with Personal Touches
Never underestimate the transformative power of well-chosen hair accessories. They can elevate even a simple style, tie your look together, and add personality.
- Best For: Any event! Accessories tailor the style’s formality and theme.
- Tools Needed: Base hairstyle (any of the above, or even simply styled loose hair), chosen accessories (headbands, clips, pins, scarves, flowers, tiaras, fascinators), bobby pins for securing accessories if needed, hairspray.
- Detailed Steps:
- Create Your Base Style: Start with your chosen hairstyle – be it an updo, half-up, waves, or straight. Ensure the base style is secure.
- Select Complementary Accessories: Choose accessories that match the formality of the event, your outfit, and your personal style.
- Weddings: Pearl pins, crystal combs, floral crowns, delicate tiaras, birdcage veils.
- Proms/Parties: Sparkly barrettes, jeweled headbands, colorful clips, ribbon accents.
- Formal Galas: Statement jeweled pieces, elegant fascinators, sleek metallic pins.
- Boho/Outdoor Events: Fresh flowers, leafy vines, woven headbands, feather clips.
- Strategic Placement: Consider where the accessory will have the most impact and best complement the hairstyle.
- Headbands: Can be worn traditionally near the hairline or pushed further back.
- Clips/Barrettes: Ideal for securing sections in half-up styles, accenting the side of an updo, or pinning back bangs.
- Pins: Perfect for scattering through updos, securing twists, or adding subtle sparkle.
- Flowers/Vines: Weave into braids, tuck into buns, or create a focal point.
- Secure the Accessory: If the accessory doesn’t have its own secure fastening (like a clip or comb), use bobby pins discreetly to hold it firmly in place. Cross pins over each other for extra hold if needed. Ensure it feels stable and comfortable.
- Final Touches: Make any minor adjustments to the hair around the accessory. A final light mist of hairspray can help hold everything together.
- Consider the Wig Cap: Be mindful when pinning heavy accessories; ensure pins anchor into the hair securely without pulling uncomfortably on the wig cap itself.
By mastering these preparation steps and exploring these diverse styling options, you can confidently use your human hair wig to achieve breathtaking looks for any wedding or special event, ensuring you look and feel your absolute best. Remember, practice makes perfect, so don’t hesitate to try these styles out before the big day!
✨ A toupee shouldn’t just hide hair loss — make it a style statement!
Securing Your Wig for Confidence and Comfort
A wig that shifts or feels insecure can ruin your special event experience. Here’s how to ensure your wig stays put all day and night.
- Wig Cap: Wear a wig cap under your wig to create a smooth surface and prevent your natural hair from slipping.
- Wig Grip: A wig grip is a velvet band that sits under your wig and helps to hold it in place.
- Wig Glue or Tape: For extra security, use wig glue or tape along the hairline. Be sure to test the adhesive on a small area of skin first to check for any allergic reactions.
- Adjustable Straps: Most wigs come with adjustable straps in the back that allow you to customize the fit.
Phuc Thien Toupee’s Experience: We’ve found that a combination of a wig cap, wig grip, and adjustable straps provides the most secure and comfortable fit for most clients.
Maintaining Your Wig’s Style Throughout the Event
Even with the best styling and securing methods, your wig may need a little maintenance throughout the event.
- Carry a Small Comb: Keep a small comb or brush in your purse for quick touch-ups.
- Hair Spray: Carry a travel-size hair spray to tame any flyaways.
- Bobby Pins: Keep a few extra bobby pins on hand in case any come loose.
- Avoid Overheating: Be mindful of heat and humidity, which can cause your wig to lose its style. Try to stay in cool, shaded areas whenever possible.
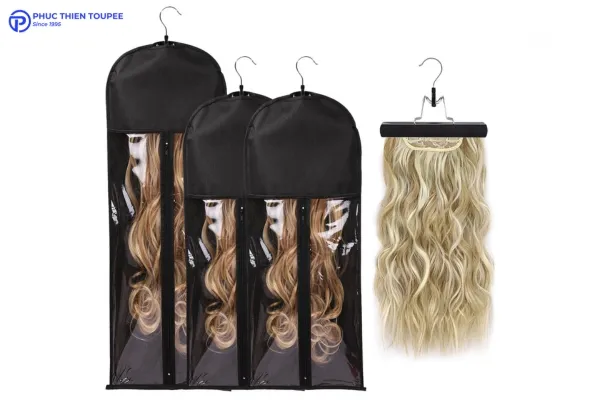
Unforgettable styles: Explore Curly Wig Styling and a Wig Density for Natural Look for special occasions
Common Wig Styling Mistakes to Avoid
Avoiding common wig styling mistakes will help you achieve a flawless look.
- Over-Styling: Avoid using too much heat or product, as this can damage the hair.
- Incorrect Sizing: Make sure your wig fits properly. A wig that is too tight or too loose will not look natural and can be uncomfortable.
- Neglecting Maintenance: Regular washing and conditioning are essential for keeping your wig looking its best.
- Using the Wrong Products: Use products specifically designed for wigs. Regular hair products can damage the hair fibers.
✂️ Be unique — create your custom-made toupee today!
Conclusion: Wig Styling for Events
Wig styling for events offers endless possibilities for creating stunning and memorable looks. With the right tools, techniques, and a little creativity, you can confidently transform your appearance and enjoy any special occasion. Phuc Thien Toupee hopes this guide has empowered you to explore the world of wig styling and discover the perfect hairstyle for your next event. Remember to prioritize wig care, experiment with different styles, and embrace the confidence that comes with a flawless look.
Phuc Thien Toupee Co., Ltd
Design Brand: Royal Hair Vietnam
Office Address:
🏢 Room A909, Decapella Building, 116 Luong Dinh Cua Street, An Khanh Ward, Thu Duc City, Ho Chi Minh City 700000, Vietnam
Factory Address:
🏭 No. 26/9, Street 57, Thuong Hamlet, Tan Thong Hoi Ward, Cu Chi District, Ho Chi Minh City 700000, Vietnam
Email: ✉️ phucthientoupeevn@gmail.com
Phone / WhatsApp: 📞 +84 933 901 196
Websites: 🌐 phucthientoupee.com – 🌐 royalhair.shop