

- 22/05/2025
- Posted by: phucthien
- Category: Blog

Wig Styling Tutorials offer invaluable guidance for anyone new to the world of human hair wigs, providing easy wig styling tutorials for everyday looks and transforming uncertainty into confidence. These hairpiece styling guides cover everything from how to style a short wig to mastering techniques for long hair systems, ensuring you can achieve salon-quality results at home with the best wig styling products. Phuc Thien Toupee is here to empower you with foundational knowledge and step-by-step instructions.
Exploring these human hair wig styling techniques opens up a world of versatility, allowing you to adapt your look effortlessly. Learning basic wig coiffure lessons helps maintain the quality and longevity of your investment, ensuring your hair unit always looks its best. Consider this your essential starting point for mastering your new hair.
Essential Wig Styling Tools and Products
Before embarking on your styling journey, gathering the right tools and products is essential. Using items specifically designed for human hair wigs ensures optimal results and protects your investment. Phuc Thien recommends assembling a core kit.
Must-Have Tools
- Wig Stand or Mannequin Head: Crucial for holding the wig securely while you wash, dry, and style. A mannequin head provides a more realistic shape for styling, especially for cutting or intricate updos. Using a stand prevents tangling and helps maintain the cap shape.
- Wide-Tooth Comb: Essential for detangling wet or dry human hair wigs without causing breakage or shedding. Always start detangling from the ends and work your way up to the roots.
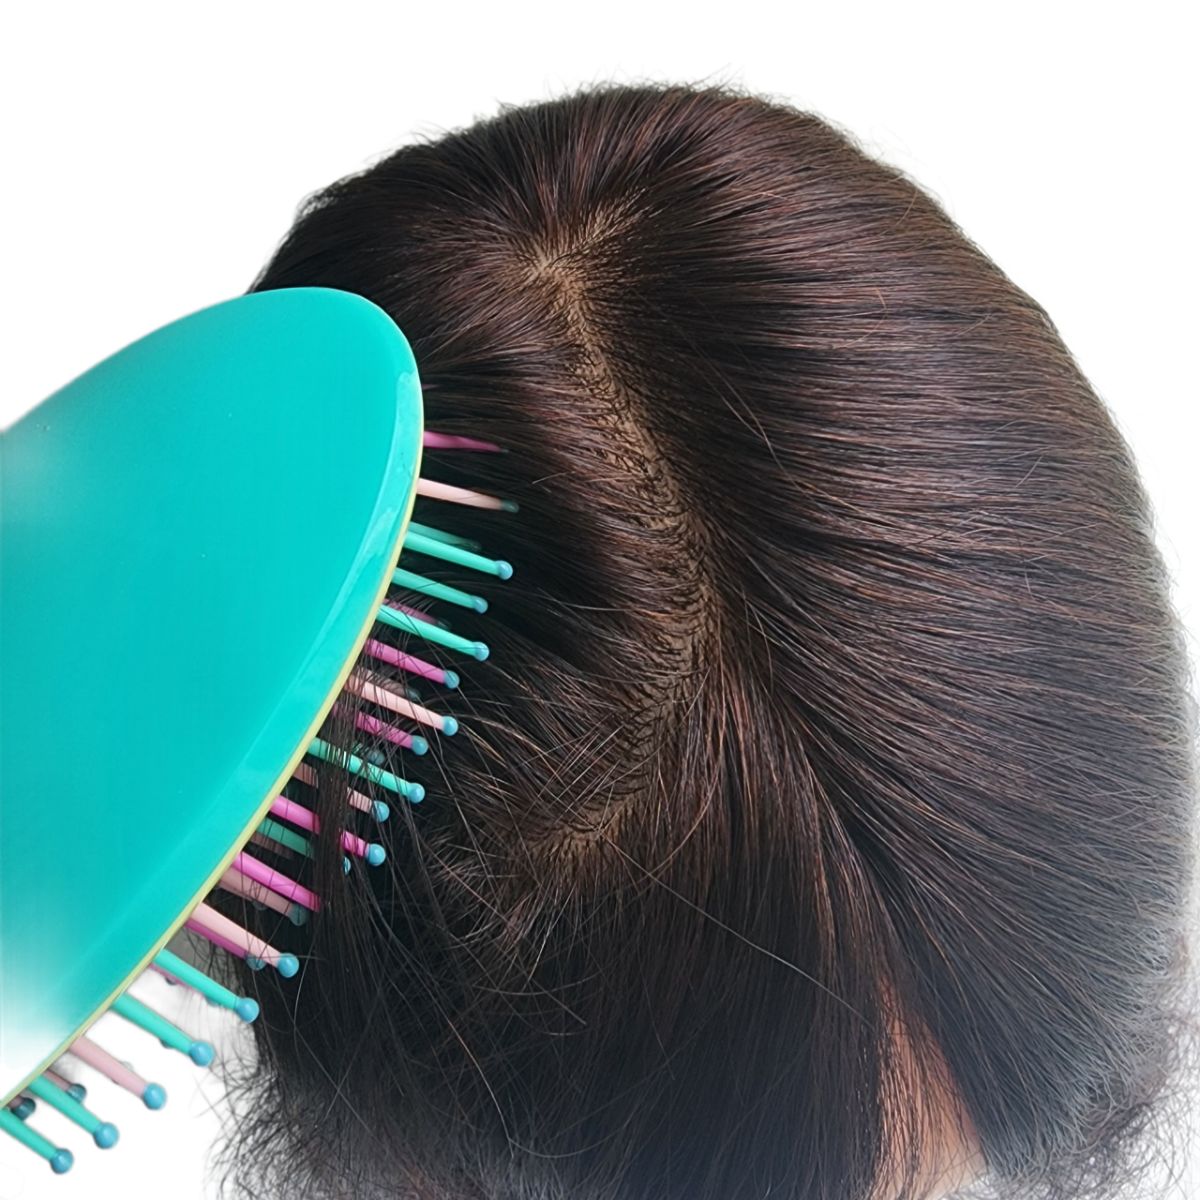
- Wig Brush: Look for brushes with smooth, rounded tips (like looped bristles or specific wig brushes) designed to glide through hair without snagging the base or causing static. Paddle brushes are often suitable for longer, straighter styles.
- Heat Styling Tools (Variable Temperature):
- Flat Iron: For straightening and smoothing. Choose one with ceramic or tourmaline plates for even heat distribution and adjustable temperature settings.
- Curling Iron/Wand: For creating curls or waves. Again, adjustable heat is key. Different barrel sizes create different curl types.
- Sectioning Clips: Used to hold sections of hair out of the way while you work on other areas, ensuring a more organized and effective styling process.
- Spray Bottle: Filled with water, this can be used to dampen the hair slightly before styling or to reactivate products.
🎨 Your style, your hair — we make it exactly how you want.
Recommended Styling Products
- Heat Protectant Spray: Absolutely non-negotiable when using any heat styling tools. It creates a barrier between the hair and the heat, minimizing potential damage, dryness, and breakage. Look for formulas suitable for human hair. Studies confirm heat protectants significantly reduce thermal damage by slowing heat conduction and distributing it more evenly.
- Leave-In Conditioner (Wig Safe): Human hair wigs, unlike growing hair, don’t receive natural oils from the scalp. A light, wig-safe leave-in conditioner helps maintain moisture, reduce frizz, and improve manageability.
- Wig-Safe Hairspray: Provides hold for your finished style. Opt for light to medium hold sprays initially to avoid stiffness or heavy buildup. Ensure it’s formulated to be easily washable from wig fibers.
- Serum or Argan Oil: Adds shine, tames flyaways, and provides a smooth, polished finish. Use sparingly, focusing on the mid-lengths and ends to avoid weighing down the roots. Argan oil is known for its moisturizing and smoothing properties due to its fatty acid and Vitamin E content.
- Styling Mousse/Foam (Optional): Can add volume and texture, especially useful for defining curls or waves. Choose lightweight, non-alcoholic formulas.
Product Compatibility Check: Always ensure products state they are safe for human hair wigs. Avoid products with harsh sulfates or heavy alcohols, which can strip moisture and damage the hair over time.
Master your wig: Learn to use Wig Styling Tools for stunning looks
Summary Table: Essential Tools & Products
| Item | Primary Use | Key Feature/Tip |
| Wig Stand/Mannequin | Secure holding for styling, drying, storage | Choose sturdy base; mannequin for better shaping |
| Wide-Tooth Comb | Detangling wet/dry hair | Start at ends, work up; avoids breakage |
| Wig Brush | Smoothing, general brushing | Use smooth/looped bristles; avoids snagging base |
| Flat Iron | Straightening, smoothing | Ceramic/Tourmaline plates, variable heat setting |
| Curling Iron/Wand | Creating curls/waves | Various barrel sizes, variable heat setting |
| Sectioning Clips | Holding hair sections during styling | Improves organization and precision |
| Spray Bottle (Water) | Dampening hair, reactivating products | Use filtered water if possible |
| Heat Protectant Spray | Protecting hair from heat damage | Essential for all heat styling; apply evenly |
| Leave-In Conditioner | Adding moisture, reducing frizz | Wig-safe formula; apply lightly |
| Hairspray | Holding the finished style | Wig-safe, light/medium hold; avoid buildup |
| Serum/Argan Oil | Adding shine, taming flyaways, smoothing ends | Use sparingly on mid-lengths/ends |
Investing in these quality tools and products, recommended by Phuc Thien Toupee, sets the stage for successful and safe human hair wig styling, allowing beginners to confidently explore various looks.

Preparing Your Human Hair Wig for Styling
Proper preparation is the foundation of any great wig style. Starting with a clean, well-conditioned, and properly detangled wig makes the styling process smoother and yields more professional-looking results. Neglecting prep can lead to frustration and potential damage.
Washing and Conditioning
Human hair wigs need regular washing, though not as frequently as natural hair. Wash frequency depends on how often you wear the wig and the amount of product used. Generally, washing every 7-14 wears is a good guideline.
- Detangle: Before washing, gently detangle the wig using a wide-tooth comb, starting from the ends and moving upwards.
- Wet: Hold the wig under cool running water, allowing water to flow in the direction of the hair (from base to ends) to prevent tangling.
- Shampoo: Apply a small amount of wig-safe, sulfate-free shampoo. Gently distribute it through the hair using downward strokes. Do not rub, scrub, or twist the hair.
- Rinse: Rinse thoroughly under cool running water until all shampoo is removed, again ensuring water flows downwards.
- Condition: Apply a wig-safe conditioner, avoiding the base/cap area (conditioner can loosen knots). Leave it on for the time specified on the product (usually a few minutes).
- Rinse Again: Rinse thoroughly under cool running water. Gently squeeze out excess water – do not wring or twist.
Phuc Thien emphasizes using cool water, as hot water can damage the hair fibers and potentially affect the cap structure.
Detangling Gently
Detangling is crucial both before washing and before styling.
- Technique: Always use a wide-tooth comb or a specialized wig brush.
- Method: Place the wig on a stand or lay it flat. Start combing gently from the tips, gradually working your way up towards the roots/cap. If you encounter a knot, hold the hair above the knot to prevent pulling on the base and gently work the tangle out.
- Wet vs. Dry: Human hair is more fragile when wet. Be extra gentle when detangling a wet wig. Applying a leave-in conditioner can help ease the process.
🔍 Looking for a specific size, base, or hair color? Order a fully personalized toupee now!
Air Drying vs. Blow Drying
- Air Drying (Recommended): This is the gentlest method. Place the damp, detangled wig on a wig stand, away from direct sunlight or heat. Allow it to dry completely. This can take several hours or overnight depending on hair length and density. This method best preserves the hair’s natural texture and moisture.
- Blow Drying (Use with Caution): If you need to speed up the process:
- Use a blow dryer on a low heat and low speed setting.
- Always apply a heat protectant spray first.
- Keep the dryer moving constantly, maintaining a distance of at least 6-8 inches from the hair.
- Direct airflow downwards, following the hair’s natural direction.
- Avoid drying the wig completely with the blow dryer; leave it slightly damp to finish air drying if possible.
According to hair science resources, excessive heat from blow dryers can cause flash drying, stripping moisture rapidly and potentially damaging the cuticle. Phuc Thien advises prioritizing air drying whenever feasible.
Securing the Wig for Styling
Once the wig is clean, dry, and detangled, secure it properly for styling:
- Place on Stand/Head: Position the wig securely on a wig stand or mannequin head. Ensure it sits naturally, as it would on your head.
- Use T-Pins (Optional but helpful): If using a canvas or styrofoam mannequin head, use T-pins inserted carefully through the cap’s ear tabs or nape area into the head to hold the wig firmly in place. Avoid pinning through lace areas or the main cap material directly if possible, to prevent damage.
With your human hair wig properly prepped and secured, you are now ready to begin the exciting process of styling. This careful preparation ensures the hair is in optimal condition to receive and hold the style you envision.
8 Easy Human Hair Wig Styling Tutorials for Beginners
Now for the fun part. These tutorials focus on achievable yet beautiful styles perfect for those new to wig styling. Remember to always start with a prepped wig and use heat protectant. Phuc Thien guides you through each step.
Tutorial 1: Sleek and Straight Perfection
- Best suited for: Medium to long wigs; everyday wear, professional settings, elegant evenings.
- What you’ll need: Wide-tooth comb, heat protectant spray, flat iron (variable heat), sectioning clips, serum/Argan oil, wig stand/mannequin.
- Step-by-Step Guide:
- Prep: Ensure the wig is completely dry and detangled. Secure it on the stand. Spray evenly with heat protectant spray, combing through gently to distribute.
- Set Heat: Turn on your flat iron to a low-medium heat setting. For human hair wigs, starting around 250-300°F (120-150°C) is often recommended. You can slightly increase if needed, but avoid exceeding 350°F (175°C) unless experienced and certain of the hair quality. Always test on a small, inconspicuous section first. Reputable cosmetology resources consistently advise lower heat settings for processed hair like that used in wigs.
- Section: Use clips to divide the hair into manageable sections, typically 1-2 inches wide. Start with the bottom layers.
- Straighten: Take a small subsection. Clamp the flat iron near the roots (avoiding the cap) and glide it smoothly down to the ends. Pass over each section only once or twice to minimize heat exposure. Maintain consistent pressure.
- Repeat: Continue section by section, working your way up towards the crown and front hairline.
- Smooth: Once all sections are straightened, allow the hair to cool completely. Apply 1-2 drops of serum or Argan oil to your palms, rub them together, and gently smooth over the surface of the hair, focusing on mid-lengths and ends to tame flyaways and add shine.
- Finishing Touches: Comb through one last time with the wide-tooth comb for a perfectly sleek finish.
- Phuc Thien’s Tip: For an extra sleek look around the face, angle the flat iron slightly inwards as you straighten the front pieces.
💡 Save money — get expert repair service instead of buying a new one.
Tutorial 2: Soft Everyday Waves
- Best suited for: Medium to long wigs; casual outings, adding texture and movement.
- What you’ll need: Wide-tooth comb, heat protectant spray, curling iron/wand (1-1.5 inch barrel), sectioning clips, light hold hairspray (optional), wig stand/mannequin.
- Step-by-Step Guide:
- Prep: Start with a dry, detangled wig secured on its stand. Apply heat protectant thoroughly.
- Set Heat: Set your curling iron/wand to a low-medium heat setting (similar to straightening, 250-320°F or 120-160°C).
- Section: Divide the hair into manageable sections using clips.
- Curl: Take a 1-inch section. If using a curling iron, clamp near the mid-shaft and wrap the hair around the barrel away from the face. Hold for 5-10 seconds (adjust based on hair response). If using a wand, wrap the hair around the barrel (away from the face is common for a natural look), holding the end.
- Release and Cool: Gently release the curl. Crucial step for soft waves: Let the curl cool completely in its coiled shape (you can cup it in your hand for a moment or clip it) before letting it drop. This helps set the wave.
- Alternate Directions (Optional): For a more modern, less uniform look, alternate the direction you wrap the hair around the barrel (some towards the face, some away).
- Repeat: Continue curling section by section.
- Break Up Waves: Once all hair is curled and completely cooled, gently run your fingers or a wide-tooth comb through the curls to break them up into softer, more natural-looking waves. Avoid over-brushing.
- Finish: If desired, mist lightly with a wig-safe hairspray for added hold.
- Phuc Thien’s Tip: For looser, more ‘undone’ waves, use a larger barrel iron and don’t curl the very ends of the hair (leave the last inch straight).

Tutorial 3: Bouncy Curls
- Best suited for: Medium to long wigs; special occasions, adding volume and glamour.
- What you’ll need: Wide-tooth comb, heat protectant spray, curling iron/wand (0.75-1 inch barrel recommended for tighter bounce), sectioning clips, medium hold hairspray (optional), wig stand/mannequin.
- Step-by-Step Guide:
- Prep: Dry, detangled wig on stand, apply heat protectant.
- Set Heat: Low-medium setting (250-320°F or 120-160°C). Smaller sections often require slightly less heat time.
- Section: Divide hair into smaller sections (approx. 0.75-1 inch) for tighter curls.
- Curl: Wrap each section snugly around the barrel. Hold for 7-12 seconds. Ensure the entire section is heated evenly.
- Release and Set: Release the curl carefully. For maximum bounce and longevity, pin the curl up against the base using a bobby pin or clip while it cools completely. This technique is widely used by professional stylists to lock in curl shape.
- Repeat: Curl and pin all sections.
- Cool Down: Allow the entire wig to cool completely with the curls pinned (at least 15-20 minutes).
- Release Pins: Gently remove all pins.
- Style: You can leave the curls defined or gently separate them with your fingers for a softer but still voluminous look. Avoid excessive combing which can create frizz.
- Finish: Mist with medium-hold hairspray if needed.
- Phuc Thien’s Tip: Ensure you curl sections consistently (e.g., all away from the face or alternating) for a cohesive look. Clipping curls while cooling makes a significant difference in hold.
🔄 Extend the lifespan of your hair system with our professional repairs.
Tutorial 4: Chic Bob Style (Short Wig Focus)
- Best suited for: Short bob-length wigs; everyday polish, professional look.
- What you’ll need: Wide-tooth comb, heat protectant spray, flat iron (narrow plates are helpful), round brush (optional, for volume/bend), serum/oil, wig stand/mannequin.
- Step-by-Step Guide:
- Prep: Dry, detangled short wig on stand. Apply heat protectant. Many short bobs benefit from styling while slightly damp if aiming for volume with a round brush and dryer, but for flat ironing, ensure it’s dry.
- Set Heat: Low setting on flat iron (250-300°F or 120-150°C). Short hair styles quickly.
- Section (If Needed): For very thick bobs, you might do a top and bottom section. Otherwise, work in small vertical sections around the head.
- Smooth/Straighten: Take a small section. Glide the flat iron down from root to end.
- Create Bend (Optional): As you reach the ends, slightly twist the flat iron inwards (towards the neck) to create a subtle, face-framing bend rather than pin-straight ends. This gives a classic bob shape.
- Add Volume (Alternative): Instead of flat ironing for sleekness, you can use a round brush and a blow dryer on low heat. Lift sections at the root with the brush and direct airflow at the root area before smoothing down, rolling the ends under with the brush. Requires more practice.
- Style the Fringe/Bangs: Carefully style any fringe or bangs as desired (straight down, swept to the side). Use the edge of the flat iron or a small round brush.
- Smooth: Apply a tiny amount of serum or oil to smooth flyaways and add shine.
- Phuc Thien’s Tip: Pay attention to the nape area; ensure it lies flat and smooth for a polished bob look. Use the comb to guide hair precisely while styling. Styling a short wig often focuses on achieving a clean shape.

Tutorial 5: Effortless Beach Waves
- Best suited for: Any length wig (looks great on bobs too); relaxed, textured style.
- What you’ll need: Wide-tooth comb, heat protectant spray, flat iron OR curling wand (1-inch barrel), texturizing spray (optional, sea salt spray works well), wig stand/mannequin.
- Step-by-Step Guide (Flat Iron Method):
- Prep: Dry, detangled wig, apply heat protectant. Low-medium heat setting.
- Section: Work in 1-1.5 inch sections.
- Create Wave: Clamp the flat iron near the root. As you glide down, twist your wrist back and forth (alternating directions) about 180 degrees each way. This creates an ‘S’ wave pattern. Keep the motion fluid.
- Leave Ends Straight: Release the hair before reaching the very ends (leave last inch or so straight) for a modern beachy look.
- Repeat: Continue around the head, alternating the starting direction of the twist occasionally for variation.
- Cool: Let hair cool completely.
- Texturize: Gently shake out the waves with your fingers. If desired, lightly mist with a texturizing or sea salt spray (wig safe) and scrunch gently to enhance the piecey, lived-in texture.
- Step-by-Step Guide (Curling Wand Method): Follow Tutorial 2 (Soft Waves) steps, but wrap hair loosely around the wand, leave the ends straight, and don’t let curls set tightly. Break them up thoroughly once cool and add texturizing spray.
- Phuc Thien’s Tip: Don’t aim for perfection. Beach waves are meant to look slightly undone and irregular. Focus on texture rather than uniform curls.
🧵 Every stitch, every strand — we take care of every detail.
Tutorial 6: Simple Half-Up, Half-Down
- Best suited for: Medium to long wigs; versatile look, keeps hair off the face.
- What you’ll need: Wig brush/comb, hair elastic or clip/barrette, bobby pins (optional), light hairspray (optional). Heat styling tools if you want the base style to be straight/wavy/curly first.
- Step-by-Step Guide:
- Prep Base Style: Start with the wig styled as desired (straight, wavy, or curly using previous tutorials). Ensure it’s detangled. Place the wig on your head for this style or keep it on the mannequin if easier.
- Section Top Half: Using your fingers or a comb, gather the hair from above your ears upwards towards the crown. The amount you take back determines the look (less hair = more delicate, more hair = bolder).
- Smooth: Gently smooth the gathered section back towards where you want to secure it (usually the back-center of the head).
- Secure:
- Elastic: Secure the section with a small, clear or hair-colored elastic band into a mini ponytail.
- Clip/Barrette: Secure the section with a decorative clip or barrette.
- Refine (Optional):
- Volume: Gently tug on small pieces of hair at the crown (in front of the elastic/clip) to create a little volume or softness.
- Wrap Base: Take a small strand of hair from the underside of the mini ponytail, wrap it around the elastic to conceal it, and secure the end underneath with a bobby pin.
- Blend: Ensure the bottom half of the hair falls naturally and blends well with the secured top section. Brush gently if needed.
- Finish: Mist lightly with hairspray if desired for extra hold.
- Phuc Thien’s Tip: Ensure you don’t pull the hair too tightly, which can reveal the wig edge or look unnatural. Keep it soft and slightly loose for a more modern feel.
Tutorial 7: Polished Low Ponytail/Bun
- Best suited for: Medium to long wigs; sophisticated, practical, good for warmer weather.
- What you’ll need: Wig brush, hair elastic, bobby pins, serum/oil, hairspray (medium hold). Heat tools if starting with unstyled hair.
- Step-by-Step Guide:
- Prep Base Style: Begin with a smooth, detangled wig (straightened often works best for sleekness). Place the wig securely on your head for accurate placement.
- Gather Hair: Gently brush all the hair back towards the nape of your neck. Keep the tension smooth but not overly tight. Use your hands to gather the hair into a low ponytail position.
- Smooth Surface: Apply a small amount of serum or use a fine-mist of hairspray on your hands to smooth down any flyaways on the top and sides as you gather the hair back.
- Secure Ponytail: Fasten the hair securely at the nape with a hair elastic.
- Refine Ponytail (Optional): Wrap a strand of hair around the elastic and pin underneath, as described in Tutorial 6. Ensure the ponytail hair itself is smooth.
- Create Bun (If Desired):
- Twist & Wrap: Twist the ponytail, then wrap it around its base to form a bun shape.
- Secure Bun: Use bobby pins inserted around the base of the bun, tucking them underneath so they are hidden, until the bun feels secure.
- Final Touches: Check for any loose hairs or bumps. Use additional bobby pins or a light mist of hairspray to secure everything neatly. Ensure the edges around your hairline look natural.
- Phuc Thien’s Tip: When gathering hair back, be mindful of the wig’s hairline and ear tabs. Ensure they remain flat and concealed. A low style is generally easier and looks more natural on wigs than high ponytails.
🔧 Don’t throw it away — let us restore your old toupee to like-new condition!
Tutorial 8: Adding Volume to a Short Wig
- Best suited for: Short wigs (bobs, pixies) that feel a bit flat.
- What you’ll need: Wig brush/comb, volumizing mousse/foam (wig safe), blow dryer with nozzle (low heat), round brush (small to medium), root lifting spray (optional).
- Step-by-Step Guide:
- Prep: Start with a clean, damp wig (towel-dried after washing or lightly misted with water). Detangle gently. Secure on stand.
- Apply Product: Apply a small amount of volumizing mousse or foam, concentrating near the roots, especially at the crown and top layers. Distribute evenly. You can also use a root lifting spray directly at the roots.
- Section: Section off the top layer of hair.
- Blow Dry for Volume: Using the blow dryer on a low heat, low speed setting with the nozzle attached, take a section of the underneath layer. Place the round brush near the roots underneath the section. Lift the hair upwards and outwards with the brush while directing the airflow at the roots for a few seconds. Then, continue drying down the hair shaft, slightly rolling the brush.
- Focus on Roots: The key is lifting at the roots. Repeat this process, working section by section through the lower and mid-layers.
- Style Top Layer: Release the top section. Use the same technique, lifting sections at the crown straight up or slightly forward for maximum volume on top.
- Finger Styling: Once mostly dry, use your fingers to Tousle the hair, break up sections, and arrange the style, enhancing the volume and texture.
- Cool Shot: If your dryer has a cool shot button, use it briefly all over to help set the style and close the hair cuticles.
- Finish: Use a tiny bit of styling paste or wax on fingertips to define pieces if desired, especially for pixie cuts. Avoid heavy products that weigh hair down.
- Phuc Thien’s Tip: Drying hair in the opposite direction it naturally falls can significantly boost root lift and volume. Don’t over-dry the hair; stop when it feels dry but still soft.
Mastering these 8 foundational tutorials from Phuc Thien Toupee provides a fantastic starting point for any beginner. Practice truly makes perfect, so don’t be discouraged if your first attempt isn’t flawless. Enjoy the process of discovering the versatility of your human hair wig.
Advanced Tips for a Natural Look
Achieving a truly undetectable wig look often involves a few extra steps beyond basic styling. These techniques help blend the wig seamlessly and enhance realism. While some require practice, incorporating even one or two can make a significant difference.
Customizing the Hairline (Plucking)
- Concept: Many human hair wigs, especially lace front wigs, come with a dense, uniform hairline. Natural hairlines are typically less dense and slightly irregular. Plucking involves carefully removing individual hairs along the front edge with tweezers to mimic this natural graduation.
- Why it Matters: A plucked hairline drastically reduces the “wiggy” look, making the transition from forehead to hair appear much softer and more realistic. According to wig experts and online communities, this is one of the most impactful customization techniques.
- Beginner Approach: Start very sparingly. Place the wig on a mannequin head. Dampen the hairline slightly. Using fine-point tweezers, gently pluck hairs one by one, focusing on creating tiny gaps and softening the dense line. Pluck behind the very first line of hairs initially. Step back frequently to check your progress. It’s easier to pluck more than to replace hairs. Consider watching detailed video tutorials specifically on plucking before attempting. Phuc Thien advises extreme caution for beginners; perhaps attempt only after gaining confidence or seek professional help.
Creating a Realistic Part
- Challenge: The parting space on a wig can sometimes look unnatural due to visible knots or a stark contrast with the scalp.
- Techniques:
- Concealer/Foundation Powder: Choose a concealer or powder that closely matches your scalp color. Using a small brush (like an angled eyeliner brush or concealer brush), lightly dab the product directly onto the lace parting space. Blend it carefully. This camouflages the lace and knots, creating the illusion of scalp showing through.
- Hot Comb (Use with Extreme Caution): For lace closures/frontals, a hot comb pressed gently near the part can help flatten the hair at the roots, making the part lay more naturally. Use low heat and always with heat protectant. Requires skill to avoid damaging lace or hair.
Blending with Your Natural Hair (If Applicable)
- Scenario: If you’re wearing a wig (like a U-part wig or integrating with leave-out), blending your own hair with the wig hair is key.
- Tips:
- Texture Match: Choose a wig texture that closely matches your natural hair.
- Color Match: Ensure the wig color blends well with your leave-out hair. Rooted colors can help.
- Styling Consistency: Style your leave-out hair using the same method (straightening, curling) as the wig hair for a seamless transition. Use the same products if possible.
Managing Flyaways and Frizz
- Issue: Even high-quality human hair wigs can experience flyaways or frizz, especially in humid conditions or due to static.
- Solutions:
- Serum/Oil: A tiny drop of lightweight serum or Argan oil smoothed over the surface works wonders.
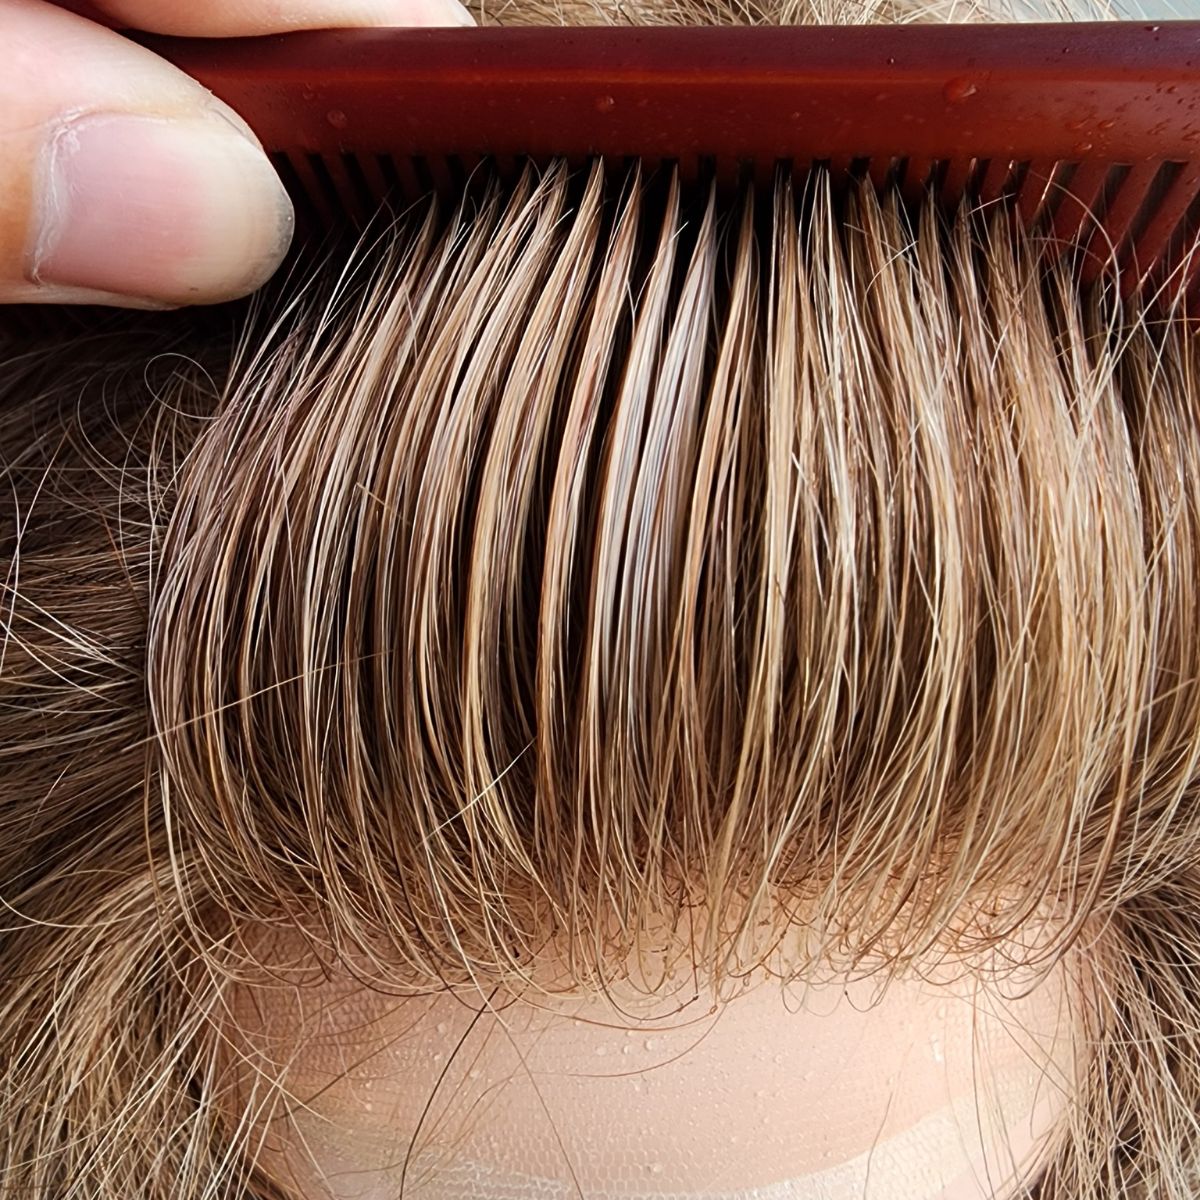
- Hairspray Trick: Spray a light mist of wig-safe hairspray onto a clean toothbrush or spoolie brush, then gently comb down flyaways along the part or hairline.
- Wax Stick: A pomade or wax stick lightly swiped over stubborn areas can provide control without greasiness.
- Static Guard (Use Sparingly): In very dry conditions causing static, a very light mist of Static Guard sprayed onto the brush, not directly on the hair, can help temporarily. Test first.
Implementing these advanced tips, recommended by Phuc Thien, elevates your wig styling from basic to beautifully integrated, boosting confidence in your look.
✨ A toupee shouldn’t just hide hair loss — make it a style statement!
Common Wig Styling Mistakes to Avoid
While human hair wigs are resilient, certain practices can shorten their lifespan or lead to styling mishaps. Being aware of common pitfalls helps beginners protect their investment and achieve better results. Phuc Thien highlights these key areas:
- Using Excessive Heat: This is the most common and damaging mistake. High temperatures can scorch, dry out, and break human hair fibers, leading to irreparable damage.
- Correction: Always use the lowest effective heat setting on your tools. Never skip heat protectant spray. Test heat on a small hidden strand first. Avoid repeated passes over the same section.
- Using Non-Wig-Safe Products: Products designed for natural scalp hair may contain ingredients (like harsh sulfates or certain alcohols) that strip wig hair, cause buildup, or damage the cap construction.
- Correction: Stick to shampoos, conditioners, and styling products specifically formulated for human hair wigs or those confirmed to be gentle and sulfate-free.
- Aggressive Brushing or Combing: Yanking or pulling through tangles can cause shedding (hair loss from the cap) and breakage. Brushing from root to tip directly can strain the knots.
- Correction: Always detangle gently using a wide-tooth comb, starting from the ends and working upwards. Support the hair near the base when detangling tough spots. Use appropriate wig brushes.
- Neglecting Wig Maintenance (Washing & Conditioning): Product buildup, dirt, and oils accumulate, making the wig look dull, feel stiff, and harder to style. Lack of conditioning leads to dryness and tangles.
- Correction: Wash your wig regularly based on wear frequency (typically every 7-14 wears). Always follow washing with a wig-safe conditioner (avoiding the base).
- Styling a Dirty or Tangled Wig: Trying to style hair that is tangled or full of product buildup will lead to uneven results, potential breakage, and frustration. Heat styling dirty hair can bake in dirt and oils.
- Correction: Always ensure the wig is clean, conditioned, and thoroughly detangled before starting any styling process, especially heat styling.
- Applying Products Too Close to the Base/Knots: Conditioners, heavy oils, or serums applied directly to the knots (where hair is tied to the cap/lace) can loosen them over time, leading to excessive shedding.
- Correction: Apply conditioning and smoothing products primarily from the mid-lengths to the ends of the hair.
- Storing the Wig Improperly: Tossing the wig aside can lead to tangling, dust accumulation, and loss of shape.
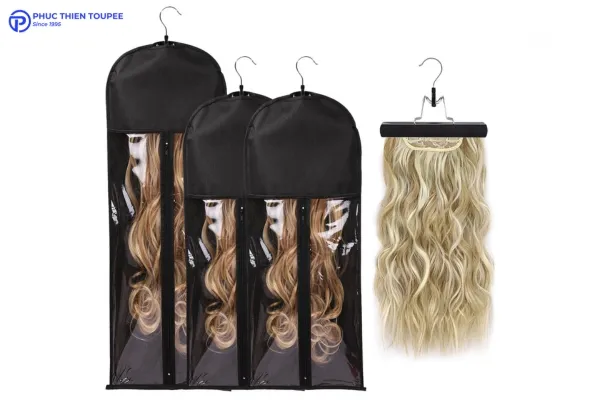
- Correction: Store your wig on a wig stand or mannequin head when not in use, away from direct sunlight and dust. If storing longer-term, place it gently in its original box or a silk/satin bag after ensuring it’s clean and dry.
Avoiding these common errors, as advised by Phuc Thien, is crucial for maintaining the health, appearance, and longevity of your human hair wig, ensuring you can enjoy styling it for a long time.
Beyond the basics: Explore Curly Wig Styling and exciting Wig Customization options for a natural look
Maintaining Your Styled Wig
Once you’ve achieved your desired style, proper maintenance helps it last longer between washes and keeps the wig looking fresh. Consistent care is key to maximizing the lifespan of your human hair unit.
Storing Your Wig Correctly
Proper storage is fundamental wig care.
- Short-Term (Daily Use): Place the styled wig on a wig stand or mannequin head. This helps maintain the style’s shape (especially curls or waves) and prevents tangles. Keep it covered lightly with a silk scarf or store it away from direct sunlight and dust if possible.
- Long-Term Storage: If you won’t be wearing the wig for an extended period, ensure it’s clean and completely dry. Gently comb it out. You can loosely fold it (following the hair direction) and place it in its original box or a breathable bag (silk or satin is ideal to reduce friction). Avoid plastic bags which can trap moisture. Store in a cool, dry place. Some people lightly stuff the cap with acid-free tissue paper to help maintain its shape.

Refreshing Styles Between Washes
You don’t always need a full wash to revive your style.
- Taming Frizz/Flyaways: Use a tiny amount of serum or a spritz of hairspray on a brush as mentioned previously.
- Reviving Waves/Curls: Lightly mist the hair with water or a curl-reactivating spray (wig safe). Gently scrunch the hair upwards to encourage the pattern to return as it dries. For heat-set curls, you might need to touch up a few sections with your curling iron on low heat (always use heat protectant again).
- Adding Shine: A light mist of shine spray or a very small amount of serum can restore luster.
- Dry Shampoo (Use Sparingly): If the base feels slightly oily or roots look flat, a wig-safe dry shampoo can be used very sparingly near the roots. Brush out thoroughly to avoid buildup. Phuc Thien advises caution with dry shampoos on wigs, as buildup can be harder to remove than on scalp hair.
Washing Frequency
This depends heavily on usage, environment, and product use.
- General Guideline: Every 7-14 wears is typical.
- Signs it Needs Washing: The hair feels stiff, looks dull, has product buildup, smells stale, or is difficult to style.
- Adjust Based On:
- Environment: Worn in smoky or dusty environments? Wash more often.
- Product Use: Heavy use of hairspray, serums, etc.? Wash more often to prevent buildup.
- Lifestyle: Worn during exercise or in hot weather? Wash more often.
Consistent maintenance routines, including proper storage and timely washing as recommended by Phuc Thien, are essential for preserving the beauty and integrity of your styled human hair wig.
Conclusion: Embrace Your Styling Potential
Embarking on the journey of styling your human hair wig is an exciting step towards personalized beauty and confidence. These Wig Styling Tutorials provide a solid foundation, demonstrating that achieving beautiful, natural-looking styles is well within reach, even for beginners. From sleek straight looks to chic bobs and effortless waves, the versatility of human hair combined with the right techniques and products opens up endless possibilities.
Remember that practice and patience are key. Each attempt builds your skill and familiarity with your specific hair unit. By following the detailed steps outlined by Phuc Thien, utilizing the recommended tools and products, and avoiding common pitfalls, you are well-equipped to care for and style your wig effectively. The ability to style your hairpiece easily enhances its value and your enjoyment of it.
Phuc Thien Toupee Co., Ltd
Design Brand: Royal Hair Vietnam
Office Address:
🏢 Room A909, Decapella Building, 116 Luong Dinh Cua Street, An Khanh Ward, Thu Duc City, Ho Chi Minh City 700000, Vietnam
Factory Address:
🏭 No. 26/9, Street 57, Thuong Hamlet, Tan Thong Hoi Ward, Cu Chi District, Ho Chi Minh City 700000, Vietnam
Email: ✉️ phucthientoupeevn@gmail.com
Phone / WhatsApp: 📞 +84 933 901 196
Websites: 🌐 phucthientoupee.com – 🌐 royalhair.shop