

- 10/06/2025
- Posted by: phucthien
- Category: Blog
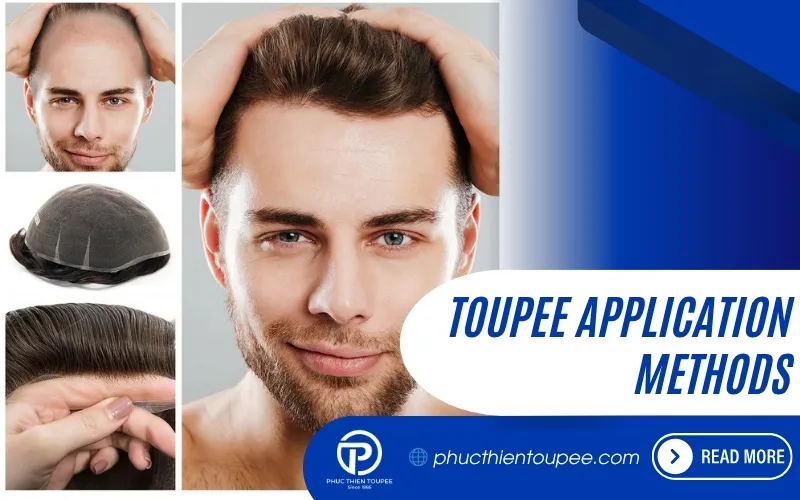
Toupee application methods explained clearly are essential for anyone seeking non-surgical hair replacement solutions, providing insights into techniques like using adhesives, tapes, or clip-on systems. Understanding the different ways to apply a toupee empowers you to choose the best approach for your lifestyle, hair system type, and desired level of security, ultimately enhancing your confidence with a natural-looking result.
Phuc Thien Toupee is here to guide you through the nuances of hairpiece attachment, ensuring you feel informed and prepared. Whether you’re exploring hair systems for the first time or looking to refine your technique, this comprehensive guide covers the most reliable and popular methods, focusing on liquid adhesives, toupee tapes, and attachment clips. We delve into secure hair system application and different hairpiece fitting options.
Understanding the Importance of Proper Toupee Application
Achieving a seamless and natural look with a toupee, hair system, or hairpiece hinges significantly on the application technique. Proper application is more than just sticking the unit to your scalp; it’s an art and science that influences:
- Security: A well-applied toupee stays firmly in place, providing peace of mind during daily activities, exercise, and even sleep. Fear of displacement is a major concern, and the right method minimizes this risk.
- Appearance: Correct application ensures an undetectable hairline and seamless blending with any existing hair. It prevents unnatural bumps, visible edges, or a misplaced look.
- Comfort: An improperly applied unit can cause discomfort, itching, or tension. Choosing the right method and executing it correctly enhances wearability.
- Longevity of the Hair System: Rough handling or incorrect adhesive use can damage the delicate base material (like lace or poly skin) over time. Proper application and removal preserve the unit’s integrity.
- Scalp Health: Using appropriate products and techniques helps prevent skin irritation, clogged pores, or potential damage to hair follicles (if using clips).
Mastering toupee application methods is fundamental to a positive hair replacement experience. It transforms the toupee from a mere accessory into an integrated part of your appearance, boosting self-esteem and allowing you to engage fully in life without hair-related anxieties. Phuc Thien believes knowledge empowers users to achieve the best possible outcomes.

Flawless application: Master Natural Look Toupee Application and achieve seamless Toupee Blending
Pre-Application Essentials
Before you even think about applying adhesive or positioning clips, thorough preparation is paramount. Skipping these steps is like building a house on shaky ground – the results won’t be stable or long-lasting.
Scalp Preparation: The Foundation of a Secure Bond
A clean, dry, and protected scalp is non-negotiable for optimal adhesion and comfort, regardless of the application method chosen.
- Cleaning:
- Why: Removes natural oils, sweat, dead skin cells, and any product residue. Adhesives and tapes bond best to a completely clean surface.
- How: Use a gentle, pH-balanced cleanser or soap specifically designed for scalp preparation or sensitive skin. Avoid harsh soaps or shampoos with heavy conditioners or oils right before application. Lather gently, rinse thoroughly, and pat the scalp completely dry with a clean, lint-free towel.
- Frequency: This deep clean is required before every new application.
- Shaving (If Applicable):
- Why: For methods involving full bonding with glue or tape (especially on polyurethane bases), a smooth surface is crucial. Stubble can interfere with adhesion and cause discomfort. Many wearers maintain a shaved area under the unit.
- How: If you shave the application area, do so carefully. Use a sharp razor and shaving cream or gel suitable for sensitive skin. Shave in the direction of hair growth initially, then against it for extra closeness if needed, being cautious not to cause nicks or irritation. Rinse well and dry completely. It’s often recommended to shave a day before application to allow any minor irritation to subside.
- Skin Protection:
- Why: Scalp protectors create a barrier between your skin and the adhesive or tape. This serves multiple purposes:
- Enhances Adhesion: Provides a uniform surface for the adhesive to grip.
- Prevents Irritation: Protects sensitive skin from direct contact with potentially irritating chemicals in adhesives. According to the American Academy of Dermatology Association (AAD), contact dermatitis is a common issue, and a barrier can mitigate this risk with hair system adhesives.
- Improves Hold Time: Can help adhesives perform better, especially in humid conditions or for individuals with oily skin.
- How: Apply a thin, even layer of a liquid scalp protector product (like Walker Tape’s Scalp Protector or No Sweat) to the entire application area. Allow it to dry completely according to the product instructions (usually 1-3 minutes until it’s no longer tacky). Some users apply two layers for extra protection and hold.
- Why: Scalp protectors create a barrier between your skin and the adhesive or tape. This serves multiple purposes:
Understanding Your Hair System Base
The type of base material your toupee is made from influences which application methods are most suitable.
- Lace Bases (French Lace, Swiss Lace): Lightweight, breathable, offer a very natural hairline. Best suited for liquid adhesive (especially for the hairline) and specialized tapes. Requires careful application to avoid adhesive seeping through.
- Polyurethane Bases (Poly Skin, Thin Skin): Thin, membrane-like material that mimics skin. Excellent for strong bonds with glue or tape. Less breathable than lace. Easier to clean adhesive residue from.
- Monofilament Bases (Mono): Durable woven material, often combined with poly perimeters. Good breathability. Works well with tape and perimeter bonding with glue.
- Hybrid Bases: Combine materials, e.g., lace front with poly sides and back. Offers benefits of both – natural hairline plus easier cleaning and stronger perimeter bond. Application often involves using glue at the lace front and tape elsewhere.
Knowing your base helps you select the most compatible and effective application products and techniques. Phuc Thien Toupee specialists can advise on the best pairings.

Gathering Your Tools and Supplies
Having everything ready beforehand makes the application process smoother and less stressful.
| Item | Purpose | Notes |
| Your Hair System (Toupee) | The centerpiece | Ensure it’s clean and dry |
| Chosen Adhesive/Tape/Clips | The attachment method | Select based on preference, hold time, skin sensitivity, base type |
| Applicator(s) | For applying liquid glue (small brush, cotton swab, sponge) | Depends on glue consistency |
| Mirror(s) | Handheld and wall-mounted | Allows viewing from multiple angles |
| Scalp Protector | Creates barrier, enhances bond | Essential for adhesive/tape methods |
| Rubbing Alcohol (99% ISO) | Final scalp cleanse, removes oils, helps cure some adhesives quicker | Use sparingly on a cotton pad just before protector/adhesive |
| Marking Pencil (Grease/Eye) | To mark hairline placement | Easily wipes off |
| Scissors | For trimming tape, cutting base (if needed), general use | Keep dedicated sharp scissors |
| Hair Clips/Clamps | To hold existing hair or toupee hair out of the way | Essential for precise application |
| Solvent/Adhesive Remover | For cleanup of mistakes and eventual removal | Choose one compatible with your adhesive and base type |
| Clean Towels/Paper Towels | For drying scalp, wiping spills | Lint-free is best |
| Time & Patience | Crucial for a good result | Don’t rush the process, especially when learning |
Having these items organized will streamline your toupee fitting procedure.
✨ A toupee shouldn’t just hide hair loss — make it a style statement!
Method 1: Liquid Adhesive Bonding (Glue) – Full Coverage
Liquid adhesive, often referred to as bonding adhesive or toupee glue, offers the potential for the strongest, most seamless, and longest-lasting bond. This method involves applying a layer of specialized cosmetic glue directly to the scalp across the entire area the toupee will cover.
Understanding Liquid Adhesives
Not all glues are created equal. They primarily fall into two categories:
- Water-Based Adhesives:
- Composition: Typically acrylic or copolymer-based emulsions. Often white when applied, drying clear.
- Pros: Generally considered safer for skin (lower potential irritants), easier cleanup with soap and water (initially), low odor. Many are formulated to be waterproof after fully curing. Examples include Ghost Bond XL or Great White.
- Cons: May have slightly longer drying/curing times compared to solvent-based. Initial tackiness can take time to develop. Humidity can sometimes affect initial bond strength.
- Best For: Sensitive skin, users prioritizing easier cleanup, achieving a very flat bond.
- Solvent-Based Adhesives:
- Composition: Contain solvents that evaporate, leaving the adhesive polymer behind. Often clear from the start or dry clear quickly.
- Pros: Typically offer a very strong, fast-grabbing initial tack and bond. Often highly resistant to water and sweat almost immediately. Examples include Walker Ultra Hold or Vapon No Tape.
- Cons: Stronger chemical odor during application. Higher potential for skin irritation for sensitive individuals (patch testing is crucial). Removal requires specific solvents.
- Best For: Users needing maximum immediate hold, active lifestyles, humid climates, experienced users.
Hold Time: Manufacturers typically rate hold times (e.g., 1-2 weeks, 2-4 weeks, 4+ weeks). However, actual duration varies greatly based on individual body chemistry (oiliness, sweat), climate, activity level, and adherence to application/maintenance guidelines. A study published in the Journal of Cosmetic Dermatology highlighted the variability of adhesive performance based on skin type and environmental factors, emphasizing personalized experience over manufacturer claims.
Pros of Full Glue Bonding:
- Potentially the strongest and longest hold.
- Can create a very flat, undetectable transition, especially with thin skin bases.
- Excellent for active individuals, swimmers.
- Allows for precise hairline application for maximum realism.
Cons of Full Glue Bonding:
- Application can be messy if not careful.
- Requires patience for drying/curing times.
- Higher learning curve than tape or clips.
- Removal process is more involved and requires specific solvents.
- Potential for skin irritation (patch test essential).
- Can fully block scalp breathability depending on the adhesive and base combination.

Step-by-Step Full Head Glue Application Guide
Precision and patience are key. Follow these steps carefully:
- Prepare the Scalp: Cleanse, shave (if needed), and dry the scalp thoroughly as described in the preparation section.
- Mark the Hairline: Use a non-permanent marking pencil (grease pencil or eyeliner) to lightly trace the desired front hairline position on your forehead. This provides a guide.
- Apply Scalp Protector: Apply 1-2 thin layers of scalp protector to the entire area where the toupee will sit. Allow each layer to dry completely (usually feels smooth, not tacky).
- Apply Rubbing Alcohol (Optional but Recommended): Lightly wipe the protected scalp area with a cotton pad soaked in 99% isopropyl alcohol. This removes any final traces of oil and can help some adhesives bond faster. Let it evaporate completely (seconds).
- Apply the Liquid Adhesive:
- Dispense a small amount of adhesive.
- Using a small brush, dedicated sponge applicator, or even a gloved fingertip, apply a thin, even layer of adhesive to the scalp within the marked area. Do not apply glue directly to a lace base. For poly bases, some apply glue to the base instead of, or in addition to, the scalp – follow manufacturer/supplier recommendations.
- Crucially: Allow this layer to dry until it becomes tacky or clear (depending on the product). This can take 3-10 minutes per layer. Consult the adhesive instructions. Rushing this step compromises the bond. Water-based glues often turn from white to clear. Solvent-based may just lose their wet shine and become tacky.
- Apply subsequent layers (typically 2-4 layers total are recommended for a strong hold, especially at the hairline). Allow each layer to dry properly before applying the next. Thin layers are much more effective than one thick layer.
- Position the Toupee:
- Carefully pick up the hair system. It’s often easiest to start at the front hairline.
- Align the front edge of the toupee with your marked hairline guide.
- Gently roll or press the system onto the scalp from front to back, smoothing it down as you go. Avoid trapping air bubbles. Do not stretch the base.
- Once positioned, do not slide it. If misplaced, you may need to partially lift and reposition immediately, or in worst cases, remove and restart (depending on the adhesive’s grab).
- Secure the Bond:
- Press down firmly over the entire bonded area using your fingertips or a clean, dry cloth. Pay special attention to the edges and hairline.
- Hold pressure for several seconds in each spot to ensure good contact between the base and the adhesive on the scalp.
- Curing Time:
- Most adhesives require a curing period (typically 24-48 hours) to reach maximum bond strength and water resistance.
- During this time, avoid: getting the toupee wet (showering, swimming), heavy sweating (intense exercise), wearing tight hats, or applying styling products near the base. Following this rule is critical for achieving the advertised hold duration.
Tips for Success with Liquid Adhesive
- Patch Test: Always perform a patch test on a small, inconspicuous area of skin (like behind the ear or inner arm) 24-48 hours before full application, especially with new adhesives, to check for allergic reactions or irritation.
- Thin is In: Multiple thin, evenly spread layers are far superior to one thick, goopy layer. Thick layers take longer to dry, cure improperly, and can create bumps.
- Patience Pays: Don’t rush the drying time between layers or the final curing period.
- Work in Good Lighting: Ensure you can see clearly for precise application, especially at the hairline.
- Clean Up Mishaps: Keep adhesive remover/solvent and cotton swabs handy to quickly clean up any glue that gets on the hair fibers or outside the desired area before it cures.
- Store Properly: Close adhesive bottles tightly and store them according to manufacturer instructions (usually cool, dark place) to maintain effectiveness.
🔍 Looking for a specific size, base, or hair color? Order a fully personalized toupee now!
Method 2: Perimeter Glue Bonding
This is a variation of glue application where the liquid adhesive is applied only around the outer edge (perimeter) of the scalp area where the toupee will sit, leaving the center area free of adhesive.
When to Choose Perimeter Bonding
Perimeter bonding is often chosen for:
- Increased Scalp Breathability: Leaving the center unbonded allows for better air circulation and sweat evaporation, which can be more comfortable, especially in warmer climates or for those prone to scalp heat.
- Specific Base Types: Often used with monofilament bases or hybrid systems that have a more durable perimeter (like polyurethane) designed for bonding, while the center might be lace or mono for breathability.
- Easier Interior Scalp Access: Allows for easier scratching of an itch in the center area without disturbing the bond.
- Reduced Adhesive Use: Uses less product compared to a full head bond.
Application Steps for Perimeter Glue Bonding
The process is very similar to the full head glue application, with the key difference being where you apply the adhesive:
- Prepare Scalp: Cleanse, shave perimeter if needed, dry thoroughly.
- Mark Hairline: Mark the front hairline as a guide.
- Apply Scalp Protector: Apply to the entire scalp area, including the center, for uniform protection and feel, OR apply only to the perimeter where glue will be placed.
- Apply Rubbing Alcohol (Optional): Wipe the perimeter area where glue will be applied. Let dry.
- Apply Liquid Adhesive: Using your applicator, apply thin, even layers of adhesive only along the perimeter edge of the scalp area (typically a band 1/2 to 1 inch wide). Follow the same drying time instructions between layers as for full bonding. Ensure the front hairline receives adequate, careful application.
- Position the Toupee: Align the front hairline and carefully roll/press the system into place, ensuring the perimeter of the base makes firm contact with the glued area on the scalp.
- Secure the Bond: Press firmly around the entire perimeter, paying extra attention to the front, temples, and nape area.
- Curing Time: Follow the same 24-48 hour curing guidelines, avoiding moisture and heavy sweating.

Pros and Cons Compared to Full Bond
- Pros: Better scalp ventilation, potentially increased comfort, uses less adhesive, easier center scalp access.
- Cons: May offer slightly less overall security than a full bond (though still very secure if done correctly), the center of the unit might feel slightly less integrated or flap minimally if touched directly (usually unnoticeable visually). Not ideal for bases designed explicitly for full bonding (like some ultra-thin skin units).
Perimeter bonding is a popular technique balancing secure attachment with improved scalp comfort for many wearers.
🎨 Your style, your hair — we make it exactly how you want.
Method 3: Toupee Tape Application (Full Coverage)
Toupee tape offers a user-friendly, less messy alternative to liquid adhesives while still providing reliable hold. It involves applying specialized double-sided adhesive tape strips or contours to the toupee base or the scalp. Full coverage means applying tape across the entire underside of the unit.
Exploring Toupee Tapes
Toupee tapes come in various forms, strengths, and finishes:
- Formats:
- Rolls: Allow you to cut custom lengths. Economical for large areas.
- Contours/Strips: Pre-cut shapes (A, B, C, CC, Straight etc.) designed to fit common hairline curves and toupee perimeters. Convenient and precise.
- Adhesive Types & Hold:
- Daily Wear: Lower tack, designed for easy removal after 1-3 days. Good for beginners or very sensitive skin.
- Extended Wear: Medium to strong hold, lasting several days to 2+ weeks. Most common type.
- Maximum Wear: Strongest hold, potentially lasting 3-5 weeks. Requires more effort for removal.
- Liners (The backing you peel off): Different colors often indicate tackiness, carrier type, or brand characteristics. Common examples:
- Red Liner: Often signifies an acrylic adhesive, strong hold, typically clear tape. Can be slightly harder to remove liner.
- White Liner: Can vary – sometimes indicates a less aggressive adhesive or a tape with a fabric-like carrier.
- Blue Liner: Often used for lace-specific tapes, known for being non-shiny and having good hold without damaging delicate lace.
- Brown/Yellow Liner: Typically indicates a German cloth tape or specific types of maximum wear tapes.
- Finishes: Some tapes have a matte (dull) finish to reduce shine through lace bases, while others are clear.
Pros of Full Tape Bonding:
- Generally easier and faster to apply than liquid glue.
- Less messy application process.
- Cleanup is often simpler, with less sticky residue on the scalp (though residue can occur).
- Provides a secure hold, suitable for most activities.
- Wide variety of hold strengths and types available.
- Good option for beginners learning how to apply a toupee.
Cons of Full Tape Bonding:
- Can sometimes feel slightly thicker or less flat than a perfectly applied thin glue layer.
- Edges, especially at the hairline, might be slightly more detectable than with glue if not applied meticulously.
- Some tapes can leave residue on the base or scalp upon removal.
- May not conform as perfectly to scalp contours as liquid glue.
Hold Time: Similar to glue, manufacturer ratings (e.g., 1-week, 2-4 weeks) are guidelines. Actual results depend on skin type, climate, activity, and proper application.
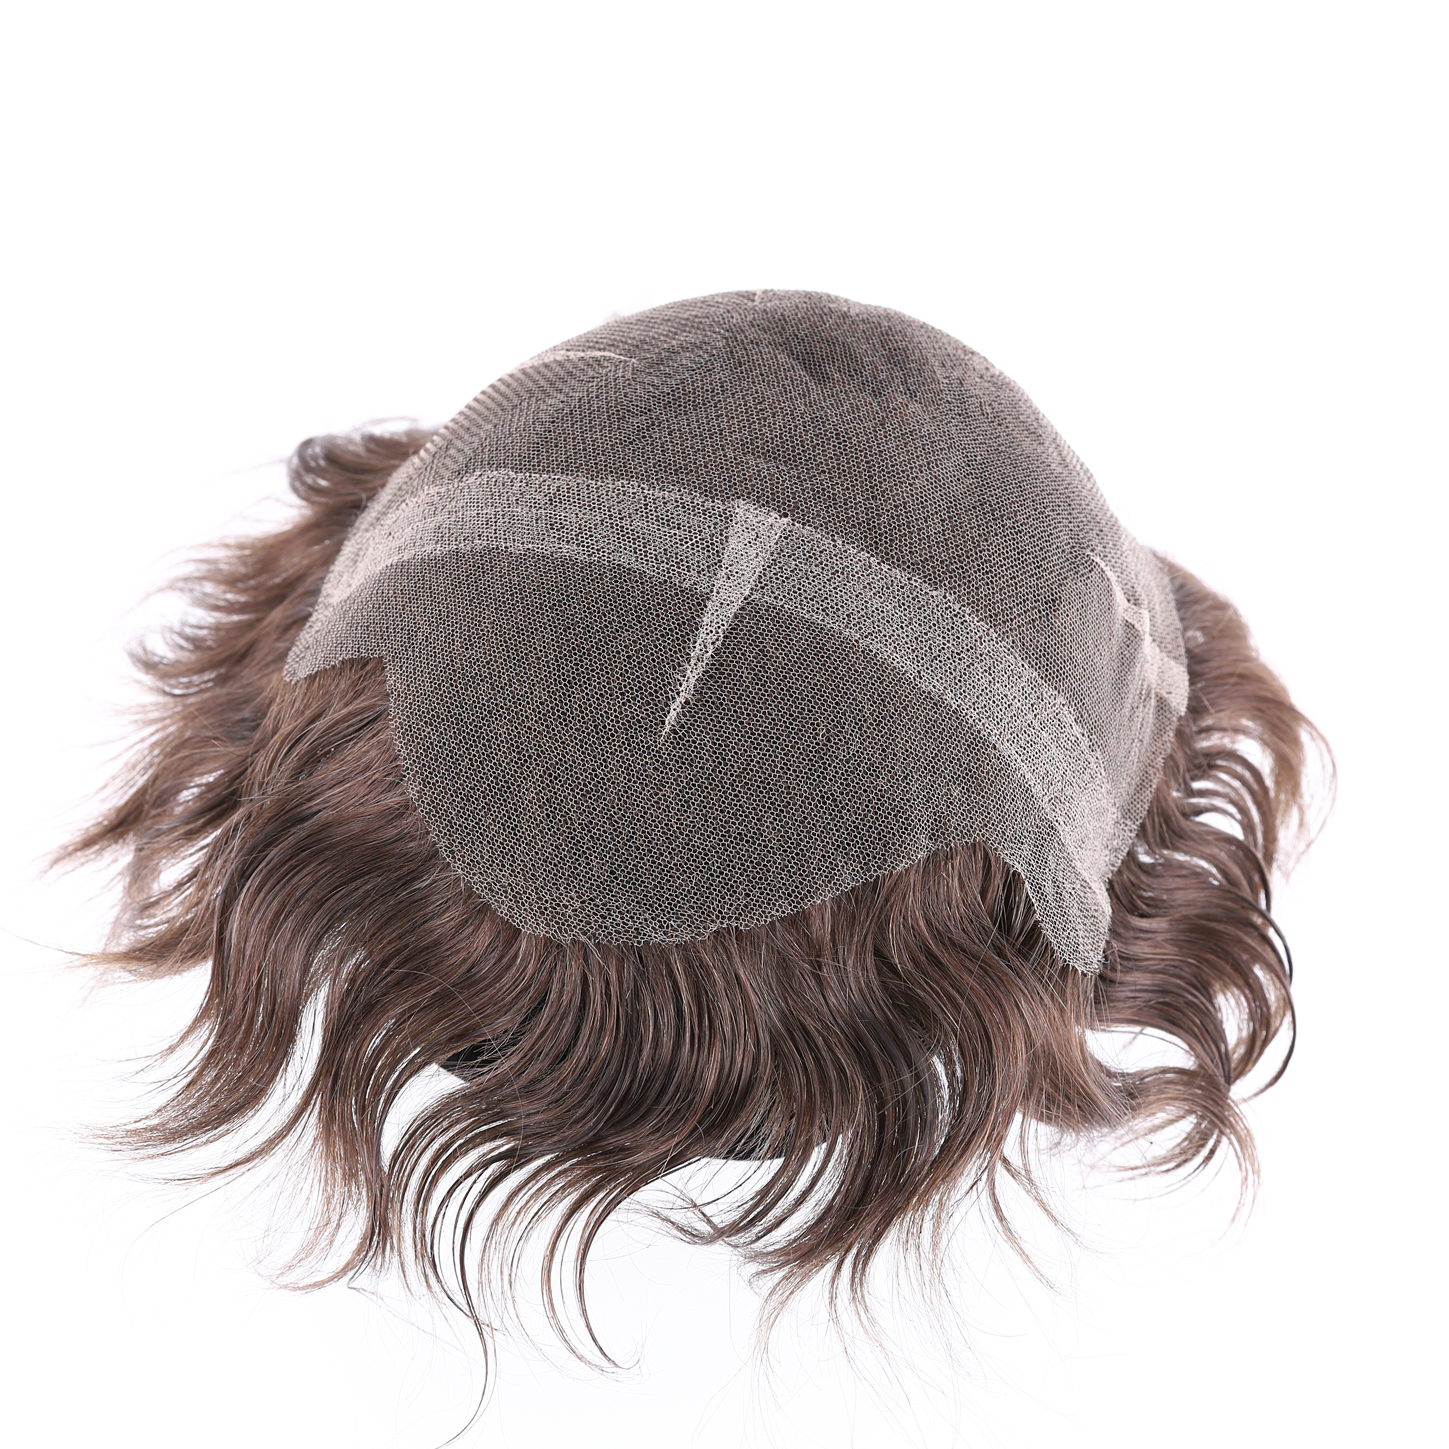
Step-by-Step Full Coverage Tape Application Guide
There are two main approaches: applying tape to the base first, or applying tape to the scalp first. Applying to the base is more common and generally recommended.
Applying Tape to the Toupee Base:
- Prepare the Scalp: Cleanse, shave (if needed), dry thoroughly. Apply scalp protector and let dry. Wipe with alcohol (optional) and let evaporate.
- Prepare the Toupee Base: Ensure the underside of the toupee base is perfectly clean and dry. Remove any old adhesive residue meticulously.
- Apply Tape to the Base:
- Select your tape rolls or contours.
- Carefully apply the tape strips/contours to the underside of the toupee base, covering the entire area. Place strips edge-to-edge or with a very slight overlap to prevent gaps.
- Press the tape firmly onto the base material to ensure good adhesion. Rubbing with the back of a fingernail can help.
- Do not remove the liner (backing paper) yet.
- Trim any excess tape that extends beyond the base edge with sharp scissors. Be precise.
- Position the Toupee:
- Mark your hairline guide on your forehead.
- Strategically peel back part of the liner on the front hairline tapes. You might peel just a corner or the center section to help with alignment.
- Align the front edge of the toupee with your marked hairline. Gently press the exposed tape section down.
- Once the front is positioned correctly, gradually peel off the remaining liner sections while simultaneously pressing the toupee onto the scalp, working from front to back or center outwards. Smooth down firmly as you go.
- Secure the Bond:
- Once the entire unit is in place, press down firmly all over the taped area through the hair using your fingertips or a cloth for several seconds per spot. Pay extra attention to the perimeter and hairline.
- Curing Time (Optional but Recommended): While tapes often provide immediate hold, some benefit from a short period (a few hours) without excessive sweating or moisture to fully set, especially extended wear types. Check tape instructions.
Tape Success Strategies
- Clean Base is Crucial: Any oil or residue on the toupee base will compromise the tape’s bond. Clean it thoroughly between applications.
- Avoid Touching Adhesive: Oils from your fingers can reduce the tape’s tackiness. Handle tape by the edges or liner as much as possible.
- Slight Overlap: Overlapping tape strips slightly (by 1-2mm) where they meet can prevent gaps and create a more secure, continuous bond.
- Press Firmly: Ensure good contact between the tape, the base, and the scalp protector layer.
- Use the Right Tape for the Base: Some tapes are specifically designed for lace (e.g., dull finish, gentle removal) while others excel on poly (stronger tack). Phuc Thien Toupee can recommend appropriate tapes.
✂️ Be unique — create your custom-made toupee today!
Method 4: Perimeter Tape Application
Similar to perimeter glue bonding, this method involves applying toupee tape only around the outer edge of the hair system base or the corresponding area on the scalp.
Suitability and Advantages
Perimeter taping is suitable for:
- Improving Scalp Breathability: Like perimeter gluing, it leaves the central scalp area uncovered by adhesive, allowing for better air circulation.
- Comfort: Can feel lighter and cooler than a full tape application.
- Base Types: Works well with monofilament or hybrid bases featuring a durable perimeter strip (often poly). Can also be used on full lace or full poly units if desired for breathability.
- Simplified Application/Removal: Less tape to apply and remove compared to full coverage.
Application Process for Perimeter Tape
The steps mirror the full tape application, but tape is only placed along the edges:
- Prepare Scalp: Cleanse, shave perimeter if necessary, dry. Apply scalp protector to the entire area or just the perimeter. Let dry. Optional alcohol wipe on the perimeter.
- Prepare Toupee Base: Ensure the entire base, especially the perimeter, is clean and dry.
- Apply Tape to Base Perimeter:
- Using tape rolls or pre-cut contours, apply tape strips firmly along the entire outer edge (front hairline, temples, sides, back) of the underside of the toupee base.
- Ensure continuous coverage around the perimeter, overlapping ends slightly.
- Press tape firmly onto the base. Leave liners on.
- Trim excess tape.
- Position the Toupee:
- Mark hairline.
- Peel back a small section of liner at the front hairline tape.
- Align and gently press the front edge onto the scalp.
- Gradually remove the rest of the liner along the perimeter while pressing the edges of the toupee firmly onto the scalp.
- Secure the Bond: Press firmly all around the taped perimeter for several seconds per spot.
- Curing (Optional): Allow a brief setting period if recommended for the specific tape used.
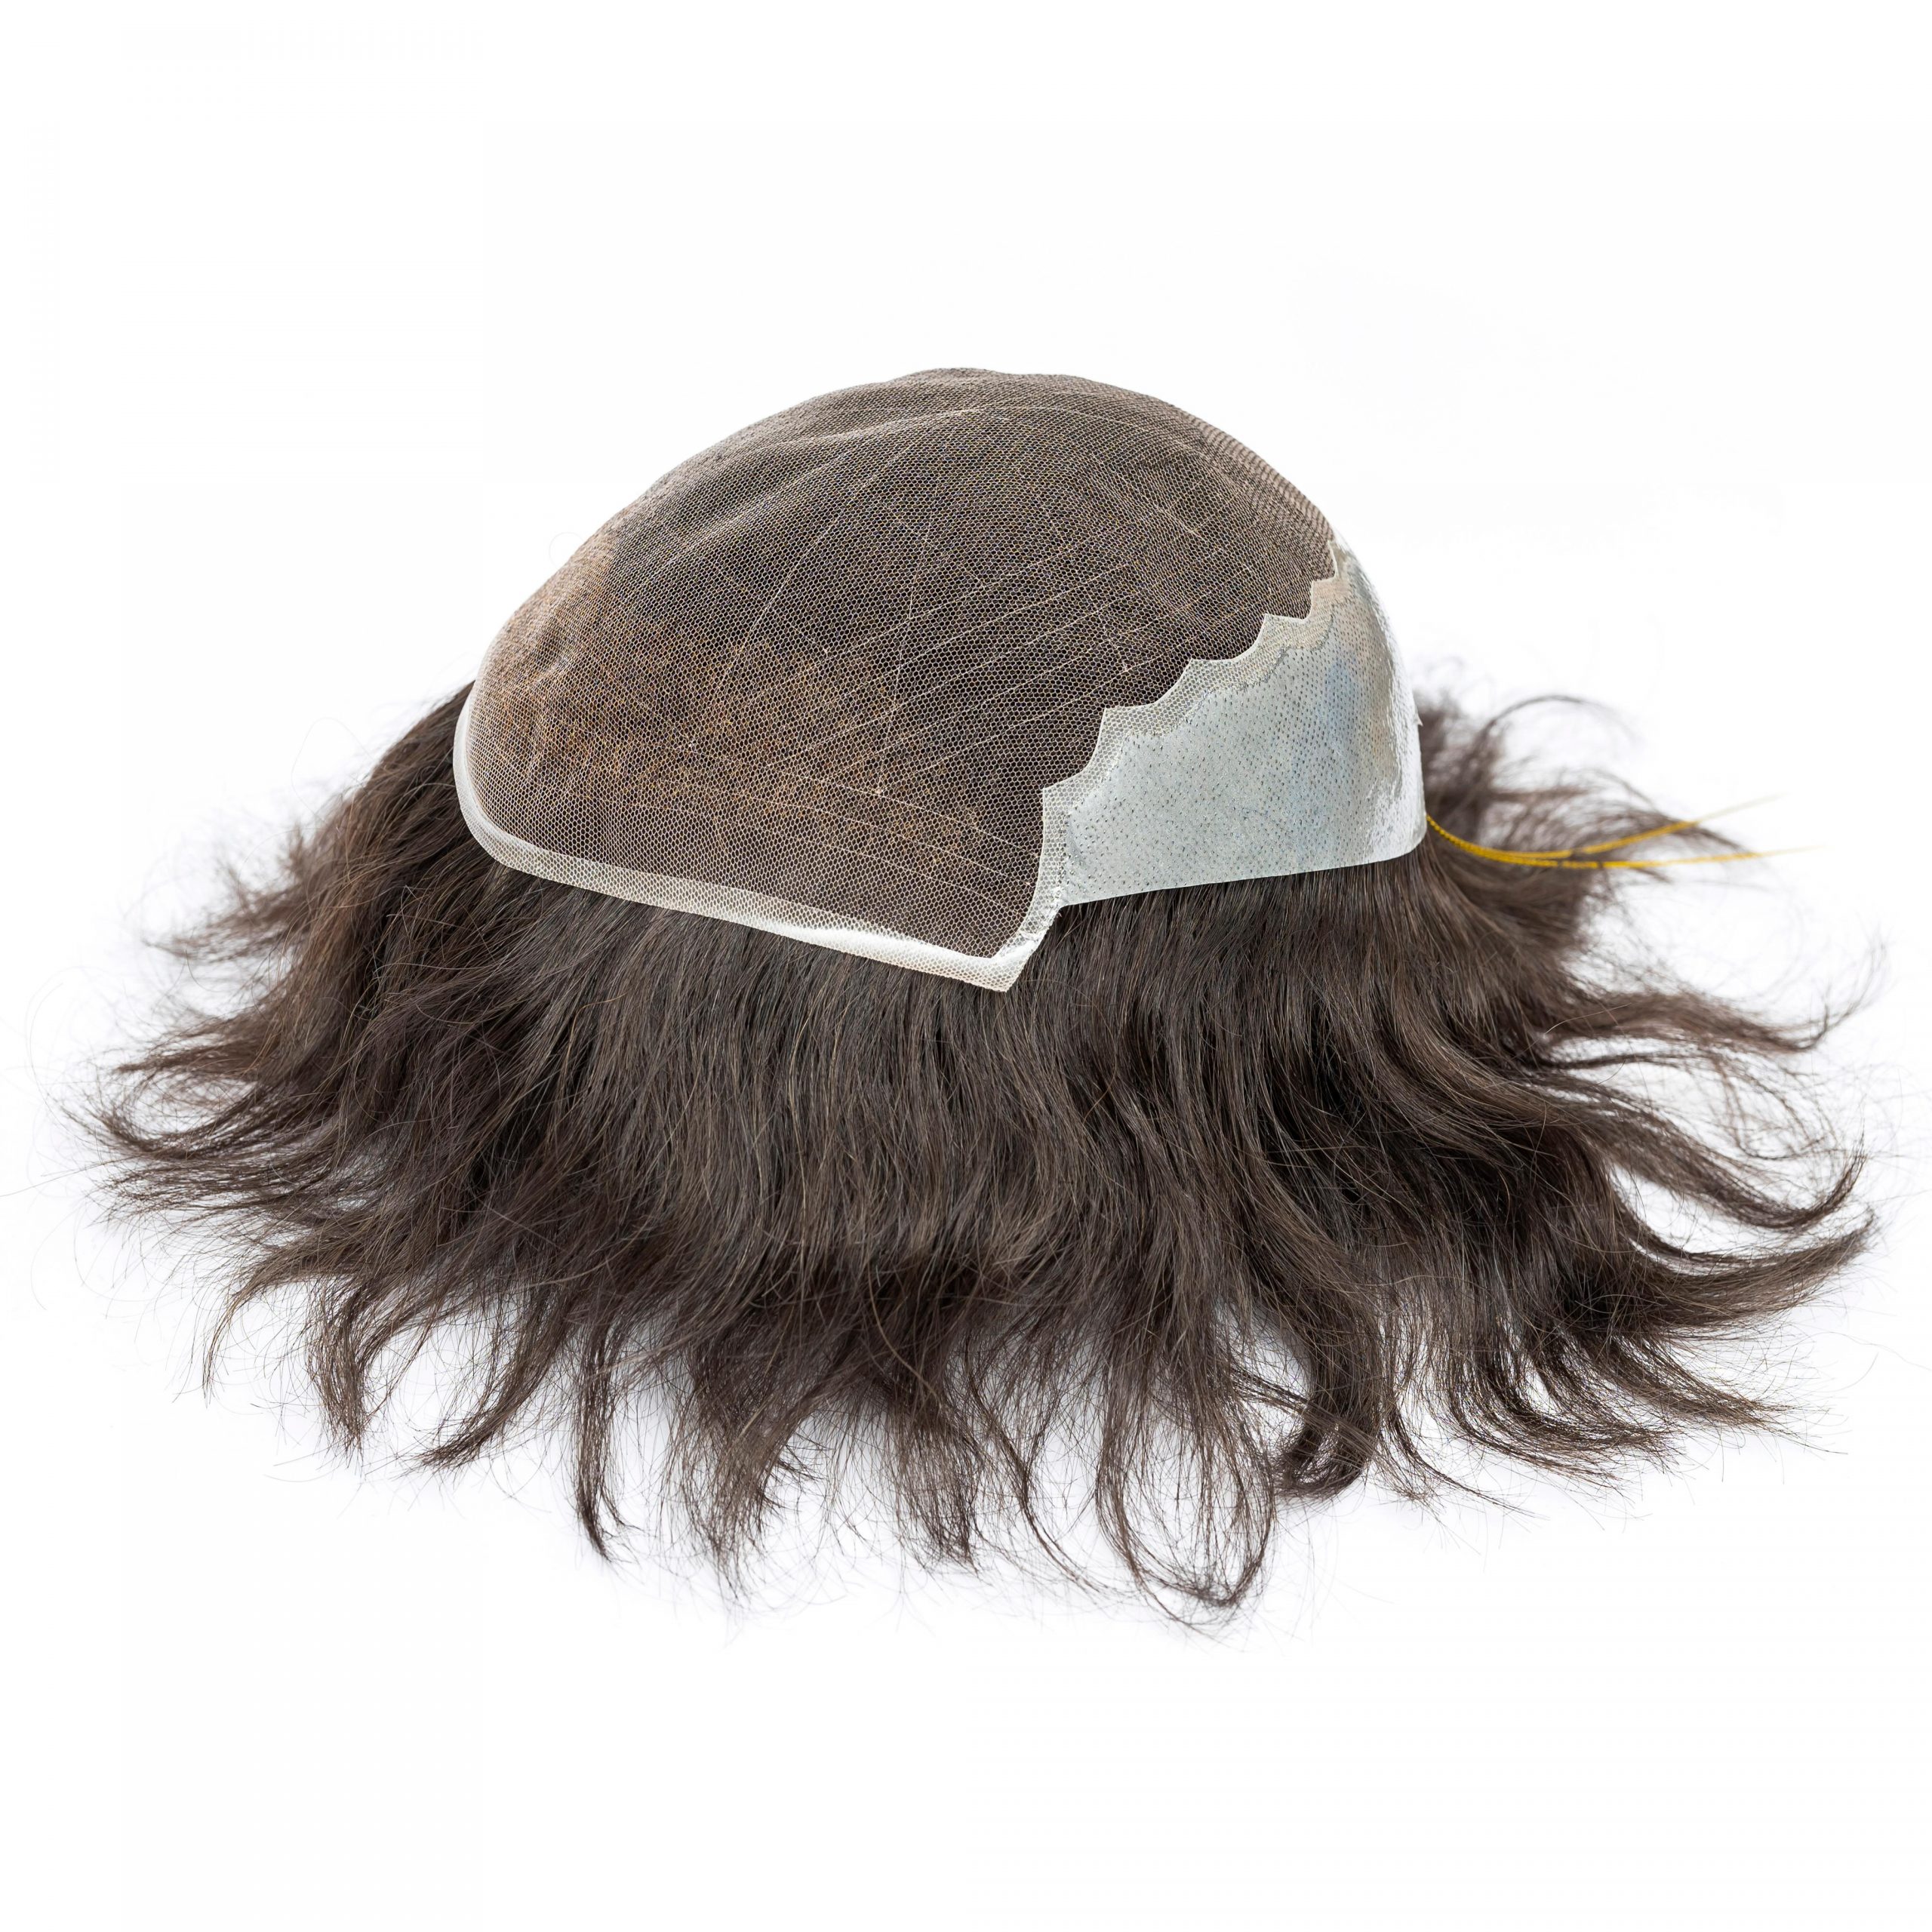
Comparing Perimeter Tape and Glue
- Ease of Use: Perimeter tape is generally easier and less messy to apply than perimeter glue.
- Hold: Perimeter glue might offer a slightly stronger or more seamless edge bond, especially at the very front hairline, if applied skillfully. However, strong perimeter tapes also provide excellent security.
- Cleanup: Tape residue is often easier to manage than dried glue residue around the perimeter.
- Feel: Both methods improve breathability over full bonding. The feel of the unbonded center section is similar.
Perimeter taping is a very popular method offering a great balance of security, comfort, and relative ease of use.
Method 5: Using Toupee Clips
Toupee clips offer a completely adhesive-free attachment method. These small, comb-like metal clips are sewn onto the underside of the toupee base and then snapped shut onto the wearer’s existing hair.
Understanding Toupee Clips
- Mechanism: Clips have small teeth that grip the existing hair and a snap-closure mechanism (similar to a barrette) that locks them in place.
- Types: Most common are pressure-sensitive snap clips, available in various sizes and colors to match hair or base material.
- Attachment: Clips need to be securely sewn onto the perimeter (and sometimes interior) of the toupee base using strong thread. Placement is key for a secure and comfortable fit.
Pros of Using Toupee Clips:
- No Adhesives: Ideal for individuals with extreme skin sensitivity, allergies to glues or tapes, or those who simply prefer not to use chemicals on their scalp.
- Easy On/Off: Relatively quick and simple to attach and remove daily or as needed.
- Maximum Scalp Breathability: The scalp remains completely uncovered and can breathe freely. Allows for easy scalp access for washing or scratching.
- No Adhesive Cleanup: Simplifies the maintenance routine significantly.
- Cost-Effective: Clips are durable and reusable; no ongoing cost for adhesives or removers.
Cons of Using Toupee Clips:
- Requires Sufficient Existing Hair: Clips need enough healthy, strong existing hair around the perimeter (and sometimes on top) to grip onto securely. Not suitable for individuals with extensive baldness or very fine/thinning peripheral hair.
- Less Secure Than Bonding: Generally considered the least secure method. While fine for normal daily activities, it might not be suitable for very vigorous sports, swimming, or extremely windy conditions. There’s a higher potential for shifting.
- Potential for Traction Alopecia: If clips are placed in the same spot repeatedly or pull too tightly on the existing hair, they can potentially cause hair loss over time in those areas (traction alopecia). Rotating clip positions slightly can help mitigate this.
- Can Feel Bulky: The clips themselves add a small amount of bulk under the base, which might be noticeable to the touch, though usually not visually.
- Initial Sewing Required: Clips must be properly sewn onto the base, which requires some initial effort or professional service.
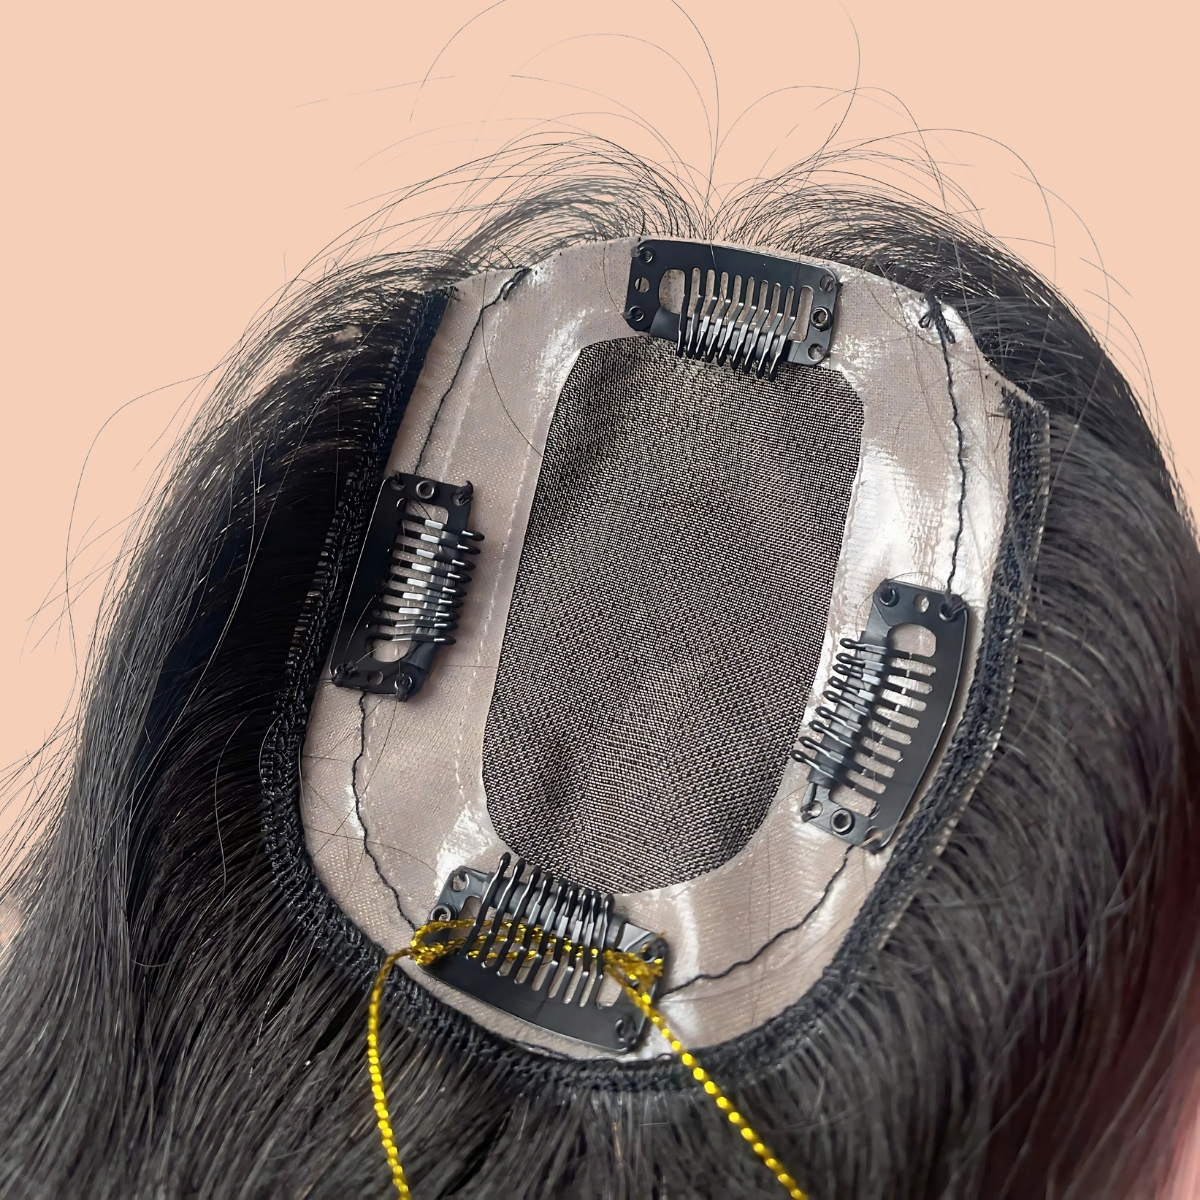
Step-by-Step Clip Application
Assuming clips are already securely sewn onto your toupee base:
- Prepare Your Existing Hair: Ensure your natural hair is clean and dry. Style it roughly as desired.
- Position the Toupee: Place the toupee onto your head in the desired position. Use your marked hairline (if needed) or natural reference points.
- Secure the Front Clips: Start with the clips at the front hairline. Lift the edge of the toupee slightly, slide the clip’s comb teeth under a small section of your existing hair, and press down on the clip edges until it snaps shut securely. Ensure it feels snug but not painfully tight.
- Secure Side and Back Clips: Work your way around the perimeter, securing the side clips (temples) and then the back clips in the same manner – slide the comb teeth into your hair and snap the clip shut. If interior clips are present, secure those last.
- Check Security and Comfort: Gently tug the toupee in different directions to ensure it feels secure. Check that no clips are pulling uncomfortably. Adjust if necessary by reopening a clip, taking a slightly different section of hair, and re-snapping.
- Blend and Style: Once secure, gently comb or brush the toupee hair to blend it with your existing hair for a natural look.
Making Clips Work for You
- Strategic Clip Placement: When sewing clips onto the base, distribute them evenly around the perimeter. More clips generally mean more security. Consider adding one or two in the central area if you have sufficient hair there. Phuc Thien Toupee can assist with optimal clip placement.
- Healthy Existing Hair: This method relies entirely on your natural hair. Keep it healthy and strong. Avoid placing clips on very weak or sparse areas.
- Vary Clip Position: To minimize stress on hair follicles, try to slightly vary the exact spot where each clip attaches each time you put the toupee on.
- Don’t Over-Tighten: Clips should be snug but not cause pain or significant tension on the scalp or hair roots.
- Regular Inspection: Periodically check that the clips are still sewn securely to the base and that the snap mechanism is functioning correctly.
Clips are an excellent non-adhesive toupee application technique for the right candidate, offering convenience and scalp freedom.
Glue vs Tape vs Clips: Making the Right Choice
Choosing the best toupee application method depends heavily on individual needs and preferences. There’s no single ‘best’ method; the ideal choice is the one that best suits your lifestyle, skin sensitivity, desired hold level, maintenance tolerance, and hair system type.
Comparison Table: Toupee Application Methods
| Feature | Liquid Adhesive (Glue) – Full Bond | Toupee Tape – Full Coverage | Toupee Clips | Perimeter Bond (Glue/Tape) |
| Hold Strength | Highest Potential | High | Moderate | High (Perimeter) |
| Typical Duration | 1-5+ Weeks | 1-4+ Weeks | Daily / As needed | 1-5+ Weeks (Perimeter) |
| Natural Hairline | Excellent (esp. thin skin) | Very Good | Good (depends on blending) | Excellent/Very Good |
| Ease of Application | Lower (Requires skill/patience) | Moderate | High | Moderate |
| Ease of Removal | Lower (Requires solvent) | Moderate (Solvent helpful) | High | Moderate (Perimeter) |
| Scalp Breathability | Low (Blocked by adhesive) | Low (Blocked by tape) | Excellent | High (Center is open) |
| Skin Sensitivity Risk | Moderate to High (Patch test!) | Low to Moderate | Low (Traction risk) | Moderate (Perimeter) |
| Mess Factor | High Potential | Low | None | Moderate Potential |
| Best for Active Life | Excellent | Very Good | Good (with caution) | Very Good |
| Best for Swimming | Excellent (after cure) | Good (with waterproof tape) | Not Recommended | Good (after cure) |
| Requires Existing Hair | No | No | Yes (Sufficient amount) | No |
| Cost Implication | Ongoing (Glue, Solvent) | Ongoing (Tape) | Minimal (Initial clips) | Ongoing (Glue/Tape) |
Factors Influencing Your Decision
Consider these questions when choosing your method:
- What is your lifestyle? (Very active, swimmer = Glue/Strong Tape; Sedentary = Clips/Tape/Glue might all work)
- How sensitive is your skin? (Very sensitive = Clips first, then patch test water-based glue/gentle tapes; Less sensitive = More options)
- What level of security do you need? (Maximum security = Full Glue/Max Wear Tape; Moderate security = Extended Wear Tape/Clips; Lower security needed = Daily Tape/Clips)
- How much time/effort are you willing to dedicate to application and maintenance? (Low effort = Clips; Moderate effort = Tape; Higher effort = Glue)
- What type of base does your hair system have? (Lace front = Glue/Specialized Tape; Poly = Glue/Tape; Mono = Tape/Perimeter Bond; Hybrid = Combination approach)
- How much existing hair do you have, and where? (Sufficient peripheral hair = Clips are an option; Little/no hair = Glue/Tape necessary)
- What’s your budget for ongoing supplies? (Clips are cheapest long-term; Tape/Glue have recurring costs)
- What climate do you live in? (Hot/Humid = Stronger Waterproof Glues/Tapes, or Perimeter/Clips for breathability)
It’s also common for users to experiment with different methods or even combine them (e.g., glue at the front hairline for naturalness, tape on the rest of the perimeter for easier cleanup).
Essential Maintenance and Safe Removal
Proper care extends the life of your hair system and keeps your scalp healthy. Safe removal prevents damage to both the unit and your skin.
Routine Care for Longevity
- Washing: Wash the hair system regularly (typically 1-2 times per week, or as needed) using sulfate-free shampoos and conditioners designed for processed human hair or synthetic fibers, depending on your system. Be gentle, avoid scrubbing the base vigorously.
- Conditioning: Use leave-in conditioners or light conditioning sprays to keep the hair soft and manageable, focusing on mid-lengths and ends. Avoid getting heavy conditioners on the base/knots.
- Detangling: Use a wide-tooth comb or a special loop brush. Start detangling from the ends and work your way up to the base gently. Hold the hair near the base to avoid pulling.
- Sleeping: Consider sleeping on a silk or satin pillowcase to reduce friction. Some wearers use a loose sleep cap.
- Storage: When not wearing the system (if using clips or daily wear tape), store it on a mannequin head or in its box to maintain shape.

Safe Removal Techniques
Never rip or pull the toupee off forcefully. This can damage the base and irritate your skin.
- For Glue/Tape Adhesion:
- Apply Solvent: Generously apply a skin-safe adhesive solvent/remover (specific to your adhesive type – citrus-based, oil-based, alcohol-based) along the edges of the toupee, especially at the front. Allow it to sit for the recommended time (usually a few minutes) to seep underneath and break down the bond. You may need to gently lift an edge to allow solvent access.
- Gentle Lifting: Once the adhesive softens, gently start lifting the toupee away from the scalp, working slowly from back to front or side to side. Apply more solvent as needed to release stubborn areas. Do not force it.
- Clean Scalp: After removal, use more solvent on a cloth or cotton pad to remove any remaining adhesive residue from your scalp. Then, cleanse the scalp thoroughly with a gentle cleanser.
- Clean Toupee Base: Apply solvent to the underside of the base to dissolve remaining adhesive/tape residue. Gently scrape (with a designated tool or old credit card on poly bases) or wipe away the residue. For lace, be extra gentle, soaking may be required. Wash the base thoroughly with soap/shampoo afterward. Let the unit dry completely before storing or reapplying.
- For Clips:
- Locate Clips: Feel for the clips around the perimeter.
- Unsnap: Place a finger on either side of the clip and press the outer edges while slightly lifting – it should unsnap easily.
- Release All Clips: Unsnap all clips around the perimeter and any interior ones.
- Lift Off: Once all clips are open, the toupee should lift off easily.
Get a secure fit: Choose the best Toupee Adhesives and Removers and follow Secure Hairpiece Tips for confidence
Conclusion: Embrace Confidence with the Right Technique
Mastering toupee application methods—whether using glue, tape, or clips—is essential for achieving a secure, comfortable, and natural-looking non-surgical hair replacement. Each method has its own advantages depending on your lifestyle and preferences.
Success depends on proper scalp preparation, the right products, and consistent practice. At Phuc Thien Toupee, you’ll find expert support and resources to help you choose and perfect the ideal application technique, boosting your confidence and quality of life. Reach out today for personalized advice and explore more about toupee care and styling.
Phuc Thien Toupee Co., Ltd
Design Brand: Royal Hair Vietnam
Office Address:
🏢 Room A909, Decapella Building, 116 Luong Dinh Cua Street, An Khanh Ward, Thu Duc City, Ho Chi Minh City 700000, Vietnam
Factory Address:
🏭 No. 26/9, Street 57, Thuong Hamlet, Tan Thong Hoi Ward, Cu Chi District, Ho Chi Minh City 700000, Vietnam
Email: ✉️ phucthientoupeevn@gmail.com
Phone / WhatsApp: 📞 +84 933 901 196
Websites: 🌐 phucthientoupee.com – 🌐 royalhair.shop