

- 28/05/2025
- Posted by: phucthien
- Category: Blog

Toppers for short hair are an excellent solution for those with thinning hair or seeking more volume and styling options for shorter cuts. They blend naturally with your own hair, enhancing both coverage and confidence. Proper application is key to achieving a secure, comfortable, and natural look, especially given the unique challenges of short hairstyles.
Phuc Thien Toupee offers a detailed guide on applying human hair toppers for short hair, covering three main methods: clip-ins, wig tape, and liquid adhesives. These techniques help ensure undetectable results for styles like bobs and pixie cuts, letting you find the best fit for your needs and lifestyle.
Understanding Toppers for Short Hair: More Than Just Coverage
Before diving into application methods, lets clarify what hair toppers are and why they are particularly beneficial for those with short hair. Gaining this foundational knowledge helps in selecting the right piece and applying it effectively.
Why Choose Human Hair Toppers for Short Styles?
Choosing human hair toppers offers significant advantages, especially when working with short hair where blending is paramount:
- Natural Appearance: Human hair moves, reflects light, and feels like your own hair. This is critical for short styles where the topper hair will be in close proximity and needs to mimic the texture and flow of your biological hair precisely.
- Styling Versatility: Human hair toppers can be heat-styled (curled, straightened, waved) just like your own hair. This allows you to perfectly match the style of your topper to your short haircut day-to-day. You can create texture, add waves to a bob, or smooth it for a sleek look. Synthetic toppers often lack this versatility or require special heat-friendly fibers.
- Color Customization: While it’s best to choose a topper color that closely matches your own, human hair offers the flexibility of being professionally dyed or toned for a perfect match or to add subtle highlights or lowlights, further enhancing the blend with your short hair.
- Longevity: With proper care, high-quality human hair toppers, like those offered by Phuc Thien, can last significantly longer than synthetic alternatives, making them a worthwhile investment.

Short hair, big volume: Explore ideal Topper Lengths and Styles for your look
Addressing Common Concerns for Short Hair Wearers
Applying toppers to short hair can present unique considerations:
- Blending Short Layers: Ensuring the shorter layers of your natural hair blend seamlessly with the topper hair requires careful placement and potentially some styling techniques like texturizing or adding slight waves.
- Visibility of the Base: With less hair to conceal the edges, choosing the right base type (like lace front or monofilament) and proper application are key to making the topper base invisible.
- Security: Shorter hair offers less natural hair length to anchor clips. Therefore, ensuring the clips are secure, or considering alternative methods like tape or adhesive, might be necessary depending on hair fineness and activity level. Phuc Thien Toupee recommends pressure-sensitive clips known for their secure grip.
- Matching Density: The topper’s hair density should mimic your natural hair density to avoid an unnatural bulky look on top, which can be more obvious with short styles.
🎨 Your style, your hair — we make it exactly how you want.
Identifying Your Needs: Base Size, Density, and Hair Type
Selecting the appropriate topper is the first step towards a successful application. Consider:
- Area of Concern: Measure the area of thinning or desired volume (front-to-back and side-to-side). Choose a base size that is slightly larger (about 1 inch) than this area to allow for secure clipping onto healthy hair. Common base sizes range from small (2×4 inches) to large (8×8 inches or more).
- Hair Density: Match the topper’s density to your natural hair. For fine, short hair, a lower density (e.g., 100%-120%) often looks most natural. Higher densities might be suitable if your natural hair is thicker or you desire significant volume.
- Hair Type and Texture: Select a human hair topper (like Remy human hair, known for its cuticle alignment and quality) that matches your hair’s texture (straight, wavy, curly) for the easiest blending. Phuc Thien offers various textures to suit diverse needs.
- Base Construction: Different bases offer different benefits.
- Monofilament: Offers a natural scalp appearance and allows multi-directional parting. Good for sensitive scalps.
- Lace (French or Swiss): Provides a very natural hairline but can be more delicate. Lace front toppers are excellent for blending the front edge.
- Silk Top: Mimics the appearance of hair growing directly from the scalp with hidden knots, offering the most realistic scalp look, often slightly thicker.
- Integration Base (Open Weft): Allows you to pull your own hair through openings for maximum integration, best for those with sufficient hair to blend.
Understanding these factors helps you select the best toppers for short fine hair and ensures the application methods below are effective.
Preparing Your Hair and Scalp for Topper Application
Proper preparation is essential for a secure, comfortable, and natural-looking topper application, regardless of the method you choose. This ensures the topper sits correctly and blends seamlessly with your short hair.
Cleanliness is Key: Washing and Drying Your Natural Hair
Start with clean, dry hair. Product buildup, oils, or dirt on your natural hair or scalp can interfere with the grip of clips, tape, or adhesive and can lead to scalp irritation.
- Wash: Use a gentle, sulfate-free shampoo and conditioner suitable for your hair type. Focus on cleansing the scalp area where the topper will sit.
- Dry Thoroughly: Ensure your hair and scalp are completely dry before application. Damp hair can prevent secure attachment and potentially lead to discomfort or microbial growth under the topper base, especially with tape or adhesive methods. Blow-drying can help add some initial volume to your short hair, aiding in blending.
Scalp Preparation: Ensuring a Healthy Foundation
A healthy scalp provides the best base for any hair addition.
- Exfoliate Gently (Occasionally): If you experience scalp buildup, occasional gentle exfoliation can help, but avoid harsh scrubbing right before application, especially if using tape or glue, as this can cause irritation.
- Check for Irritation: Ensure your scalp is free from any cuts, sores, or irritation before applying tape or adhesive. Applying these products to broken skin can cause pain and infection.
- Scalp Protector (for Tape/Glue): If using wig tape or liquid adhesive, applying a scalp protector product creates a barrier between your skin and the adhesive. This enhances adhesion, protects sensitive skin, and makes removal easier. Allow it to dry completely before applying the adhesive or tape.
Sectioning Short Hair for Optimal Blending
While short hair doesn’t require complex sectioning like long hair might, creating a clean parting and ensuring the topper is placed correctly relative to your hairline and desired style is important.
- Identify Placement Area: Determine exactly where the topper will sit based on your area of thinning or where you want to add volume. Usually, this is centered on the top of your head, aligning the front edge about 1-2 inches back from your natural hairline for the most natural look (unless using a lace front designed to create a new hairline).
- Create a Parting (Optional but helpful): If your style involves a specific part, create that part in your natural hair first. This helps guide the topper placement.
- Smooth the Hair: Gently brush or comb your short hair around the placement area so it lies flat, allowing the topper base to sit flush against the scalp or hair.
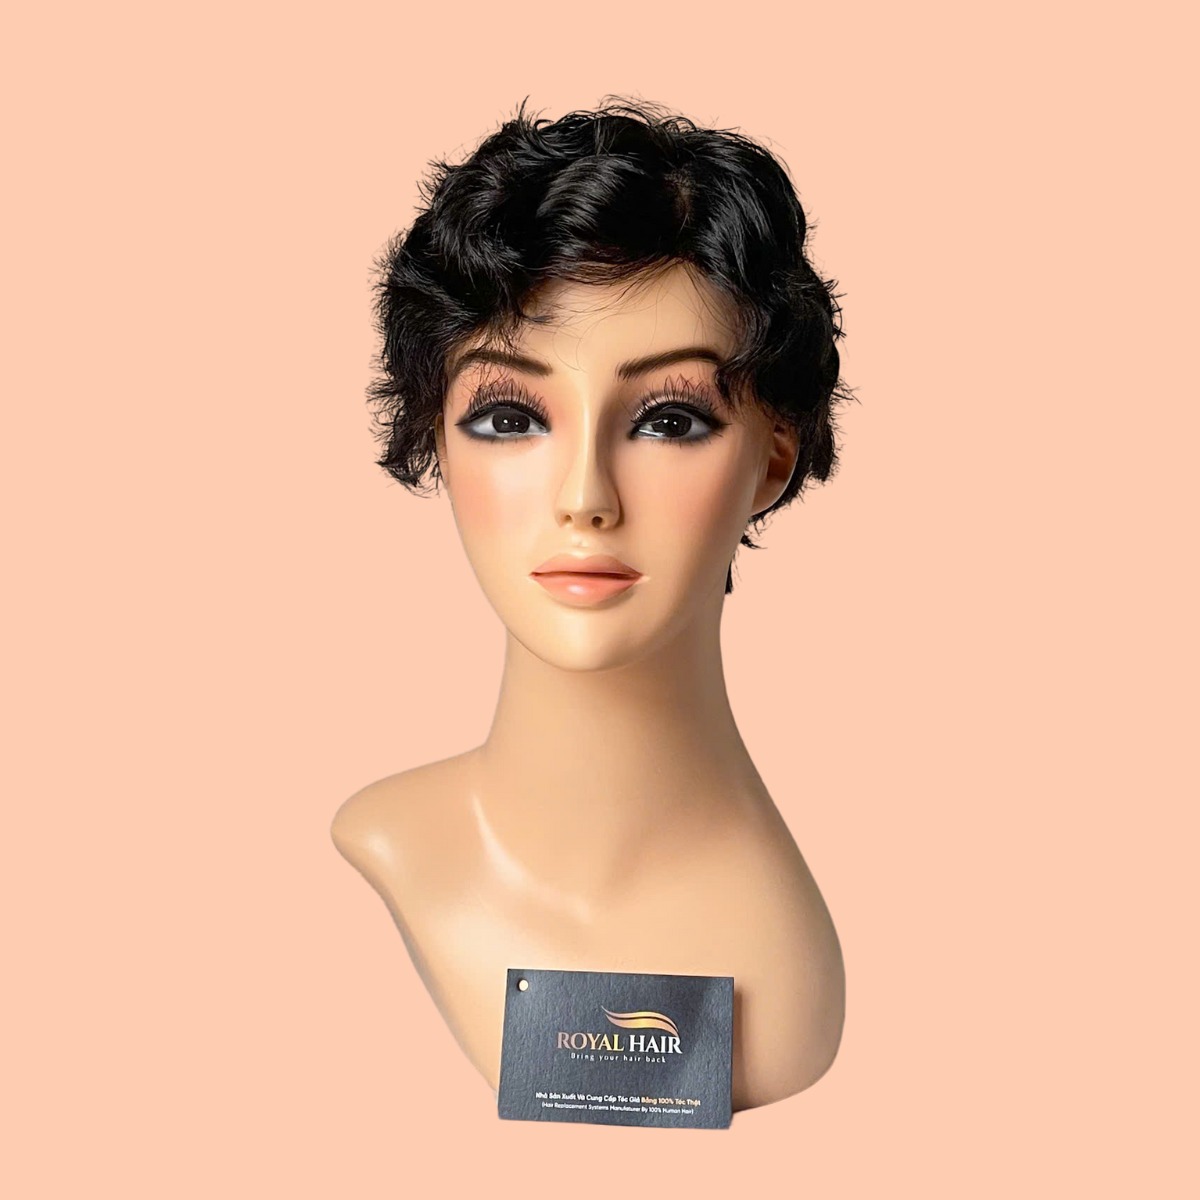
Preparing the Topper Itself
Before placing the topper on your head, prepare the piece itself:
- Inspect Clips: Ensure all pressure-sensitive clips are functioning correctly. Open and close each one to check the spring mechanism. Make sure they are sewn securely to the base.
- Brush Gently: Using a wide-tooth comb or a brush designed for hairpieces, gently detangle the topper hair, starting from the ends and working your way up to the base. This prevents shedding and keeps the hair smooth.
- Style Direction: Ensure the hair on the topper is brushed in the direction you intend to style it.
Taking these preparatory steps, recommended by Phuc Thien Toupee professionals, sets the stage for a successful application using any of the following methods.
🔍 Looking for a specific size, base, or hair color? Order a fully personalized toupee now!
Method 1: The Classic Clip-In Application
The clip-in method is the most common, user-friendly, and non-invasive way to apply a hair topper, especially for daily wear or for those new to hair additions. It relies on small pressure-sensitive clips sewn around the perimeter of the topper base.
Suitability: Who Benefits Most from Clip-Ins?
This method is ideal for:
- Individuals seeking a temporary, easily removable solution.
- Those with sufficient existing hair around the perimeter of the placement area for the clips to grip securely.
- People who prefer not to use tapes or adhesives on their scalp.
- Beginners who want a straightforward application process.
- Wearers with short, fine hair where strategic clip placement can provide adequate hold for normal daily activities.
Step-by-Step Guide: Applying a Clip-In Topper to Short Hair
Follow these steps carefully for a secure and natural blend:
- Open All Clips: Before placement, ensure all the pressure-sensitive clips on the underside of the topper are snapped open. You’ll hear or feel a slight click.
- Position the Topper: Hold the topper by the front edge. Align the front of the topper base approximately 1-2 inches behind your natural hairline. If your topper has a lace front intended to mimic a hairline, position it right at your hairline or slightly in front, depending on the desired effect. Center the topper on your head, ensuring it covers the target area evenly.
- Secure the Front Clip(s): Once positioned, locate the front clip(s). Slide the comb part of the clip into your natural hair, angling it slightly. Press down firmly on both sides of the clip base until you hear or feel it snap shut. This anchors the front of the topper. Ensure it feels secure but not painfully tight.
- Secure the Side Clips: Working one side at a time, gently pull the topper base taut against your scalp. Locate a side clip. Slide the comb into your hair near the edge of the base and press down firmly to snap it shut. Repeat on the other side. For short hair, ensure these clips grab onto a sufficient amount of hair close to the scalp.
- Secure the Back Clip(s): Smooth the back of the topper base against your head. Locate the back clip(s). Slide the comb(s) into your hair and press down firmly to snap them closed. Ensure the base lies flat against your head without buckling.
- Check Security: Gently tug on the topper in different directions to ensure all clips are securely fastened and the topper feels stable. It should feel snug but comfortable. If any clip feels loose, reopen it, grab a slightly different section of hair, and re-snap it closed.
- Blending and Styling: This is the crucial final step for short hair.
- Use your fingers or a wide-tooth comb to gently blend the topper hair with your natural hair at the front hairline and around the sides and back.
- You may need to pull out a few wisps of your own short hair around the front and sides to soften the transition.
- Style the integrated hair as desired. Use heat tools (on human hair toppers only) on a low to medium setting if needed to match the texture or wave pattern of your natural hair. Apply a light-hold hairspray if necessary.
Tips for Seamless Integration with Short Haircuts
Achieving an undetectable blend with short hair requires extra attention:
- Tease Roots Slightly: For very fine or short hair where clips might struggle for grip or show through, you can gently tease the small sections of your natural hair where the clips will attach. This creates a more substantial base for the clip comb to grab onto. Use a fine-tooth comb and be gentle to avoid hair breakage.
- Strategic Placement: Experiment with slightly adjusting the topper’s position (a bit further back or forward) to find the spot where it integrates most naturally with your specific short haircut layers.
- Professional Cut-In: Consider having a hairstylist experienced with hairpieces trim the topper hair while it’s on your head to perfectly blend the layers into your short style. This is often the key to the most natural look. Phuc Thien often recommends this service.
- Add Texture: Sometimes adding a slight wave or texture to both your hair and the topper using a curling iron or texturizing spray can help meld the two together more effectively than a super straight style.

Pros and Cons of the Clip-In Method for Short Hair
Pros:
- Ease of Use: Quickest and simplest method to learn.
- Non-Damaging: No chemicals or adhesives involved, minimizing risk to natural hair and scalp when used correctly.
- Flexibility: Easy to put on and take off daily, allowing your scalp to breathe overnight.
- Low Maintenance: Requires minimal extra products beyond standard hair care.
Cons:
- Potential for Slippage (Fine/Short Hair): Clips may feel less secure on very fine, thin, or short hair compared to longer, thicker hair, especially during vigorous activity.
- Possible Discomfort: Some users find the clips can cause slight tension or discomfort with prolonged wear, though modern clips are designed for comfort.
- Visibility Risk: If not placed carefully or if natural hair is extremely thin, clip bases could potentially be visible through short layers.
- Requires Sufficient Perimeter Hair: Needs enough healthy hair around the application area for clips to attach securely.
The clip-in method remains a highly popular and effective choice for many short hair topper wearers, providing a balance of convenience and natural results.
✨ A toupee shouldn’t just hide hair loss — make it a style statement!
Method 2: Utilizing Wig Tape for Enhanced Security
For short hair topper wearers seeking extra hold beyond what clips alone might offer, wig tape provides a reliable and secure alternative or supplement. This double-sided adhesive tape is specifically designed for attaching hairpieces to the scalp or existing hair.
When to Consider Wig Tape with Short Hair Toppers
Using wig tape might be the preferred method if you:
- Have very fine, thin, or short hair that doesn’t provide a strong anchor for clips.
- Lead a very active lifestyle (sports, frequent movement) and need maximum security.
- Are concerned about the topper shifting during the day.
- Have a topper base specifically designed with polyurethane (PU) tabs or perimeter for tape adhesion.
- Prefer a flatter profile than clips might allow in certain areas.
- Experience complete hair loss in the placement area, providing a smooth surface for tape.
Choosing the Right Wig Tape
Various types of wig tape are available, differing in hold strength, finish (shine/matte), and liner color (red, blue, brown, white). Consider:
- Hold Time: Tapes range from daily wear (removed each night) to extended wear (lasting several days to weeks, though less common for toppers vs. full wigs). Choose based on your needs. Daily wear tapes are generally gentler on the skin.
- Base Material Compatibility: Some tapes adhere better to specific base materials (like PU) than others (like lace). Check manufacturer recommendations.
- Skin Sensitivity: Look for hypoallergenic medical-grade tapes if you have sensitive skin. Always perform a patch test before full application. Phuc Thien Toupee advises prioritizing skin health.
- Contour/Shape: Tapes come in rolls or pre-cut contours (straight, curved) to match the shape of the topper base edge.
Common reputable tape types include Red Liner (Sensi-Tak), Blue Liner (Lace Front Support), Super Tape, or No-Shine Bonding Tape.
Step-by-Step Guide: Applying a Topper with Wig Tape
This method requires careful preparation and placement:
- Prepare the Topper Base: Ensure the areas on the topper base where you will apply tape (typically the perimeter or designated PU sections) are clean and free from oils or residues. Wipe with an alcohol prep pad and allow to dry completely.
- Apply Tape to the Topper: Cut the wig tape into appropriate lengths for the perimeter or tabs of the topper. Peel off one side of the tape’s backing liner. Carefully apply the sticky side of the tape to the designated areas on the underside of the topper base. Press firmly to ensure good adhesion. Do not remove the outer liner yet.
- Prepare Your Scalp/Hairline: Clean the corresponding area on your scalp where the tape will adhere. If applying directly to skin (in areas of complete hair loss), use an alcohol prep pad and let it dry. Apply a scalp protector liquid or spray to this area and allow it to dry completely (usually turns matte). This step is crucial for protecting your skin and improving hold. If applying over very short, fine hair, ensure the hair is clean and lying flat.
- Position the Topper: Carefully position the topper on your head, aligning it as desired (similar to the clip-in method, usually 1-2 inches behind the hairline unless using a lace front). Ensure it’s centered and covering the target area.
- Remove Outer Liner and Press Firmly: Once you are satisfied with the placement, carefully lift one section of the topper slightly. Peel off the outer backing liner from the tape strips in that section, exposing the adhesive. Gently lower the topper back into place, pressing down firmly on the taped areas for several seconds (e.g., 10-30 seconds per section) to activate the bond. Work your way around the perimeter, removing liners and pressing each section securely. Avoid trapping loose hairs under the tape.
- Secure Any Additional Clips (Optional): If your topper has both tape tabs and clips, secure the clips after the tape is adhered for extra stability, following the steps in Method 1.
- Blending and Styling: Gently blend the topper hair with your natural short hair using your fingers or a comb. Style as desired, being mindful not to pull excessively on the taped areas initially while the bond fully sets (some tapes require a short curing time).
Removal and Maintenance Considerations for Tape Users
- Removal: Use a designated adhesive remover (solvent) suitable for scalp use and the type of tape you used. Apply the remover along the taped edge, allowing it a few moments to dissolve the bond. Gently lift the topper away from your scalp. Never pull or force the topper off, as this can damage your skin or pull out natural hair.
- Clean-Up: After removal, use the solvent and a cloth or cotton pad to clean any remaining adhesive residue from your scalp and the topper base. Follow up by washing your scalp and the topper according to care instructions.
- Frequency: Daily wear tapes should be removed and reapplied daily. Extended wear tapes require careful monitoring for any signs of irritation and scheduled removal/reapplication as recommended by the tape manufacturer (typically 1-4 weeks, though less common/recommended for toppers compared to full systems).

Pros and Cons of Using Wig Tape on Short Hair
Pros:
- Enhanced Security: Offers a significantly stronger hold than clips alone, ideal for active individuals or those with very fine/short hair.
- Flatter Profile: Tape lies flatter against the scalp than clips, potentially offering a more seamless look under very short hair.
- Good for Hair Loss Areas: Works well on smooth scalp areas where clips have nothing to grip.
- Versatile: Can be used alone or in combination with clips.
Cons:
- Requires More Prep Time: Application and removal take longer than the simple clip-in method.
- Potential for Skin Irritation: Adhesives can cause reactions in sensitive individuals; patch testing is essential. Requires careful use of scalp protectors and removers.
- Residue Clean-Up: Can leave sticky residue on the scalp and topper base that requires thorough cleaning.
- Cost: Ongoing cost of purchasing tape, scalp protectors, and adhesive removers.
- Learning Curve: Requires some practice to apply smoothly and securely without errors.
Wig tape is an excellent method for achieving enhanced security, particularly beneficial for the unique challenges posed by short or very fine hair when wearing a topper.
🌸 Lightweight, breathable, and stylish — discover the perfect topper just for you.
Method 3: Liquid Adhesives for Longer Wear
Liquid adhesives, often referred to as bonding adhesives or wig glue, offer the longest and most secure hold for hairpieces. This method creates a semi-permanent bond between the topper base and the scalp. However, it requires the most skill, carries the highest potential risks if not done correctly, and is generally recommended for experienced users or specific circumstances.
Understanding Liquid Adhesives: For Specific Needs
Liquid adhesives are typically reserved for:
- Individuals seeking extended wear times (e.g., 1-4 weeks between removals), although this is less common and often less recommended for partial pieces like toppers compared to full cap wigs or hair systems due to scalp health considerations under the piece.
- Those with significant or total hair loss in the application area, providing a smooth, hair-free surface for bonding. Applying strong adhesives over existing hair is generally not recommended due to difficulty and potential for hair damage during removal.
- Wearers who require maximum, waterproof security for activities like swimming (though waterproof claims vary by product and application).
- Users who have experience with hair systems or have received professional guidance. Phuc Thien Toupee strongly advises consulting a professional before attempting this method for the first time.
Safety First: Patch Testing and Scalp Protection
This method demands rigorous attention to safety:
- Patch Test: ALWAYS perform a patch test 24-48 hours before applying any new liquid adhesive. Apply a small amount of the adhesive and the corresponding remover to an inconspicuous area of skin (like behind the ear or inner elbow). Monitor for any signs of redness, itching, burning, or irritation. Do not use the product if any reaction occurs.
- Scalp Protection: Thorough scalp preparation is non-negotiable. Cleanse the scalp area meticulously with an appropriate cleanser (like 99% isopropyl alcohol) to remove all oils and residues. Apply multiple layers of a quality scalp protector, allowing each layer to dry completely. This creates a crucial barrier between the potent adhesive and your skin.
- Ventilation: Apply liquid adhesives in a well-ventilated area, as some products have strong fumes.
Step-by-Step Guide: Applying a Topper with Liquid Adhesive
Precision is key when using liquid adhesives:
- Prepare Scalp Meticulously: Ensure the application area on the scalp is completely clean, free of hair (if bonding directly to skin), and protected with fully dried layers of scalp protector. Define the exact placement area clearly.
- Apply Adhesive to Scalp OR Topper Base: Depending on the specific adhesive product instructions (read them carefully!), apply a thin, even layer of the liquid adhesive. Some adhesives are applied directly to the prepared scalp area, while others are applied to the topper base (especially PU perimeters). Do not apply adhesive to lace material directly unless specified by the adhesive type (some are designed for this, but require specific techniques). Often, applying to the scalp is preferred for control. Use a dedicated applicator brush or sponge for an even coat. Avoid thick or uneven application.
- Allow Adhesive to Become Tacky: This is a critical step. Most liquid adhesives require a specific amount of time to cure or become tacky before placing the hairpiece. This time varies by product (check instructions – could be anywhere from 30 seconds to several minutes). The adhesive often changes appearance, perhaps becoming clearer or less shiny when ready. Applying the topper too soon results in a weak bond; waiting too long can also compromise adhesion.
- Position and Apply Firm Pressure: Once the adhesive is properly tacky, carefully position the topper onto the prepared area, starting from the front and rolling it back, or vice-versa, ensuring correct alignment. Once in place, apply firm, even pressure using your fingertips or a comb over the entire bonded area for a sustained period (e.g., 30-60 seconds per section) to ensure a strong bond forms. Be precise – repositioning after contact can be difficult and messy.
- Allow Curing Time: Many adhesives require a period after application to fully cure and reach maximum bond strength. During this time (often 12-24 hours), avoid getting the area wet, excessive sweating, or styling that puts tension on the bond. Follow the specific adhesive’s curing instructions.
- Careful Blending and Styling: Once the bond is fully cured, you can proceed with gently blending the topper hair with your natural short hair and styling as usual. Be gentle around the bonded edges initially.
Removal Process: Using Solvents Safely
Safe removal is as important as application:
- Use Correct Solvent: Always use the adhesive remover specifically designed for the type of liquid adhesive you used. Different adhesives (e.g., water-based vs. solvent-based) require different removers.
- Apply Solvent Generously: Apply the remover liberally along the bonded edge where the topper meets the scalp. Allow sufficient time for the solvent to penetrate and break down the adhesive bond (this can take several minutes – be patient).
- Gently Lift: As the bond releases, gently lift the edge of the topper. Continue applying solvent underneath as needed. Never force or pull the topper off. Work slowly and carefully around the entire perimeter until the topper lifts away easily.
- Thorough Clean-Up: Use the remover and a cloth to clean all adhesive residue from your scalp and the topper base. This step is crucial to prevent buildup and irritation. Follow with a thorough scalp cleansing and topper washing.

Pros and Cons of Liquid Adhesives for Short Hair Applications
Pros:
- Maximum Security and Hold: Offers the longest-lasting and most secure bond available.
- Waterproof Potential: Many formulations allow for swimming and showering (after full cure).
- Undetectable Edges: When applied correctly to a suitable base (like thin skin/PU), can create very flat, undetectable edges.
- Suitable for Complete Hair Loss Areas: Provides a solution when there is no hair for clips or tape to adhere to.
Cons:
- Highest Risk of Skin Irritation/Allergy: Adhesives are strong chemicals; reactions are more likely than with tape or clips. Patch testing is mandatory.
- Potential Scalp/Hair Damage: Incorrect application or removal can damage the scalp or follicle, or cause hair breakage if applied over natural hair.
- Difficult Application/Removal: Requires significant skill, precision, and patience. Messy application or removal is common for beginners.
- Time-Consuming: Both application and removal processes are lengthy.
- Scalp Needs Recovery Time: Continuous extended wear without breaks can compromise scalp health. Regular removal, thorough cleaning, and allowing the scalp to breathe are vital. Phuc Thien advocates for prioritizing scalp health.
- Cost: Requires ongoing purchase of specialized adhesives, scalp protectors, and removers. Professional application/removal adds further cost.
Liquid adhesive bonding is a powerful tool for hairpiece security but should be approached with caution, thorough research, and ideally professional guidance, especially when starting out. It is generally overkill for typical daily topper use with short hair unless specific circumstances necessitate maximum, extended hold.
👨🦱 Ready to wear and natural-looking — explore our men’s stock hairpieces today!
Choosing the Best Topper for Your Short Hair Needs
Selecting the right product is as important as the application method. Answering the search intents best toppers for short fine hair and where to buy short hair toppers requires understanding key features.
Base Construction Matters: Mono, Silk, Lace for Short Hair
The base impacts comfort, appearance, and blending:
- Monofilament (Mono):
- Pros: Natural scalp appearance, multi-directional parting, durable, good for sensitive scalps.
- Cons: Can be slightly less breathable than lace.
- Best For: Overall natural scalp look, durability.
- Lace (French/Swiss):
- Pros: Most natural-looking hairline (especially lace front), very breathable.
- Cons: More delicate, requires careful handling, knots may be visible up close (unless bleached).
- Best For: Hairline blending, breathability.
- Silk Top:
- Pros: Most realistic scalp appearance (knots are hidden between layers), durable.
- Cons: Can be slightly thicker/less breathable than lace or mono, often more expensive.
- Best For: Ultimate scalp realism where parting is visible.
- Integration/Open Weft:
- Pros: Maximum integration with own hair, very breathable.
- Cons: Requires sufficient biological hair to pull through, less coverage than other types.
- Best For: Adding volume rather than concealing significant loss, active wearers needing airflow.
For short hair, a Monofilament base often provides a good balance of natural appearance and durability, while a Lace Front feature is invaluable if hairline blending is a priority. Phuc Thien Toupee offers options in various base constructions.
Determining the Right Size and Shape
Measure your area of concern accurately. Choose a base size that extends about 0.5 to 1 inch beyond this area on all sides to allow secure attachment to healthy hair. Shapes vary (oval, oblong, round, rectangular) – choose one that best covers your pattern of thinning or desired volume area. Custom options are also available.
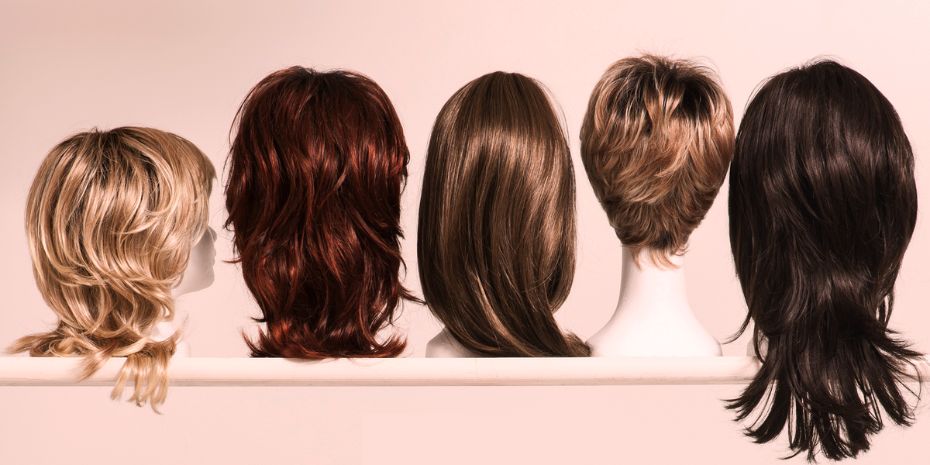
Selecting Hair Density and Length Appropriate for Short Styles
- Density: This is crucial for short hair. Opt for a density that matches your existing hair. For fine, short hair, 100% to 130% density is typically recommended. Too high a density will look unnatural and bulky.
- Length: Choose a topper length slightly longer than your current short style to allow for trimming and blending. Common short topper lengths might be 6-10 inches, intended to be cut into styles like pixies, bobs, or lobs. Buying excessively long hair usually isn’t necessary or cost-effective for short styles.
Where to Buy Quality Short Hair Toppers
Finding reputable sellers is key:
- Specialized Retailers: Look for companies specializing in wigs and hair toppers, like Phuc Thien Toupee. They offer expertise, quality control, and customer support.
- Online Stores: Many reputable brands sell online. Look for detailed product descriptions, clear photos/videos, customer reviews, and good return policies.
- Salons: Some salons specialize in hair replacement solutions and offer fitting, customization, and application services.
- Criteria for Quality:
- Hair Type: Look for 100% Human Hair, preferably Remy Human Hair.
- Base Construction: High-quality materials (durable mono, fine lace, realistic silk).
- Customer Reviews: Check independent reviews and testimonials (short hair topper reviews).
- Support & Consultation: Reputable sellers offer guidance on selection and use. Phuc Thien provides consultations.
- ✂️ Be unique — create your custom-made toupee today!
Reading Short Hair Topper Reviews
When researching short hair topper reviews, look for:
- Reviews specifically mentioning short hair or fine hair.
- Comments on blendability with short styles (pixie, bob).
- Feedback on base comfort and visibility with less hair coverage.
- Notes on the security of clips or other attachment methods on short hair.
- Before/after photos if available.
- Longevity and durability feedback.
Considering these factors ensures you invest in a high-quality topper well-suited for your short hairstyle and application needs.
Maintenance and Care for Your Human Hair Topper
Proper care extends the lifespan of your human hair topper and keeps it looking its best, preserving your investment.
Washing and Conditioning Your Topper
- Frequency: Wash your topper only when necessary (typically every 7-14 wears, depending on product use and environment) to avoid unnecessary wear.
- Products: Use sulfate-free, gentle shampoos and conditioners specifically designed for color-treated hair or human hair extensions/wigs.
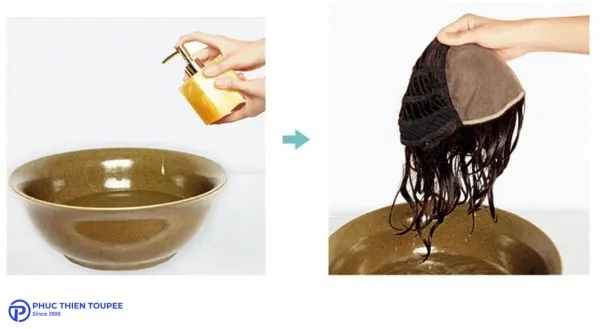
- Process:
- Gently brush out tangles before washing.
- Hold the topper by the base and wet it under cool running water, pointing the water flow from base to ends.
- Apply a small amount of shampoo, gently stroking downwards. Do not rub or scrub vigorously.
- Rinse thoroughly under cool running water until all shampoo is gone.
- Apply conditioner, avoiding the base/knots (conditioner can loosen knots). Focus on mid-lengths and ends. Leave on for a few minutes (as per product instructions).
- Rinse thoroughly again under cool, running water.
Fuller hair made easy: Find the best Topper for Thinning Hair and Toppers for Fine Hair to boost confidence
Drying and Storing Your Topper Correctly
- Drying:
- Gently squeeze out excess water (do not wring).
- Lay the topper flat on a clean towel and blot gently to remove more water.
- Place the topper on a wig stand or mannequin head to air dry completely. This helps maintain its shape. Keep it away from direct sunlight or heat sources.
- Heat styling should only be done when the topper is completely dry, using low-medium heat and a heat protectant.
- Storing: When not in use, store your topper on a wig stand or mannequin head, away from direct sunlight and dust. This prevents tangling and helps maintain its style and shape. A silk or satin bag can also be used for travel or long-term storage after ensuring the hair is detangled and smooth.
Extending the Lifespan of Your Investment
- Minimize Washing: Over-washing strips moisture and causes wear.
- Use Proper Tools: Use wide-tooth combs or brushes designed for wigs/extensions.
- Be Gentle: Avoid excessive pulling, tugging, or harsh brushing, especially near the base.
- Protect from Elements: Limit exposure to harsh sun, chlorine, and saltwater, as these can dry out and damage human hair. Wear a hat or use UV protectant sprays if needed.
- Deep Condition Occasionally: Use a deep conditioning treatment specifically for human hair pieces every few weeks if the hair feels dry.
Following these care instructions, recommended by Phuc Thien Toupee, will help keep your human hair topper looking beautiful and natural for as long as possible.
Phuc Thien Toupee Co., Ltd
Design Brand: Royal Hair Vietnam
Office Address:
🏢 Room A909, Decapella Building, 116 Luong Dinh Cua Street, An Khanh Ward, Thu Duc City, Ho Chi Minh City 700000, Vietnam
Factory Address:
🏭 No. 26/9, Street 57, Thuong Hamlet, Tan Thong Hoi Ward, Cu Chi District, Ho Chi Minh City 700000, Vietnam
Email: ✉️ phucthientoupeevn@gmail.com
Phone / WhatsApp: 📞 +84 933 901 196
Websites: 🌐 phucthientoupee.com – 🌐 royalhair.shop