

- 23/05/2025
- Posted by: phucthien
- Category: Blog

Natural Look Toupee Application techniques are essential for achieving seamless integration and boosting confidence; discovering the right methods transforms your appearance. Phuc Thien understands that finding realistic hair system placement solutions is paramount, offering guidance for both beginners and experienced users seeking undetectable results.
This guide provides detailed, step-by-step instructions and insights, ensuring your hairpiece fitting enhances your features naturally. We will explore crucial aspects like hairline precision and secure adhesion for a flawless finish. Consider exploring advanced hair unit attachment methods and scalp preparation details.
Understanding the Foundation: Why Natural Look Matters
Hair loss can significantly impact self-perception and confidence for many individuals across diverse backgrounds. Non-surgical hair replacement, specifically through the use of high-quality toupees or hair systems, offers a powerful solution to restore not just hair, but also a sense of self. However, the ultimate goal extends beyond simply covering thinning areas; it is about achieving an appearance so natural that the hair system becomes completely undetectable.
The psychological benefits of a successful, natural-looking hair system application are well-documented. A study published in the Journal of Cosmetic Dermatology indicated a strong correlation between effective hair restoration techniques and improved quality of life and psychological well-being. When a hairpiece blends seamlessly, it alleviates anxieties about discovery and allows the wearer to engage socially and professionally without reservation.
This undetectable integration is the gold standard Phuc Thien Toupee strives for with every client and through guides like this one. Setting realistic expectations is also vital; while modern systems are incredibly advanced, achieving perfection requires careful technique and quality products.

Achieve perfection: Master Toupee Blending with the right Toupee Styling Products
Tip 1: Master the Hairline – The Gateway to Realism
The front hairline is the most scrutinized area of any hair system. It is the first thing people notice, and even a slight misstep here can instantly signal that you are wearing a hairpiece. Achieving a natural-looking hairline requires precision, an understanding of natural hair patterns, and careful placement. It truly is the gateway to an undetectable result.
Precise Template Creation or Measurement
Accuracy begins with knowing exactly where the system should sit. Freehanding placement, especially for beginners, often leads to asymmetry or an unnaturally low or high hairline.
- Mapping Your Natural Hairline: If you remember where your natural hairline was before significant recession, aim for that general area. A common guideline is placing the front edge about four fingers’ width above your eyebrows. However, this varies per individual facial structure. Look at old photos if possible. Avoid placing it too low, which is a frequent mistake and looks artificial. A slight, natural recession often looks more realistic than a perfectly straight, low line, especially as one ages. Phuc Thien Toupee emphasizes matching age-appropriate recession patterns.
- Using a Template: For custom systems, a template of your balding area is often created during consultation. If applying a stock unit, you can create a guide. Use a flexible measuring tape and an erasable marking pencil (like an eyebrow pencil). Mark the desired center point and the points where the hairline should curve gently towards the temples. Ensure symmetry by measuring from the center of your nose or other facial landmarks.
- Step-by-Step Marking:
- Identify the desired center front point (e.g., four fingers above the brow bone). Mark lightly.
- Determine the desired recession points at the temples. These should align naturally with the sides of your forehead. Mark lightly.
- Connect these points with a gentle, slightly curved line, mimicking a natural hairline shape. Avoid ruler-straight lines.
- Double-check for symmetry using your mirror system.
Front Edge Placement Techniques
With your guideline marked, the actual placement is the next critical phase.
- Aligning with Features: Ensure the marked line complements your facial structure. The curve should flow naturally. Stand back and view from different angles.
- Avoiding the ‘Too Low’ or ‘Too Straight’ Look: This is a common pitfall making hair systems look like ‘rugs’. A natural hairline has subtle irregularities and is rarely perfectly straight across. Embrace a slight elevation and soft curve. According to hair restoration specialists cited in resources like the International Society of Hair Restoration Surgery (ISHRS), mimicking natural imperfections is key to realism.
- Gradual Density (if applicable): High-quality lace front systems often feature finer hairs and lighter density right at the edge, gradually increasing further back. Ensure these finer hairs are positioned correctly at the very front for the most natural transition. If your system has uniform density at the edge, careful styling becomes even more crucial.
- Initial Tack: When using liquid adhesive, allow it to become tacky as per instructions before placement. If using tape, expose the adhesive edge. Gently place the front edge onto your marked line, starting from the center and working outwards. Apply only light pressure initially, allowing for minor adjustments.
🔍 Looking for a specific size, base, or hair color? Order a fully personalized toupee now!
Blending the Front Edge
Even with perfect placement, the transition point needs finessing for ultimate undetectability.
- Makeup or Specialized Products: For thin skin bases, sometimes a very slight edge can be visible. A tiny amount of matte concealer or foundation, carefully dabbed and blended along the edge only if necessary, can help it merge with the skin tone. Specialized products like knot sealers or concealers for lace systems can also help camouflage knots, though modern ventilation techniques often minimize visible knots on quality lace units. Use sparingly; less is more.
- Styling Techniques: This is often the most effective method.
- Avoid Slicked-Back Styles Initially: While possible with perfectly applied lace fronts, styles with some hair falling forward or across the hairline provide extra camouflage, especially when starting out.
- Create Lift: Style the hair at the front with some volume or lift off the scalp rather than flat against it. This breaks up any visible line.
- Incorporate Imperfection: A slightly messy or piecey look at the hairline appears more natural than a perfectly uniform edge. Use a light wax or pomade to create texture.
Mastering the hairline through precise measurement, careful placement, and smart blending is fundamental for achieving that coveted natural look toupee application.

Tip 2: Secure Yet Seamless Adhesion
The goal of adhesion is twofold: to hold the hair system securely in place for the desired duration and to do so without creating visible bumps, ridges, or seepage that would compromise the natural appearance. The choice of bonding method and the application technique are paramount for achieving this balance. A bond that feels secure provides peace of mind, while a seamless application ensures undetectability.
Choosing Bonding Method: Tape vs Glue
The two primary methods for attaching hair systems are double-sided toupee tape and liquid bonding adhesive (glue). Each has its own set of characteristics:
| Feature | Toupee Tape | Liquid Adhesive (Glue) | Considerations |
| Hold Time | Varies (Daily wear to 3-4 weeks) | Generally longer (1-5 weeks depending on product) | Choose based on desired reapplication frequency and lifestyle. |
| Application | Easier for beginners, less messy, precise placement | Requires more practice for even layers, can be messy | Tape contours (A, B, C, CC) help fit curves. Glue needs drying/curing time. |
| Cleanup | Generally easier, tape peels off (residue varies) | Can be more time-consuming, requires solvent | Thin skin bases clean easier than lace with glue. |
| Realism | Can sometimes create a slight ridge if thick | Thinner layer possible, potentially more seamless | Ultra-thin tapes minimize ridges. Proper glue application is key. |
| Scalp Comfort | Less potential for widespread irritation | Covers more area, higher potential for sensitivity | Patch testing essential for glue. Breathability depends on base/coverage. |
| Base Suitability | Works well on Poly perimeters, some full Poly | Best for full Poly/Skin, can be used on Lace | Glue on lace requires careful application to avoid seeping through. |
Lifestyle Factors: Consider your activity level, climate, and scalp type.
- Active Lifestyles/Sweating: Stronger, waterproof glues or extended-wear tapes might be necessary. Scalp protectors become even more important.
- Humid Climates: Can challenge bond longevity. Look for humidity-resistant adhesives.
- Oily Skin: May require more frequent cleaning and stronger adhesives or more preparation steps.
Phuc Thien often recommends beginners start with tape for ease of use, potentially graduating to liquid adhesives or hybrid methods (tape on perimeter, glue at front) as experience grows.
👨🦱 Ready to wear and natural-looking — explore our men’s stock hairpieces today!
Application Technique: Less Is Often More
Whether using tape or glue, the application technique is crucial for both security and invisibility.
- Applying Tape:
- Cut tape strips to fit the perimeter sections of the base or scalp. Avoid overlapping tape pieces, as this creates thickness.
- Apply tape to the underside of the hair system base, right up to the edge. Press firmly. Alternatively, apply directly to the prepared scalp along your placement guidelines. Applying to the base usually allows for more precise system placement.
- Leave the backing paper on the upper side until ready to attach.
- Applying Liquid Adhesive:
- To Scalp or Base?: Can be applied to the scalp, the base (especially thin skin), or sometimes both (thin layer on each). Applying to the scalp is common.
- Thin, Even Layers: This is critical. Use the applicator brush or tool to spread a thin, consistent layer over the designated bonding area. Multiple thin layers (allowing drying time in between) are often better than one thick layer. Thick layers take longer to cure, can seep, create bumps, and are harder to remove.
- Avoid Seepage: Do not apply adhesive too close to the very edge, especially on lace fronts, as it can seep through the mesh or onto the hair. Leave a tiny margin (1-2mm).
- Curing Time: This is VITAL for liquid adhesives. Most require the adhesive to become tacky (not fully dry, but not wet) before placing the system. This time varies by product (check instructions – often 5-10 minutes, may turn clear). Applying the system to wet glue results in a weak bond and potential sliding. Some products require multiple layers, each needing curing time.
Securing the Perimeter and Interior
Once the adhesive is ready (tape backing removed or glue tacky), the attachment process requires care.
- Positioning: Carefully align the front hairline of the system with your scalp markings or natural hairline guide. Start from the center front and gently roll/press the system backwards. Alternatively, some prefer starting at the back and rolling forward. Find what works best for you.
- Initial Contact: Lightly press the system onto the scalp to make initial contact. Check alignment in the mirror. Minor adjustments are easier now than after full pressure.
- Applying Pressure: Once satisfied with the position, apply firm, even pressure across the entire bonded area. Use your fingertips or a clean cloth. Press down for several seconds in each spot, working systematically around the perimeter and across the interior (if adhesive was applied there). This ensures full contact between the base and the adhesive/scalp. Pay special attention to the edges.
- Waiting Period: After attachment, many adhesives require a period (often 24 hours) before getting wet, sweating heavily, or washing the hair. This allows the bond to fully cure and reach maximum strength. Adhering to this waiting period significantly impacts longevity. Check product specifics.
- Checking Edges: Gently run a fingertip along the perimeter edges to check for any lifting spots. If found immediately after application, carefully lift only that small section, apply a tiny bit more adhesive if needed (using a Q-tip), allow it to tack up, and press down firmly again.
Achieving secure yet seamless adhesion is a learned skill. Patience, following product instructions precisely, and understanding the principle of ‘less is more’ with adhesives are key components of a natural look toupee application.

Tip 3: Perfecting the Blend with Your Natural Hair
Even with a perfectly chosen and attached hair system, the illusion is incomplete if it doesn’t blend seamlessly with any existing biological hair. This involves strategic cutting and styling, ensuring color harmony, and adopting daily grooming habits that integrate the system naturally. This step transforms the hairpiece from an addition to a part of your overall look.
Strategic Cutting and Styling Integration
This is arguably where professional expertise shines brightest. While minor trims might be manageable at home with experience, the initial cut-in and blending should ideally be performed by a stylist skilled in working with hair systems.
- The Crucial Role of an Experienced Stylist: A regular barber or stylist may not understand the nuances of cutting and blending system hair with natural hair. They might cut too much, fail to layer correctly, or damage the base. Phuc Thien Toupee strongly advises seeking professionals specifically trained in hair replacement systems. They understand how system hair behaves differently and how to create a fluid transition.
- Layering Techniques: Layering is essential to break up density and merge the system hair with your own. The stylist will cut layers into the system, especially where it meets your biological hair at the sides and back, creating a gradual flow rather than a distinct line.
- Thinning Shear Usage: Thinning shears may be used judiciously, particularly at the transition points, to reduce bulk and soften the edges, helping the system hair mimic the texture and density of your own growing hair. Over-thinning should be avoided.
- Matching Flow and Direction: The stylist will cut the system considering the natural growth patterns and direction of your own hair, ensuring everything combs and falls cohesively. The final cut should look like a single, unified haircut, not two separate entities.
- Initial Cut-In Process: When getting a new system cut-in, it’s usually attached first, then cut while on your head for the most accurate blend with your facial features and existing hair.
Color Harmony Is Non-Negotiable
Color mismatch is one of the quickest giveaways that someone is wearing a hairpiece.
- Initial Color Matching Importance: As discussed in preparation, selecting the right color from the start is vital. Natural lighting is key. Remember that natural hair often contains multiple subtle tones, not just one flat color. High-quality systems replicate this. Consider sending a sample of your own hair for custom matching if possible.
- Subtle Adjustments: If there’s a very slight discrepancy, or if your natural hair color changes slightly (e.g., due to sun exposure), minor adjustments might be possible. However, coloring hair systems, especially human hair ones, should only be done by a professional experienced with system hair, which can process color differently than growing hair. Never attempt to bleach a hair system yourself. It’s generally easier to color your own natural hair slightly to match the system if needed.
- Avoiding Harsh Color Lines: The blend should be seamless not just in cut but also in color. Any visible line where the system color abruptly meets your natural hair color needs correction, either through better blending techniques during the cut or potential color adjustment by a professional.
💁♀️ Add instant volume and confidence — browse our stock hair toppers for women!
Daily Styling for Seamless Integration
How you style your hair daily plays a significant role in maintaining the blend.
- Appropriate Styling Products: Use lightweight products that don’t weigh the hair down or cause excessive buildup on the base. Water-based products are often recommended. Avoid heavy oils or pomades near the base, as they can potentially weaken the bond over time. Products specifically designed for hair systems are available.
- Techniques to Lift Roots: Styling the hair with some volume at the roots, especially around the transition areas and the front hairline, helps obscure any lines and creates a more natural appearance. Using a blow dryer on a low heat setting with a brush can achieve this. Avoid aiming high heat directly at the base for prolonged periods.
- Combing/Brushing Methods: Use a wide-tooth comb or a brush designed for hair systems (like a loop brush) to avoid snagging the base or pulling out hairs. Start detangling from the ends and work your way up to the roots. Comb gently, especially near the base and edges. Style the system hair together with your natural hair to encourage integration.
Perfecting the blend is an ongoing process that combines a great initial cut-in with mindful daily styling. It’s the fine-tuning that elevates a good application to a truly natural look toupee application.
Tip 4: Maintenance for Longevity and Continued Realism
Applying the toupee flawlessly is only half the journey. Consistent and correct maintenance is essential to ensure the hair system continues to look natural, the bond remains secure, and the unit itself lasts as long as possible. Neglecting maintenance can lead to premature deterioration of the system, unpleasant odors, scalp issues, and a less convincing appearance over time.
Regular Cleaning and Reapplication Schedule
The frequency of removal, cleaning, and reapplication depends on several factors:
- Adhesive Type: Daily wear tapes/adhesives require daily removal and cleaning. Extended wear tapes and glues allow for longer periods, typically ranging from 1 to 4 weeks.
- Skin Type: Individuals with oilier skin or those who sweat more may find the bond breaks down faster, necessitating more frequent maintenance.
- Climate: Hot and humid conditions can shorten bond duration.
- Lifestyle: Very active individuals might need more frequent reapplications.
- Personal Preference: Some users prefer the feeling of a fresh application more often.
General Maintenance Cycle:
- Removal: Apply adhesive remover/solvent liberally around the edges of the system. Allow it time to work (as per product instructions) to break down the adhesive. Gently lift the system away from the scalp, adding more solvent as needed. Never pull or force the system off, as this can damage the base and irritate your scalp. Lace Release is excellent for lace systems as it allows the lace to detach without dissolving the adhesive buildup initially, making cleanup easier.
- Cleaning the Base: This is crucial. All adhesive residue must be removed from the underside of the base.
- For Tape Residue: Peel off as much tape as possible. Use solvent (like C-22) on a cloth or cotton pad to dissolve and wipe away remaining residue.
- For Glue Residue: Apply solvent and let it sit to soften the glue. Gently scrape (using a plastic scraper carefully or just your fingers/cloth) and wipe away the residue. This can take time and patience. Mirror cleaning (placing the base adhesive-side down onto a mirror covered in solvent) can help loosen residue from lace.
- After removing adhesive, wash the base gently with a clarifying shampoo or specialized base cleaner to remove solvent residue. Rinse thoroughly.
- Cleaning the Scalp: While the system is off, thoroughly cleanse your scalp. Use shampoo, potentially an exfoliating scalp scrub (if not too irritated), and ensure all adhesive and solvent residues are gone. This is also the time to check for any signs of irritation.
- Allow Scalp to Breathe: Whenever possible, allow your scalp some time (even just an hour or overnight between applications if using daily wear) without the system to breathe and recover.
- Reapplication: Once the system base is clean and dry, and your scalp is prepared (as detailed in the Preparation section), you can reapply the system.
Establishing a consistent schedule based on your chosen adhesive and personal factors is key to predictable performance and scalp health. Phuc Thien advises keeping a log initially to determine your optimal wear time.
🎯 Find the perfect fit and color — shop high-quality men’s hair systems now.
Proper Hair System Care
Caring for the hair itself preserves its appearance and extends the life of the unit. System hair, especially human hair, doesn’t receive natural oils from the scalp, so it requires external hydration and gentle handling.
- Washing and Conditioning:
- Wash the hair system 1-2 times per week (or as needed) while it’s off your head for thorough cleaning, or carefully while wearing it for extended wear.
- Use lukewarm water and sulfate-free shampoos and conditioners specifically designed for color-treated hair or hair systems. Regular shampoos can strip the hair.
- Apply shampoo gently, smoothing it down the hair shaft. Avoid harsh rubbing or massaging, which can cause tangling or inversion (hair pushed back through the base).
- Rinse thoroughly.
- Apply conditioner, focusing on the mid-lengths and ends. Avoid getting conditioner on the base/knots, as it can loosen them or weaken the bond. Leave it on for a few minutes.
- Rinse thoroughly again with cool water to seal the cuticle.
- Detangling: Gently detangle using a wide-tooth comb or loop brush, starting from the ends and working upwards. Do this when the hair is damp with conditioner or a leave-in conditioner/detangler applied.
- Drying: Pat the hair gently with a towel – do not rub. Allow it to air dry on a mannequin head or stand whenever possible. If blow-drying, use a low heat setting and keep the dryer moving. Avoid prolonged high heat, especially near the base.
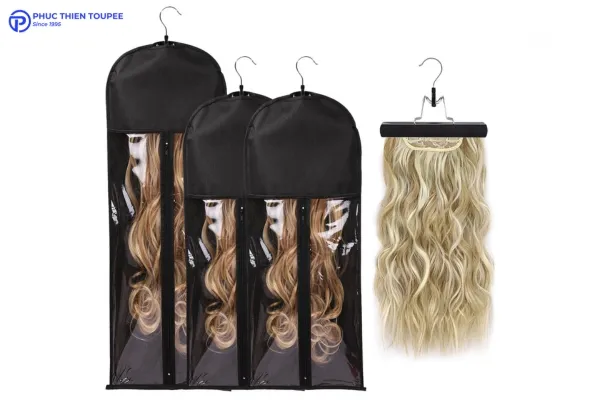
- Storage: When not wearing the system, store it on a mannequin head or in its box to maintain its shape and prevent tangling. Keep it away from direct sunlight.
Recognizing When Adjustments Are Needed
Regular self-checks and awareness help catch issues before they become major problems.
- Signs of Adhesive Breakdown: Lifting edges, movement of the system, loss of secure feeling. This indicates it’s time for removal and reapplication.
- Scalp Irritation: Redness, itching, or discomfort under the system. This might necessitate trying a different adhesive, using a better scalp protector, or allowing the scalp more breathing time. Persistent irritation warrants professional advice.
- Changes in Natural Hair: If your own hair grows significantly, the blend might need adjustment via a trim. If your natural hair color changes, you might need to address the color harmony.
- System Wear and Tear: Noticeable hair shedding, thinning patches on the system, or damage to the base (rips in lace or poly) indicate the system might be nearing the end of its lifespan or requires professional repair.
Proactive maintenance and care are investments in the longevity of your hair system and the continuity of your natural look toupee application. Don’t hesitate to seek professional help from specialists like Phuc Thien Toupee if you encounter persistent issues or need guidance on specific products or techniques.
Tip 5: Confidence Is Your Best Accessory
Beyond the technical aspects of application and maintenance, the final, yet perhaps most crucial, element in successfully wearing a hair system is confidence. A perfectly applied toupee can still feel ‘wrong’ if the wearer is constantly plagued by self-doubt or fear of detection. Embracing your choice and wearing your hair system with assurance is the ultimate key to making it look and feel truly natural.
Overcoming Self-Consciousness
It’s entirely normal to feel some degree of self-consciousness initially, especially if hair loss has been a long-standing concern.
- Focusing on the Positive: Remind yourself why you chose a hair system – likely to feel better, look younger, or regain a sense of normalcy. Focus on the positive transformation in the mirror, not on minuscule perceived imperfections that others likely won’t notice. Remember the data suggesting improved well-being.
- Practice Makes Perfect: Your application technique will improve over time. Early attempts might not be flawless, but each reapplication is a learning opportunity. As your skills grow, so will your confidence in the results.
- Gradual Introduction (Optional): If you’re concerned about sudden, dramatic changes, you could potentially start with a lighter density system or a style that offers more coverage initially, gradually moving towards your ideal look. However, many find embracing the change fully from the start is more empowering.
- The Reality Check: Understand that most people are not scrutinizing your hairline. They are engaged in conversation, looking at your eyes, and reacting to your overall demeanor. A well-applied system, combined with confident posture and engagement, is rarely questioned.
Owning Your Look
Confidence comes from accepting and embracing your appearance, including the hair system.
- Experimenting with Styles: Don’t be afraid to try different hairstyles that suit your system and personality. Learning versatile styling techniques gives you more control and helps you feel the hair is truly ‘yours’. This reinforces the idea that it’s a part of your look, not something you’re hiding.
- Internalizing Undetectability: When application and blending are done well using the tips outlined by Phuc Thien, trust that the system is undetectable to the casual observer. Letting go of the fear of discovery is liberating.
- The Self-Esteem Boost: Acknowledge the positive impact on your self-esteem. Looking good often translates to feeling good. Let that enhanced confidence radiate outwards. It becomes a positive feedback loop – the more confident you feel, the more natural the system appears because you wear it with ease.
✨ Designed to blend seamlessly — shop ready-made toppers for a natural look.
Seeking Support and Community
You are not alone on this journey. Connecting with others who wear hair systems can be incredibly beneficial.
- Online Forums and Groups: Platforms like Reddit (e.g., r/HairSystems), dedicated forums, and social media groups offer spaces to share experiences, ask questions, exchange tips, and see results from others. This can normalize the experience and provide practical solutions. Look for communities focusing on natural looking toupee application techniques.
- Sharing Experiences: Talking about your experience (with trusted friends, family, or within these communities) can demystify the process and reduce feelings of isolation or secrecy.
- Professional Support: Don’t underestimate the value of ongoing support from hair system specialists like Phuc Thien Toupee. They can troubleshoot issues, offer advanced tips, and provide reassurance.
Ultimately, the most natural-looking toupee application is one worn with self-assurance. Technical skill gets you 90% of the way there; genuine confidence completes the picture, making the hair system an integrated part of you.
Advanced Considerations & Troubleshooting
Even with careful adherence to the five core tips, specific situations or challenges may arise. Addressing these proactively can prevent frustration and maintain the integrity of your natural look.
Dealing with Sensitive Skin
Scalp sensitivity is a common concern. Adhesives and tapes are foreign materials, and reactions can occur.
- Patch Testing: ALWAYS perform a patch test with any new adhesive or scalp protector before full application. Apply a small amount to an inconspicuous area (like behind the ear or inner elbow) and leave it for 24-48 hours, checking for redness, itching, or irritation.
- Hypoallergenic Options: Many manufacturers offer adhesives and tapes formulated for sensitive skin. Look for products explicitly labeled as hypoallergenic or medical grade. Water-based adhesives are sometimes gentler than solvent-based ones.
- Importance of Scalp Protectors: Using a quality scalp protector is non-negotiable for sensitive skin. It creates a barrier that minimizes direct contact between the adhesive and the skin. Products like Walker Tape Max Hold Sport contain ingredients that soothe as well as protect.
- Rotation and Breaks: If irritation occurs, try rotating between different types of adhesives. Ensure you are allowing the scalp adequate time to breathe between applications. Persistent irritation requires stopping use and potentially consulting a dermatologist or your hair system specialist.
✨ A toupee shouldn’t just hide hair loss — make it a style statement!
Application in Different Climates
Environmental factors significantly impact adhesive performance.
- Humidity: High humidity introduces moisture, the enemy of most adhesives.
- Adhesive Choice: Opt for adhesives known for strong, waterproof, humidity-resistant bonds (often solvent-based glues or specific extended-wear tapes).
- Preparation: Extra thorough scalp cleaning and drying are crucial. Using an anti-perspirant formulated for the scalp (applied before the scalp protector) can help.
- Application: Ensure full curing time is allowed, potentially even longer than stated in humid conditions. Pressing edges firmly is vital.
- Heat: High temperatures increase sweating, which can break down bonds.
- Adhesive Choice: Similar to humidity, choose robust, waterproof options.
- Scalp Protection: Scalp protectors that help manage sweat are beneficial.
- Base Choice: More breathable bases like lace can improve comfort in heat, although the bond might still be challenged by sweat.
- Frequency: Be prepared for potentially shorter wear times and more frequent maintenance in very hot weather.
Common Mistakes to Avoid
Learning from common errors can save time and improve results quickly.
| Mistake | Why It Compromises Natural Look | Solution |
| Incorrect Hairline Placement | Looks artificial (too low, too high, too straight) | Use 4-finger guide (approx.), aim for slight natural recession, mark carefully. |
| Too Much Adhesive | Seepage, bumps under base, difficult cleanup | Apply thin, even layers; allow proper curing time. Less is more. |
| System Applied to Wet Glue | Weak bond, sliding, premature lifting | Wait for glue to become tacky (clear/hazy) as per instructions before attaching. |
| Poor Blending Cut | Visible line between system and natural hair | Use a stylist experienced with hair systems for initial cut-in and blending. |
| Color Mismatch | Obvious difference between system and natural hair | Match color meticulously in natural light; seek professional help for adjustments. |
| Neglecting Scalp Prep | Poor adhesion, shorter wear time, potential irritation | Cleanse thoroughly, dry completely, use alcohol wipe, apply scalp protector. |
| Skipping Maintenance | Odor, buildup, bond failure, system damage | Adhere to a regular cleaning/reapplication schedule based on adhesive/skin type. |
| Aggressive Handling | Hair shedding, base damage, tangling | Use gentle washing techniques, proper tools (wide-tooth comb), detangle carefully. |
| Ignoring Scalp Irritation | Can lead to worsening skin issues | Patch test new products, use scalp protector, seek advice if irritation persists. |
Avoiding these pitfalls through careful technique and attention to detail significantly increases the chances of achieving and maintaining a consistently natural look toupee application.
Avoid common pitfalls: Understand Toupee Mistakes and choose proper Toupee Adhesives and Removers for a seamless look
Conclusion: Your Path to Undetectable Confidence
Achieving a natural look toupee application is entirely possible and can greatly boost appearance and confidence. By mastering five key steps—careful preparation and system selection, precise hairline creation, seamless adhesion, proper blending, and consistent maintenance—you can ensure undetectable results.
With guidance from Phuc Thien Toupee, wearers at any experience level can learn effective techniques for realistic and comfortable hair system use. The journey involves proper scalp care, the right products, expert cutting, and confident styling. For optimal results, practice consistently and seek professional support when needed. Phuc Thien is ready to help you achieve a flawless, natural look with expert advice and personalized solutions.
Phuc Thien Toupee Co., Ltd
Design Brand: Royal Hair Vietnam
Office Address:
🏢 Room A909, Decapella Building, 116 Luong Dinh Cua Street, An Khanh Ward, Thu Duc City, Ho Chi Minh City 700000, Vietnam
Factory Address:
🏭 No. 26/9, Street 57, Thuong Hamlet, Tan Thong Hoi Ward, Cu Chi District, Ho Chi Minh City 700000, Vietnam
Email: ✉️ phucthientoupeevn@gmail.com
Phone / WhatsApp: 📞 +84 933 901 196
Websites: 🌐 phucthientoupee.com – 🌐 royalhair.shop