

- 13/06/2025
- Posted by: phucthien
- Category: Blog

Wig Styling Tools Guide is your ultimate resource for achieving flawless wig styles. This comprehensive guide provides invaluable insights into the essential tools for wig care, from basic maintenance to advanced customization. With Phuc Thien Toupee’s expert tips, transform your wigs into stunning reflections of your personal style, enhancing confidence and beauty. Ready to dive in? Discover the best wig styling methods, wig accessories, and hairpiece styling tips.
Why Invest in the Right Wig Styling Tools?
Investing in the right wig styling tools can elevate your wig-wearing experience. It’s not just about aesthetics; it’s about preserving the longevity and beauty of your investment.
- Longevity: Proper tools prevent damage, extending the life of your wig.
- Versatility: Achieve a wide range of styles, from sleek and sophisticated to voluminous and playful.
- Confidence: A well-styled wig boosts self-esteem and enhances your overall look.
Consider this statistic: a study by the American Hair Loss Association found that 40% of women experience visible hair loss by age 40. Wigs offer a fantastic solution, and with the right tools, they can be seamlessly integrated into your personal style. Phuc Thien Toupee understands this need, and we’re here to guide you.

Master your look: Use top Wig Styling Tools and follow our Wig Styling Tutorials today
8 Essential Wig Styling Tools: A Detailed Guide
Let’s explore eight essential wig styling tools that are vital for achieving salon-quality results at home:
1. Wide-Tooth Comb: The Gentle Detangler
- Why it’s Essential: Human hair wigs, like natural hair, can tangle. However, the strands are secured differently (knotted or sewn onto a cap), making them more susceptible to shedding if treated harshly. A wide-tooth comb features smoothly spaced teeth that glide through hair fibers with minimal friction or snagging. This significantly reduces stress on the knots and the hair shaft, preventing breakage and excess shedding, thereby preserving the wig’s density and lifespan. Using combs with sharper or closely spaced teeth can pull out hairs or stretch and damage the fibers.
- How to Use It Effectively:
- Secure the Wig: Place your wig securely on a wig stand or canvas block head. This provides stability and prevents the wig from moving around, allowing for more controlled combing.
- Work in Sections: Divide the wig into manageable sections (e.g., four quadrants). Working section by section prevents overwhelming tangles and ensures thoroughness.
- Start at the Ends: Always begin combing at the very tips of the hair within a section. Gently work out any knots here first.
- Gradually Move Up: Once the ends are tangle-free, move a few inches up the hair shaft and comb down towards the ends again. Continue this process, gradually working your way up towards the wig cap or roots.
- Hold the Hair: When encountering a tangle higher up, gently hold the hair above the knot with one hand to support the base and prevent pulling directly on the cap knots. Use the comb with your other hand to patiently work the tangle out.
- Optional Detangling Spray: For stubborn tangles, lightly mist the section with a wig-specific detangling spray. Allow it to sit for a moment before combing. Avoid over-saturating.
- Pro Tip from Phuc Thien: Choose a comb made from smooth plastic or rubber. Avoid metal combs, which can sometimes snag or cause static. Never brush or comb a human hair wig when it is soaking wet, as hair is most fragile then. Allow it to air dry significantly first.
✨ A toupee shouldn’t just hide hair loss — make it a style statement!
2. Wig Brush: The Smoothing Specialist
- Why it’s Essential: While a wide-tooth comb detangles, a wig brush is designed for smoothing, styling, and distributing natural oils (if applicable) or styling products evenly. Wig brushes typically have flexible bristles, often looped or with soft, rounded tips (like ball-tipped bristles). These design features prevent the bristles from catching on the knots at the wig base or snagging the hair strands, which is a common issue with standard hair brushes not designed for wigs. They help align the cuticles for a smoother finish and can gently add volume.
- How to Use It Effectively:
- Ensure Detangling: Only use a wig brush after the wig has been thoroughly detangled with a wide-tooth comb. Brushing a tangled wig will cause damage and shedding.
- Section the Hair: Similar to combing, work in manageable sections for better control.
- Gentle Strokes: Use long, fluid, gentle strokes starting from mid-shaft down to the ends.
- Work Towards the Roots: Once the lower parts are smooth, you can gently brush closer to the roots, always being mindful of the cap construction. Avoid aggressive brushing at the base.
- Styling: Use the brush to direct the hair into your desired style, whether it’s smoothing it straight, creating gentle curves, or distributing styling products.
- Pro Tip from Phuc Thien: Metal-bristle brushes should generally be avoided as they can cause more friction and potential damage to wig fibers and the cap. Look for brushes explicitly labeled for wig use.

3. Wig Stand: The Shape Keeper and Styling Station
- Why it’s Essential: A wig stand is multi-functional. Primarily, it helps the wig maintain its cap shape and style when not being worn, preventing crushing or distortion that can happen if stored improperly (like in a box or bag). Proper air circulation around the wig on a stand also helps it dry after washing and stay fresh between wears. Furthermore, it provides a stable, elevated base crucial for effective styling, cutting, or washing. Trying to style a wig while holding it or laying it flat is inefficient and can lead to uneven results.
- How to Use It Effectively:
- Choose Your Stand: Options range from inexpensive collapsible plastic stands (great for travel and basic storage/drying) to more sturdy styrofoam heads (good for basic styling) and durable canvas block heads (best for serious styling, heat application, and securing with T-pins). Choose based on your needs and budget.
- Placement: Gently place the wig onto the stand, aligning the wig’s hairline and nape with the corresponding areas on the stand or head. Ensure the cap sits naturally without stretching.
- Storage: After wearing, place the wig on its stand away from direct sunlight, heat sources, and high humidity. A light covering can protect it from dust.
- Styling: For styling, especially involving heat or cutting, a canvas block head secured to a table clamp offers the most stability. Use T-pins (discussed later) to firmly attach the wig.
- Pro Tip from Phuc Thien: If using a styrofoam head, consider covering it with a plastic bag or wrap first to prevent the styrofoam from shedding onto the wig cap’s interior over time. Canvas block heads come in various head circumference sizes; try to match one closely to your own head size for the best styling simulation.
🔍 Looking for a specific size, base, or hair color? Order a fully personalized toupee now!
4. Hair Dryer: Controlled Airflow for Styling
- Why it’s Essential for Human Hair Wigs: Unlike air-drying alone, a hair dryer allows you to manipulate the hair into specific styles (straight, voluminous, beveled ends) as it dries. For human hair wigs, using controlled heat is possible and often necessary for achieving polished looks. The key is control – using appropriate settings and techniques to avoid heat damage.
- How to Use It Safely and Effectively:
- Apply Heat Protectant: This is non-negotiable. Before any heat application, lightly spray the wig evenly with a quality heat protectant spray designed for human hair. This creates a barrier, reducing potential damage.
- Select Low to Medium Heat: Never use the highest heat setting on your wig. Start with the lowest setting and only increase slightly if absolutely necessary. Excessive heat can dry out the hair, cause frizz, and even singe the fibers over time.
- Use Attachments: A concentrator nozzle helps direct airflow for smooth straightening. A diffuser attachment is excellent for enhancing natural waves or curls without causing frizz, distributing the air more gently.
- Maintain Distance: Keep the dryer nozzle at least 6-8 inches away from the wig hair. Avoid concentrating heat on one spot for too long.
- Keep it Moving: Constantly move the hair dryer around the section you are working on.
- Dry in Sections: Work with manageable sections for even drying and styling. Use clips to keep other sections out of the way.
- Cool Shot: If your dryer has a cool shot button, use it at the end of drying each section to help set the style and add shine by closing the hair cuticle.
- Pro Tip from Phuc Thien: Invest in a hair dryer with multiple heat and speed settings for maximum control. Ionic technology can help reduce frizz and drying time. Always let the wig cool completely on the stand before storing or further handling.

5. Hair Straightener (Flat Iron): Sleekness and Polish
- Why it’s Essential for Human Hair Wigs: Flat irons are perfect for achieving ultra-sleek, smooth styles, eliminating waves or frizz, and creating a polished, sophisticated look on human hair wigs. They can also be used to create soft bends or curves at the ends.
- How to Use It Safely and Effectively:
- Heat Protectant First: As with drying, applying a heat protectant spray is crucial. Ensure the wig is completely dry before straightening.
- LOW Heat Setting: This cannot be stressed enough. Start with the absolute lowest temperature setting (ideally below 300°F / 150°C, but check manufacturer recommendations for your specific wig). Human hair on wigs doesn’t have the scalp’s natural oils for protection, making it more vulnerable. You can do a test on a small, hidden strand first.
- Choose Quality Plates: Irons with ceramic, tourmaline, or titanium plates generally provide more even heat distribution, reducing the risk of hot spots that can scorch the hair. Plate size depends on wig length (smaller plates for shorter wigs or detail work, wider plates for long, thick wigs).
- Work in Small Sections: Use thin sections of hair, about 1-1.5 inches wide. This ensures the heat passes through evenly and requires fewer passes.
- Smooth, Continuous Motion: Clamp the iron near the roots (but not too close to the base/knots) and glide it smoothly and continuously down the hair shaft to the ends. Do not stop or hold the iron stationary on the hair.
- One Pass if Possible: Aim to straighten each section effectively in a single pass. Repeated passes increase the risk of damage. If needed, allow the section to cool completely before a second quick pass.
- Pro Tip from Phuc Thien: Never use a flat iron on a synthetic wig unless it is explicitly labeled as heat-friendly, and even then, use extreme caution and the lowest possible heat setting after testing an inconspicuous spot. Regular synthetic fibers will melt.
6. Curling Iron / Wand: Crafting Curls and Waves
- Why it’s Essential for Human Hair Wigs: Curling irons and wands offer versatility, allowing you to transform a straight wig into bouncy curls, loose waves, or add subtle bends and texture to human hair wigs. Different barrel sizes create different effects.
- How to Use It Safely and Effectively:
- Apply Heat Protectant: Ensure the wig is dry and protected with a heat protectant spray.
- Select Low to Medium Heat: Similar to flat irons, start with a low temperature setting (below 300°F / 150°C is often recommended, but test first) and only increase slightly if the curls aren’t holding.
- Choose Barrel Size: Smaller barrels (e.g., 0.5 – 1 inch) create tighter curls. Larger barrels (e.g., 1.25 – 2 inches) create looser waves or volume. Wands (clipless) often yield more natural-looking waves.
- Work in Sections: Section the hair cleanly. The size of the section will also affect the curl tightness (smaller sections = tighter curls).
- Wrap and Hold Briefly: Wrap the hair section around the barrel, starting a couple of inches from the root to avoid damaging the base. Hold for only a few seconds (typically 5-10 seconds, depending on heat and hair). Avoid prolonged contact.
- Release and Cool: Gently release the curl from the iron. Crucially, cup the warm curl in your hand or clip it up using a pin curl clip until it cools completely. Curling hair while it’s warm allows the style to set properly and last longer.
- Style After Cooling: Once all sections are curled and completely cool, you can gently finger-style, use a wide-tooth comb (very gently), or a wig brush to break up the curls for a softer look, if desired.
- Pro Tip from Phuc Thien: For clipless wands, wearing a heat-resistant glove (often included) is highly recommended to avoid burning your fingers. Practice your technique on the back sections first.
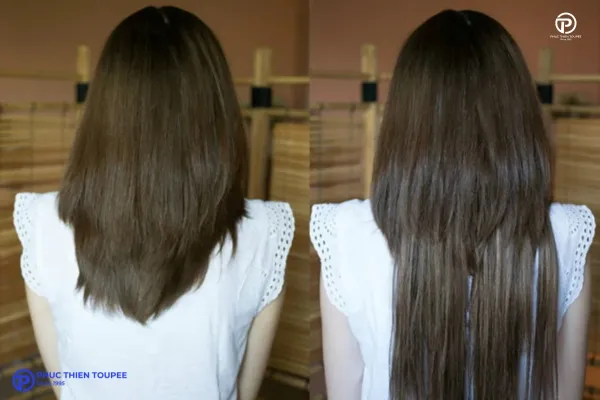
7. Wig Hair Spray: The Finishing Touch
- Why it’s Essential: Once you have styled your wig, hair spray helps lock the look in place, control flyaways, and provide lasting hold throughout the day. It adds a final polish and ensures your efforts last.
- How to Use It Effectively:
- Choose Wig-Specific Spray: Opt for hair sprays specifically formulated for wigs, especially if dealing with synthetics. Regular hair sprays can sometimes contain harsh alcohols or ingredients that can dry out or damage wig fibers over time or cause build-up. Look for flexible hold options unless you need a very firm style.
- Hold at a Distance: Hold the can about 10-12 inches away from the wig. Spraying too close can result in wet patches, stiffness, or uneven application.
- Use Light, Even Strokes: Apply the spray in short, sweeping bursts rather than one continuous stream. This ensures a light, even coating.
- Build Up if Needed: It’s better to apply a light layer, let it dry, and add another if more hold is required, rather than saturating the wig initially.
- Target Specific Areas: You can target areas needing extra control, like flyaways around the hairline or the ends of curls.
- Pro Tip from Phuc Thien: To tame specific flyaways without spraying the entire wig, spray a small amount onto your fingertips or a clean mascara wand and gently smooth the stray hairs into place. Avoid sprays that leave a heavy or sticky residue.
8. T-Pins: The Styling Anchors
- Why it’s Essential: When performing more intensive styling, cutting, or even washing on a wig head (especially a canvas block head), T-pins are indispensable for securing the wig firmly in place. They prevent the wig from shifting or sliding, allowing for greater precision and control. The ‘T’ shape makes them easy to insert and remove.
- How to Use It Effectively:
- Choose the Right Head: T-pins work best with canvas block heads or sturdy styrofoam heads that can accept pins without crumbling easily.
- Position the Wig: Place the wig correctly on the head form.
- Strategic Placement: Insert T-pins through the wig cap’s sturdier parts, such as the ear tabs, the nape area, and along the perimeter seam, angling them slightly into the block head.
- Avoid Delicate Areas: Be cautious around lace front areas or monofilament tops. If you need to secure these areas, place pins carefully through reinforced edges or tabs if available, not directly through the delicate mesh itself if possible.
- Use Sufficient Pins: Use enough pins to hold the wig securely without stretching the cap excessively. Typically, 4-8 pins are sufficient depending on the wig’s weight and the styling task.
- Removal: Remove pins carefully after styling is complete.
- Pro Tip from Phuc Thien: Opt for rust-resistant stainless steel T-pins, especially if you plan on using them during wet styling or washing processes. Ensure pins are sharp enough to penetrate the block head easily but handle them with care.
✂️ Be unique — create your custom-made toupee today!
Additional Tools for Wig Perfection
While the previous eight are essential, these additional tools can further enhance your wig styling capabilities:
- Wig Cap: For a secure and comfortable fit.
- Scissors: For trimming and shaping the wig.
- Thinning Shears: For removing bulk and creating a more natural look.
- Rat Tail Comb: For precise parting and sectioning.
- Hair Clips: For holding sections of hair in place during styling.
Event-ready beauty: Learn Wig Styling for Events and enhance Curly Wig Styling with pro tips
Maintaining Your Wig Styling Tools
Proper maintenance of your wig styling tools is crucial for their longevity and performance.
Regular Cleaning: Hygiene and Performance
- Combs and Brushes:
- Remove Hair: After each use, or at least weekly, remove all trapped hair from your wide-tooth comb and wig brush. You can use your fingers, the end of a rat-tail comb, or another comb to clear the bristles/teeth.
- Wash Periodically: Every few weeks (or more often if you use a lot of product), wash your combs and brushes. Fill a basin with warm water and add a few drops of gentle shampoo or wig shampoo. Swish the tools in the water, using your fingers or an old toothbrush to gently scrub away residue.
- Rinse Thoroughly: Rinse completely under clean running water to remove all soap.
- Air Dry Completely: Shake off excess water and lay the tools flat on a clean towel to air dry completely before storing. Ensure brushes are dried with bristles facing down or sideways to prevent water from pooling in the base.
- Heat Styling Tools (Dryer, Flat Iron, Curling Iron):
- Ensure They Are Cool and Unplugged: Never attempt to clean heat tools while they are hot or plugged in.
- Wipe Down: Once cool, wipe the exterior surfaces and plates/barrels with a soft, slightly damp cloth to remove dust and product residue. For stubborn buildup on plates, you can use a cloth lightly dampened with rubbing alcohol (check manufacturer instructions first), ensuring it dries completely before next use.
- Nozzle/Diffuser Care: Clean hair dryer attachments regularly as they can accumulate dust and lint.
- Wig Stands:
- Wipe Down: Periodically wipe down plastic or metal stands with a damp cloth.
- Canvas/Styrofoam Heads: These can absorb oils or product. Spot clean canvas heads carefully with a damp cloth and mild soap if needed, allowing them to air dry fully. Keep styrofoam heads covered when not in use to minimize dirt. Replace styrofoam heads if they become excessively dirty or damaged.
- T-Pins:
- Wipe Clean: Wipe pins clean if they accumulate residue. Ensure they are completely dry before storing to prevent rust, especially if not stainless steel. Discard any bent or rusted pins.
Proper Storage: Protection and Longevity
- Prevent Damage: Store tools where they won’t be crushed, bent, or have their bristles damaged. Avoid just tossing them into a drawer with other items.
- Combs and Brushes: Keep them in a dedicated container, drawer compartment, or upright holder.
- Heat Tools: Many come with heat-resistant pouches – use them. Allow tools to cool completely before storing. Wrap cords loosely (avoid tight wrapping around the tool itself, which can damage the cord over time) and store them in a drawer or designated pouch/box to protect plates and barrels from scratches.
- Wig Stands: Store stands upright in a clean, dry area. Collapsible stands can be folded for space-saving storage.
- Keep Dry: Store all tools in a dry environment to prevent rust (on metal parts like pins or screws) and potential electrical issues with heat tools.
Regular Inspection and Timely Replacement
- Inspect Before Use: Briefly check your tools before each use.
- Combs/Brushes: Look for broken teeth or missing/bent bristles that could snag hair.
- Heat Tools: Check cords and plugs for any signs of fraying, cracking, or damage. Ensure plates are smooth and free from deep scratches or peeling coatings. Check that temperature controls are working correctly.
- Stands: Ensure they are stable and not cracked or broken.
- Know When to Replace: Tools don’t last forever. Using damaged or worn-out tools can be ineffective and potentially harmful to your wig or even unsafe (in the case of electrical tools).
- Replace combs/brushes if they have significant damage that could catch on hair.
- Replace heat tools if the cord is damaged, plates are scratched, they overheat, or temperature control becomes unreliable. Using a malfunctioning heat tool poses a serious fire or burn risk and can instantly ruin a wig.
- Replace T-pins if they become bent or rusted.
- Replace stands if they are broken or unstable.
🎨 Your style, your hair — we make it exactly how you want.
Choosing the Right Tools for Your Wig Type
The best tools for you will depend on the type of wig you own.
| Wig Type | Recommended Tools |
| Human Hair | All tools mentioned above, with a focus on heat protectant sprays and low heat settings. |
| Synthetic Hair | Wide-tooth comb, wig brush, wig stand, and styling products specifically for synthetics. Avoid high heat. |
| Lace Front | T-pins, wig cap, and gentle styling techniques to avoid damaging the lace. |
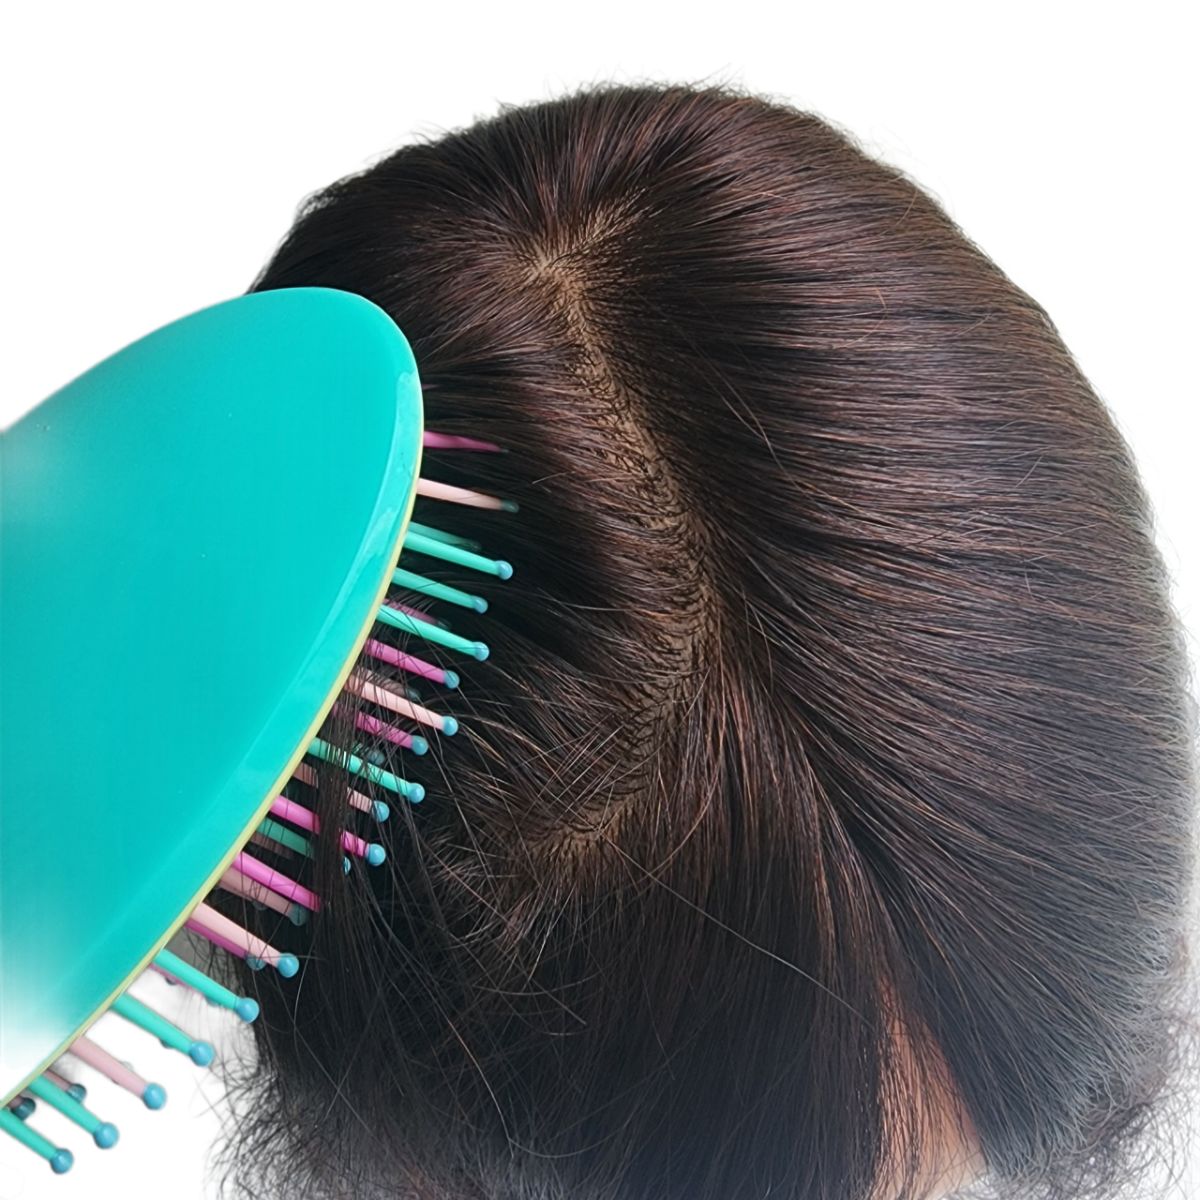
Conclusion: Human Hair Wig Styling Tools Guide
Wig styling tools are essential for achieving flawless, natural-looking styles. By investing in the right tools and mastering basic techniques, you can transform your wig into a stunning reflection of your personal style. With Phuc Thien Toupee as your trusted guide, the possibilities are endless. Embrace the power of wig styling and discover a world of confidence, versatility, and beauty.
Phuc Thien Toupee Co., Ltd
Design Brand: Royal Hair Vietnam
Office Address:
🏢 Room A909, Decapella Building, 116 Luong Dinh Cua Street, An Khanh Ward, Thu Duc City, Ho Chi Minh City 700000, Vietnam
Factory Address:
🏭 No. 26/9, Street 57, Thuong Hamlet, Tan Thong Hoi Ward, Cu Chi District, Ho Chi Minh City 700000, Vietnam
Email: ✉️ phucthientoupeevn@gmail.com
Phone / WhatsApp: 📞 +84 933 901 196
Websites: 🌐 phucthientoupee.com – 🌐 royalhair.shop