

- 01/06/2025
- Posted by: phucthien
- Category: Blog
Securing a hairpiece can be a game-changer, boosting your confidence and allowing you to express your style without worry. This comprehensive guide provides secure hairpiece tips, exploring the best ways to achieve a worry-free wear, whether you’re swimming, working out, or simply enjoying life. Let’s ensure your alternative hair stays exactly where you want it, providing comfort and a natural look.
Ready to unlock the secrets to a perfectly secured toupee? We’ll cover proven techniques, from the right adhesives to maintenance tips, ensuring your hairpiece stays flawless all day long. Get ready to discover lasting hold solutions, strategic attachment methods, and expert advice.
Understanding Hairpiece Security: The Foundation for Confidence
Hairpiece security isn’t just about keeping the hairpiece in place; it’s about feeling secure and confident in your everyday life. Let’s explore the fundamentals:
Why Hairpiece Security Matters
- Confidence Boost: A securely attached hairpiece eliminates the fear of slippage, allowing you to focus on living your life fully.
- Natural Appearance: Proper attachment ensures a seamless blend with your natural hairline, enhancing the realism of your hairpiece.
- Activity Freedom: Whether you’re exercising, swimming, or dancing, a secure hairpiece allows you to participate without hesitation.
- Longevity of Hairpiece: Correct attachment and removal techniques protect the delicate base of your hairpiece, extending its lifespan.
🎨 Your style, your hair — we make it exactly how you want.
Factors Affecting Hairpiece Security
- Hairpiece Base Material: Lace, monofilament, polyurethane (skin) – each material requires different attachment methods.
- Adhesive Type: Tapes, glues, and clips offer varying degrees of hold and are suited for different skin types and activities.
- Scalp Condition: Oily skin, dry skin, or sensitivity can affect the adhesion of tapes and glues.
- Lifestyle: High-impact activities require stronger attachment methods.
- Hairpiece Size and Weight: Larger or heavier hairpieces require more robust security measures.

Ultimate hold: Learn Hairpiece Attachment for Beginners and find top Hairpiece Adhesives
Top Attachment Methods: Choosing What’s Right for You
The key to hairpiece security lies in selecting the appropriate attachment method. Let’s examine the most popular options:
1. Adhesive Tapes: The Versatile and Accessible Choice
Hair system tapes are often the first method many explore due to their user-friendliness and variety. They come in pre-cut contours or rolls, offering flexibility in application.
Understanding Tape Varieties
It’s crucial to recognize that not all tapes are created equal. They differ significantly in hold strength, cleanup ease, and formulation:
- Daily Wear Tapes:
- Characteristics: Offer a lighter hold (typically 1-3 days). Designed for easy application and removal with minimal residue. Often less irritating for sensitive skin.
- Examples (Conceptual): Tapes prioritizing gentleness, often white liners, lower tack.
- Best For: Users who prefer frequent removal and cleaning, testing different placements, or have sensitive skin.
- Extended Wear Tapes:
- Characteristics: Provide a stronger bond (ranging from 1-4 weeks, depending on the specific product and individual factors like body chemistry and climate). Usually stickier, require more effort and solvent for removal.
- Examples (Conceptual): Tapes marketed for longer holds, often blue liners or clear with high tack, may be less flexible.
- Best For: Users seeking longer attachment periods, active individuals, those comfortable with a more involved removal process.
- Specialty Tapes:
- Lace Front Tapes: Often feature a dull finish to reduce shine through lace bases, providing a more natural front hairline appearance. Hold strength varies.
- Perimeter Tapes: Designed specifically for securing the edges of the hairpiece base.
- Waterproof Tapes: Formulated to maintain adhesion during swimming, heavy sweating, or in humid climates. Hold times vary.
Choosing the Right Tape for Your Needs
Consider these factors when selecting a tape:
| Feature | Considerations | Recommendation Focus |
| Wear Time | How long do you want the hairpiece attached without removal? Daily, a few days, weeks? | Match tape category (Daily vs. Extended) |
| Skin Type | Is your skin oily, dry, or sensitive? | Oily: Stronger hold. Sensitive: Daily/gentle |
| Base Material | Is your hairpiece base lace, polyurethane (skin), monofilament, or a hybrid? | Lace: Low-shine tapes. PU: Stronger bonds |
| Activity Level | Do you engage in sports, swim frequently, or live in a humid environment? | Extended wear, waterproof options |
| Cleanup | How much time and effort are you willing to spend on removing adhesive residue? | Daily wear = easier cleanup |
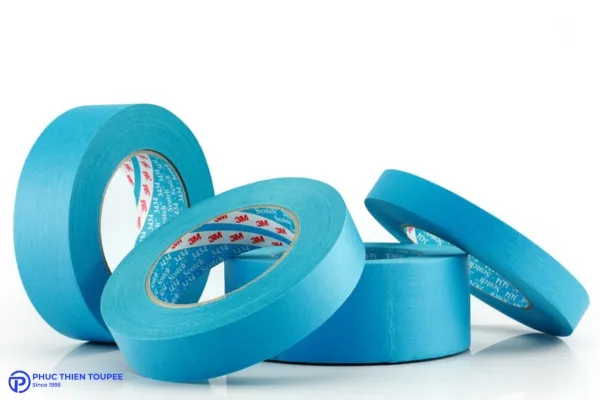
Detailed Tape Application Steps
Precision is key for a secure and comfortable tape application:
- Prepare the Scalp: Cleanse the designated attachment area thoroughly using a scalp cleanser or 99% isopropyl alcohol on a cotton pad. Ensure the skin is completely dry. Apply a scalp protector if desired.
- Prepare the Hairpiece: Turn the hairpiece inside out. Ensure the base is clean and free of residue from previous applications.
- Cut and Apply Tape: If using a tape roll, cut strips to match the contours of your hairpiece base perimeter or specific attachment zones. Peel off one side of the tape’s backing. Carefully apply the sticky side to the designated areas on the underside of the hairpiece base. Press firmly to ensure good adhesion. Avoid touching the sticky surface with your fingers.
- Positioning: Identify your desired hairline placement. Using reference points (like fingers width above eyebrows) can help ensure symmetry.
- Attach the Hairpiece: Peel off the remaining backing from the tape strips applied to the hairpiece. Carefully align the front edge of the hairpiece with your target hairline mark. Slowly roll the hairpiece back over your head, gently smoothing the base onto your scalp as you go.
- Secure the Bond: Once positioned, apply firm, even pressure over all taped areas for at least 30-60 seconds. This activates the bond between the tape and your scalp. Avoid getting the hairpiece wet or excessive sweating for the first few hours (ideally 24 hours) to allow the bond to fully set.
Pros and Cons Revisited
- Advantages: Relatively easy to learn, precise placement control, wide variety of hold strengths available, less messy than liquid adhesives during application.
- Disadvantages: Can leave residue upon removal (especially extended wear tapes), hold might be less secure than glue for some activities, daily application can become tedious for some, potential for shine through lace if wrong tape is used.
🔧 Don’t throw it away — let us restore your old toupee to like-new condition!
2. Liquid Adhesives (Glues): The Long-Lasting, Seamless Solution
Liquid adhesives, often called bonding adhesives or wig glue, create a powerful bond directly between the scalp and the hairpiece base, often favoured for achieving the most invisible hairlines and longest wear times.
Understanding Liquid Adhesive Types
These adhesives vary in their chemical composition, affecting hold, drying time, and skin compatibility:
- Acrylic-Based Adhesives:
- Characteristics: Known for providing a very strong, rigid, and often waterproof bond. They typically have a longer curing time. Removal requires specific, often potent solvents.
- Best For: Maximum hold duration, swimming, heavy perspiration, users without skin sensitivities. Often preferred for polyurethane bases.
- Silicone-Based Adhesives:
- Characteristics: Offer a strong but more flexible bond compared to acrylics. Generally considered gentler on the skin and potentially better for sensitive users. Cleanup might be slightly easier than some acrylics. Hold times can be substantial.
- Best For: Users seeking a balance of strong hold and comfort, potentially better for lace bases due to flexibility, sensitive skin (after patch testing).
- Water-Based Adhesives:
- Characteristics: Typically white liquids that dry clear. Considered the gentlest option, often hypoallergenic and non-flammable. Cleanup is usually easier, often possible with soap and water once the bond breaks down. Hold strength is generally less than acrylic or silicone but sufficient for many users (days to weeks).
- Best For: Sensitive skin, users prioritizing easy cleanup and non-toxic formulations, those who prefer shorter wear cycles between reapplications.
Choosing the Right Liquid Adhesive
Selection requires careful consideration:
| Feature | Considerations | Recommendation Focus |
| Wear Time | Seeking maximum duration (weeks) or comfortable multi-day wear? | Weeks: Acrylic/Silicone. Days/Week+: Water-based/Silicone |
| Skin Type | Prone to irritation or allergies? Oily scalp? | Sensitive: Water-based/Silicone (patch test!). Oily: Acrylic |
| Base Material | Lace requires careful application to avoid seepage. PU allows for broader application. | Lace: Thin layers, consider specific lace glues. PU: Most types work. |
| Climate/Activity | High humidity, frequent swimming, or heavy sweating? | Waterproof Acrylic/Silicone recommended |
| Removal Process | How much time/effort for removal? Sensitivity to solvents? | Water-based = easiest removal |
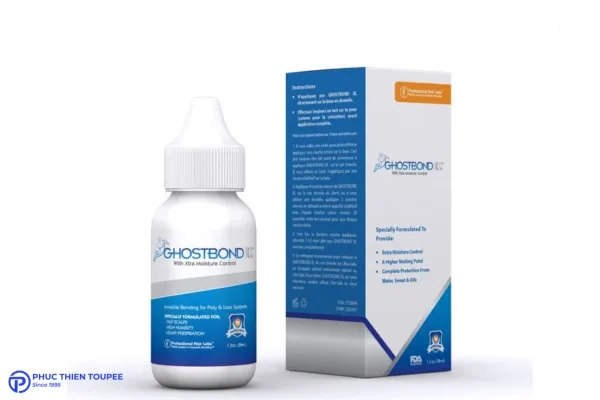
Detailed Liquid Adhesive Application Steps
Application requires patience and precision for optimal results:
- Prepare the Scalp: Cleanse the scalp attachment area meticulously with 99% isopropyl alcohol. Ensure it is completely dry. Apply a scalp protector; this is highly recommended with liquid adhesives to shield the skin and potentially enhance the bond. Allow the protector to dry fully.
- Apply the Adhesive: Apply a thin, even layer of the liquid adhesive directly to your scalp in the designated attachment area OR to the underside of the hairpiece base (follow product instructions – some work better on skin, others on the base). Using a dedicated applicator, small brush, or even a cotton swab can help achieve thin layers. Avoid thick application, which hinders proper curing and can cause oozing.
- Build Layers (Optional but Recommended): For stronger holds, especially with water-based adhesives, apply multiple thin layers (2-3 is common). Crucially, allow each layer to dry completely (it will turn clear or reach a specific level of tackiness per instructions) before applying the next.
- Achieve Tackiness: Wait for the final layer of adhesive to become tacky. This is vital. The exact time varies by product and environment (humidity, temperature), ranging from a few minutes to 10+ minutes. The adhesive should feel sticky to the touch but not transfer to your finger. Rushing this step leads to a weak bond.
- Position and Attach: Carefully align the front hairline of the hairpiece and gently place it onto the prepared area. Slowly roll/press the rest of the system into place, ensuring no air bubbles are trapped. Do not slide the unit once it makes contact with the tacky adhesive.
- Secure the Bond: Apply firm, even pressure across the entire bonded area for 60-90 seconds. Pay special attention to the edges.
- Curing Time: Allow the adhesive to fully cure. Most manufacturers recommend avoiding showering, swimming, or intense exercise for at least 24 hours to ensure the strongest possible bond forms.
Pros and Cons Revisited
- Advantages: Potential for the longest and strongest hold, can create highly realistic and undetectable hairlines, often waterproof options available.
- Disadvantages: Application requires more skill and patience, can be messy if not careful, removal requires specific solvents and more time, higher potential for skin irritation if not chosen or used correctly, requires precise timing (waiting for tackiness).
💡 Save money — get expert repair service instead of buying a new one.
3. Clips and Combs: The Temporary, Non-Adhesive Option
Clips (usually pressure-sensitive snap clips) and small combs can be sewn onto the hairpiece base and attach directly to your existing natural hair. This method avoids scalp adhesives altogether.
How Clips and Combs Work
- Pressure-Sensitive Clips: These small metal clips have a comb-like edge and snap open and closed. You slide the comb edge under a small section of your own hair close to the scalp and snap the clip shut, securing the hairpiece.
- Combs: Small plastic or metal combs are sewn flat onto the base. These slide into your existing hair for stability, often used in conjunction with clips or at the nape/sides.
Application Nuances
- Strategic Placement: Clips/combs must be sewn securely to the hairpiece base in locations where you have sufficient existing hair for attachment. Common placements are around the perimeter, especially at the temples, sides, and back.
- Sectioning Hair: Lift small sections of your natural hair where the clips will attach.
- Attachment: Slide the open clip’s comb under the sectioned hair near the root and snap it closed. For combs, simply slide them firmly into your hair.
- Adjust for Comfort: Ensure the clips are secure but not pulling uncomfortably on your natural hair.
Pros and Cons Revisited
- Advantages: Extremely easy and fast application/removal, no chemicals or adhesives on the scalp, no drying or curing time, ideal for daily removal, minimal cost after initial setup.
- Disadvantages: Least secure method (not suitable for high winds, intense activity, or swimming), requires sufficient existing hair of adequate length/strength for attachment points, can potentially cause traction alopecia (hair loss from pulling) if clips are too tight or worn constantly in the same spots, may feel less integrated than bonded methods.
Best For
This method is most suitable for individuals with partial hair loss who have enough surrounding hair for attachment, those who want the ability to remove their hairpiece nightly or frequently, users with extreme adhesive sensitivities, or as a temporary solution. Often used for toppers and integration pieces rather than full cap systems needing perimeter security.

4. Combination Methods: Leveraging Strengths
For enhanced security or comfort, many wearers utilize a combination of methods.
Why Combine Methods?
This approach allows you to use the best properties of different attachment types in different areas:
- Example 1: Glue Front + Tape Sides/Back: Use liquid adhesive at the front hairline for the most natural, undetectable look, and use extended wear tape around the sides and back for strong, reliable hold with slightly easier cleanup in those less visible areas.
- Example 2: Perimeter Tape + Interior Clips: For larger pieces or those with some existing hair underneath, use tape around the edges for security and clips in the interior for added stability and reduced reliance on full adhesive coverage.
Considerations
While offering flexibility, combination methods require managing different application and removal procedures for each type of attachment used. Ensure the methods chosen are compatible with your hairpiece base material.
🧵 Every stitch, every strand — we take care of every detail.
Expert Secure Hairpiece Tips for a Rock-Solid Hold
Here are actionable tips to maximize your hairpiece security, brought to you by Phucthien:
Scalp Preparation is Non-Negotiable
Think of your scalp as the foundation. A poorly prepared foundation leads to subpar results.
- Immaculate Cleansing: Use a dedicated scalp cleanser or 99% isopropyl alcohol. Saturate a cotton pad and wipe the entire attachment area thoroughly. This removes natural oils (sebum), sweat residue, and any lingering adhesive traces that will interfere with the bond. Let it air dry completely – any moisture is detrimental.
- Strategic Exfoliation: Gently exfoliate the scalp area 1-2 times per week (on non-application days). This removes dead skin cells that can otherwise flake off, taking the adhesive with them. Use a gentle scalp scrub or even a soft washcloth. Do not exfoliate immediately before application, as it can cause sensitivity.
- Utilize Scalp Protectors: These products create a micro-thin barrier between your skin and the adhesive.
- Benefits: They significantly reduce irritation for sensitive skin, provide a better surface for the adhesive to grip (especially on oily skin), and can even extend hold times. Some contain antiperspirants.
- Application: Apply a thin layer to the attachment area after cleansing and before adhesive application. Let it dry completely (usually 1-2 minutes). Phucthien recommends barrier film wipes or sprays for easy, even application.
🔄 Extend the lifespan of your hair system with our professional repairs.
Master Your Adhesive Choice and Use
Selecting the right product is only half the battle; using it correctly is critical.
- Patch Test Religiously: Before committing to a full application of any new tape or liquid adhesive, always perform a 24-48 hour patch test on a discreet skin area. This helps identify potential allergic reactions or irritation before it becomes a widespread issue.
- Consider Your Environment: High humidity and temperature can accelerate adhesive breakdown and increase sweating. If you live in or travel to such climates, opt for stronger hold, waterproof adhesives (often acrylics) and potentially more frequent reapplication schedules. Colder, drier air can sometimes make tapes slightly less pliable initially.
- Base Material Compatibility: Ensure your chosen adhesive is suitable for your hairpiece base. Some aggressive solvents needed for certain acrylic glues might damage delicate lace over time. Polyurethane (skin) bases generally tolerate most adhesive types well. Check manufacturer recommendations for both the hairpiece and the adhesive.

Precision Application Techniques Make the Difference
Sloppy application is a primary cause of premature lifting and weak bonds.
- Thin, Even Layers (Liquid Adhesives): Resist the urge to apply thick coats of glue, thinking more is stronger. Thick layers cure improperly, remain gummy underneath, can ooze, and actually provide a weaker bond. Apply thin, consistent layers, allowing appropriate drying/tacky time between each if multi-coating.
- Respect the Tacky Time (Liquid Adhesives): This is arguably the most crucial step for liquid adhesives. Applying the hairpiece when the glue is still wet results in a weak, messy bond. Applying it when it’s fully dry results in no bond at all. Follow product instructions precisely – it should feel sticky like flypaper but not transfer wetness to your finger. This can take 3-15 minutes depending on the product and conditions.
- Firm, Consistent Pressure: Once the hairpiece is positioned correctly, apply firm pressure across all bonded areas using the palm of your hand, a small towel, or a specialized tool. Hold pressure for at least 60-90 seconds. This ensures intimate contact between the adhesive, scalp, and base, pushing out any tiny air pockets.
- Accurate Alignment: Use visual cues (eyebrows, nose) or even a washable marker to dot your desired hairline placement before applying adhesive. This prevents needing to reposition the unit once the adhesive is tacky, which compromises the bond.
🛠️ Send us your damaged piece today and receive a fast quote!
Hairline Blending Secrets for Security and Realism
A secure hairline not only looks better but is often less prone to lifting.
- Place it Right: Avoid placing the hairline too low on the forehead where excessive movement from facial expressions occurs. Find the natural transition point.
- Concealer Trick (Lace Fronts): After attachment, use a very fine brush or cotton swab to dab a tiny amount of concealer (matching your scalp/skin tone) underneath the lace edge or directly onto any visible knots. This helps the edge blend seamlessly. Use sparingly.
- Strategic Styling: Gently comb a few strands of your hairpiece hair back away from the immediate hairline or blend a few of your own bio hairs (if available) over the front edge to soften the transition. Avoid harsh, pulled-back styles immediately after application.
Maintenance Habits That Bolster Security
How you care for your hairpiece between applications directly impacts how well the next bond holds.
- Clean Base is Crucial: Thoroughly remove all adhesive residue from the hairpiece base after every removal. Lingering residue creates an uneven surface and prevents the new adhesive from bonding properly. Use the recommended solvent for your specific adhesive and be patient.
- Conditioner Caution: While conditioning the hair is essential, avoid applying conditioner directly to the base or knots, especially with lace systems. Conditioner oils can seep down, coating the base and compromising future adhesive bonds, potentially loosening knots over time as well. Apply conditioner mid-shaft to ends only.
- Proper Drying: Ensure both your scalp and the hairpiece base are completely dry before reapplying adhesive. Moisture is the enemy of adhesion. Allow ample air-drying time or use a hairdryer on a cool setting.
- Adhere to Wear Time Limits: Pushing adhesives beyond their recommended wear time leads to messy breakdown, potential skin issues, and makes cleanup significantly harder. Stick to a regular maintenance schedule based on your chosen adhesive and personal factors. Phucthien generally advises a reapplication cycle of 1-3 weeks for most extended wear adhesives, adjusting based on individual experience.

Active life, no worries: Discover safe Swimming with Hairpieces and how Hairpiece Care for Oily Scalps helps
Swimming and Intense Activity Protocols
Maintaining security during demanding situations requires extra care:
- Choose Waterproof Adhesives: Select tapes or liquid adhesives specifically labelled as waterproof or sport-focused. These are formulated to resist moisture and salt/chlorine better. Acrylics often perform well here.
- Allow Full Cure Time: Ensure the adhesive has cured for at least 24 hours before swimming or engaging in activities causing heavy sweat. This initial period is critical for bond strength.
- Consider a Swim Cap: While not foolproof, a snug silicone swim cap adds a layer of protection, reducing direct water flow over the hairline and keeping the unit more stable.
- Post-Activity Care: After swimming or intense exercise, rinse the hairpiece (while wearing it, if possible) with fresh water to remove chlorine, salt, or sweat. Gently pat dry. Check the bond integrity once dry and perform touch-ups if needed. Heavy sweat can sometimes require more frequent reapplications.
Advanced Application Considerations
- Layering Techniques: Some experienced users layer different adhesives for custom results (e.g., a base layer of tape with a thin layer of liquid adhesive over it or at the very edge for extra seal). This requires experimentation and understanding of product compatibility.
- Adhesive Boosters: Certain products claim to enhance adhesive strength or longevity when applied before the main adhesive. Use these according to their specific instructions.
- Edge Control: For hairline security, some users apply a very thin bead of strong-hold liquid adhesive right at the leading edge, even if using tape primarily elsewhere.
By incorporating these expert tips from Phucthien into your routine, you significantly enhance the reliability and security of your hairpiece bond, leading to greater confidence and worry-free wear.
🔍 Looking for a specific size, base, or hair color? Order a fully personalized toupee now!
Staying Secure During Activities and Exercises
Maintaining hairpiece security during physical activities requires special attention. Here are some tips:
Low-Impact Activities
- Secure Adhesives: Opt for waterproof or sweat-resistant adhesives for a reliable hold.
- Headbands: Use headbands to keep hair away from the face and add extra security, especially during light exercises like yoga or walking.
- Regular Checks: Periodically check the hairpiece’s edges during breaks to ensure everything is in place.
High-Impact Activities
- Tight Fit: Make sure the hairpiece fits snugly and securely.
- Protective Headwear: Consider wearing a sports cap or bandana to hold the hairpiece in place and absorb sweat.
- Avoid Extreme Conditions: Try to avoid activities in extreme heat or humidity, as these conditions can affect adhesive performance.
Phuc Thien Toupee Co., Ltd
Design Brand: Royal Hair Vietnam
Office Address:
🏢 Room A909, Decapella Building, 116 Luong Dinh Cua Street, An Khanh Ward, Thu Duc City, Ho Chi Minh City 700000, Vietnam
Factory Address:
🏭 No. 26/9, Street 57, Thuong Hamlet, Tan Thong Hoi Ward, Cu Chi District, Ho Chi Minh City 700000, Vietnam
Email: ✉️ phucthientoupeevn@gmail.com
Phone / WhatsApp: 📞 +84 933 901 196
Websites: 🌐 phucthientoupee.com – 🌐 royalhair.shop