

- 12/05/2025
- Posted by: phucthien
- Category: Blog
Topper styling mistakes can be frustrating, but understanding the common pitfalls can help you achieve flawless, natural-looking results. With the right techniques, anyone can enhance their look with hair toppers and unlock their full potential for added volume and stylish versatility. Let’s delve into key strategies to avoid these common mistakes and elevate your topper game. Unlock your confidence with hair enhancements, volume solutions, and seamless integration techniques.
Investing in a high-quality human hair topper is a great first step, but styling it correctly is key to a natural and confident look. Phucthientoupee is here to guide you through the most common styling errors and provide easy-to-follow solutions to transform your topper experience.

Mistake 1: Incorrect Blending with Natural Hair
One of the most frequent challenges users face is achieving a seamless transition between the topper’s hair and their own biological hair. Poor blending is often the primary reason a hairpiece looks unnatural.
The Telltale Signs of Poor Blending
Identifying poor blending is the first step toward correction. Look out for these indicators:
- Visible Demarcation Line: A noticeable line where the topper begins or ends, creating an abrupt change in density or texture.
- Color Mismatch: The topper hair color contrasts sharply with your natural hair color, especially noticeable under different lighting conditions (natural vs. artificial light). Even subtle differences in undertones (cool vs. warm) can be apparent.
- Texture Discrepancy: The topper hair (e.g., silky straight) looks distinctly different from your natural hair texture (e.g., wavy or coarse).
- Unnatural Hairline: If the topper edge is placed too far forward or doesn’t mimic a natural hairline gradient, it can look artificial.
- Bulkiness at the Part: The area where the topper meets your scalp looks too dense or elevated compared to the surrounding hair.
Why Blending Goes Wrong
Several factors contribute to blending challenges:
- Incorrect Topper Selection: Choosing a topper with a color, density, or texture that doesn’t closely match your natural hair is the most common root cause. Online color matching can be tricky due to screen variations. Texture differences, like straight versus wavy, are immediately obvious.
- Poor Placement: Placing the topper too far forward, too far back, or crookedly disrupts the natural flow and integration with your own hair.
- Lack of Integration Techniques: Simply clipping the topper on without actively blending the hairs together often results in a separated look.
- Insufficient Styling: Failing to cut or style the topper hair to layer and blend with your natural hair maintains a distinct separation. Human hair toppers often require customization by a stylist.
- Base Construction Awareness: Different bases (monofilament, silk, lace front) offer varying degrees of natural appearance at the hairline and part. Not understanding how to work with a specific base type can hinder blending. For instance, a lace front requires careful handling to look invisible.
According to a study published in the International Journal of Trichology, observer perception of hair naturalness is highly sensitive to color and density transitions. Smooth gradients are key to perceived realism, highlighting the importance of meticulous blending.

Avoid common errors: Master Human Hair Topper Styling with expert Topper Brushing techniques
Phucthien’s Step-by-Step Guide to Seamless Blending
Achieving undetectable blending requires careful attention to detail. Follow these steps provided by Phucthientoupee for optimal results:
Step 1: Perfect Color and Texture Matching
- Consultation is Key: If possible, consult with a hair professional or a Phucthien expert. We can help assess your natural hair’s color (including undertones), texture, and density.
- Utilize Color Rings/Swatches: When purchasing online, request a color ring or physical swatches if available. Compare them to your natural hair in various lighting conditions (natural daylight is best). Hold the swatch near your roots and ends.
- Consider Custom Coloring: Human hair toppers can often be professionally colored to achieve a perfect match. A stylist can add subtle lowlights or highlights to mimic the natural variations in your hair. Phucthien offers customization services.
- Texture Harmony: Choose a topper texture that mirrors your own. If your hair is wavy, select a wavy topper. Minor texture differences can sometimes be managed with styling, but significant ones are hard to disguise. Remy human hair often provides the most natural movement and texture.
Step 2: Strategic Placement
- Identify Your Target Area: Determine precisely where you need coverage or volume. This dictates the ideal placement zone.
- Align with Your Natural Part: Position the topper so its part aligns naturally with where you usually part your hair. If the topper has a defined part (like a monofilament top), this is crucial. For freestyle parting bases (like full lace), you have more flexibility but should still aim for a natural location.
- Distance from Hairline: Generally, place the front edge of the topper about 1/2 to 1 inch (approx. 1.3 to 2.5 cm) behind your natural hairline. This allows some of your own hair to blend over the front edge, creating a softer, more natural transition. Adjust based on your specific hairline and the topper’s front edge construction (e.g., lace fronts can sometimes be placed closer).
- Ensure it’s Straight: Use a mirror to check that the topper is placed straight and centered, not tilted to one side.
Step 3: The Art of Integration
- Secure the Topper: Clip the topper securely following the placement guidelines (more on security in Mistake #3).
- Pull Natural Hair Through: Gently use your fingers or a wide-tooth comb to lift sections of your natural hair from underneath and around the perimeter of the topper. Pull these strands over the edges of the topper base.
- Comb Together: Use a wide-tooth comb or your fingers to gently comb the topper hair and your natural hair together, encouraging them to intermingle. Avoid harsh brushing near the base or clips. Start combing from the ends and work your way up to prevent tangling.
- Focus on the Part: Pay special attention to the parting area. Ensure your natural hair is blended smoothly into the topper’s part.
Step 4: Styling for Unity
- Custom Cutting/Layering: This is often the most transformative step. Take your topper to an experienced stylist (ideally one familiar with alternative hair) to have it cut and layered while it’s on your head. This integrates the lengths and shapes, removing any blunt lines. Request face-framing layers for a softer look.
- Use Styling Products: Apply a small amount of smoothing serum or light-hold hairspray to both your hair and the topper hair to unify the texture and manage flyaways. Avoid heavy products near the base.
- Heat Style Together (Carefully): If both your hair and the topper are human hair and can tolerate heat, you can use tools like curling irons or flat irons to create waves or curls that flow continuously from your hair into the topper hair. Always use heat protectant (more on this in Mistake #2).
Table: Blending Quick Reference
| Feature | Best Practice Recommendation | Why It Matters |
| Color | Match in natural light; use swatches; consider pro coloring. | Prevents obvious color blocking. |
| Texture | Choose topper texture matching natural hair. | Avoids stark visual/tactile differences. |
| Placement | 1/2 – 1 inch behind hairline; align with natural part; keep straight. | Creates a natural hairline and flow. |
| Integration | Pull natural hair over edges; comb together gently. | Merges the two hair sources visually. |
| Styling | Professional cut/layering; use unifying products; heat style. | Creates cohesive shape and movement. |
By diligently following these steps, you can overcome blending challenges and wear your topper with the assurance that it looks entirely natural. Remember, practice enhances proficiency, so be patient with yourself as you refine your technique.
🎨 Your style, your hair — we make it exactly how you want.
Mistake 2: Improper Heat Styling Techniques
Human hair toppers offer the wonderful advantage of being heat-stylable, just like your own hair. This allows for immense versatility in creating different looks – sleek and straight, bouncy curls, or soft waves. However, improper heat styling is a major pitfall that can irreversibly damage the topper hair, shorten its lifespan, and compromise its appearance.
The Risks of Incorrect Heat Application
Applying heat incorrectly or excessively poses several dangers to your human hair topper:
- Fiber Damage: Human hair, whether on your head or in a topper, is susceptible to heat damage. High temperatures break down the hair’s protein structure (keratin) and strip away moisture, leading to dryness, brittleness, and breakage.
- Frizz and Flyaways: Damaged hair cuticles become raised and rough, resulting in frizz and making the hair difficult to manage.
- Reduced Lifespan: Consistent heat damage weakens the hair fibers over time, causing shedding and thinning of the topper, ultimately reducing how long you can use it.
- Color Fading: High heat can accelerate the fading of colored or processed topper hair.
- Loss of Natural Texture/Shine: Overheating can alter the hair’s natural texture and diminish its healthy sheen, making it look dull and lifeless. Unlike your natural hair, topper hair doesn’t receive natural oils from the scalp, making it more vulnerable to drying out from heat.
Research published in the Journal of Cosmetic Science confirms that temperatures exceeding 350°F (175°C) can cause significant damage to the hair cuticle and cortex, emphasizing the need for caution.
Common Heat Styling Errors
Many users inadvertently damage their toppers by making these frequent mistakes:
- Using Excessive Heat: Setting flat irons or curling irons to the highest temperature, assuming it’s necessary for styling. Human hair toppers often require lower temperatures than biological hair might tolerate.
- Skipping Heat Protectant: Failing to apply a heat protectant spray or serum before using any heat tool. This leaves the hair completely exposed to potential damage.
- Using the Wrong Tools: Employing cheap styling tools with uneven heat distribution or plates/barrels that snag and pull the hair. Metal-plated tools are generally harsher than ceramic, tourmaline, or titanium options.
- Styling While Wet or Damp: Applying high heat to wet or damp hair can cause the water inside the hair shaft to boil, leading to steam damage (bubble hair) and breakage. The topper should be completely dry.
- Holding Heat Too Long: Keeping the iron clamped on one section of hair for an extended period, concentrating heat and causing localized damage.
- Repetitive Styling: Heat styling the topper daily or multiple times a day without allowing the hair to rest.
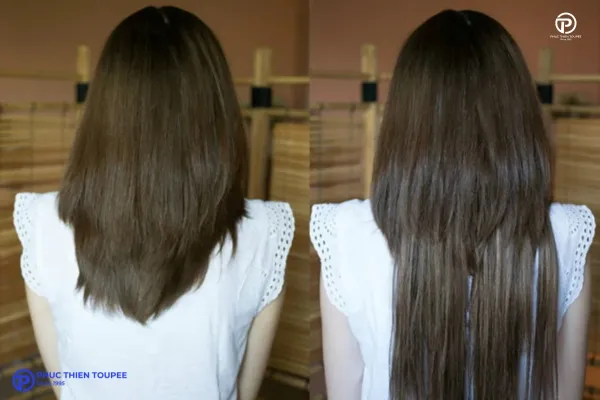
Phucthien’s Safe Heat Styling Protocol
Protect your investment and keep your human hair topper looking beautiful by adhering to Phucthien’s recommended safe heat styling practices:
Step 1: Always Use a Heat Protectant
- Mechanism: Heat protectants work by creating a protective barrier on the hair shaft, reducing moisture loss and distributing heat more evenly. Many contain silicones, polymers, and moisturizing ingredients.
- Application: Before applying any heat, lightly mist a quality heat protectant spray evenly over the dry topper hair. Hold the bottle about 6-8 inches (15-20 cm) away. Comb through gently with a wide-tooth comb to ensure even distribution.
- Product Choice: Select a lightweight formula designed for human hair. Avoid heavy oil-based products that can weigh the hair down, especially near the base. Phucthien can recommend suitable products.
Step 2: Choose the Right Temperature
- Start Low: Always begin with the lowest heat setting on your tool and gradually increase only if necessary. Human hair toppers often style effectively at lower temperatures than you might expect.
- General Guideline: For most human hair toppers, keep the temperature below 350°F (175°C). A range of 280-320°F (140-160°C) is often sufficient.
- Consider Hair Texture/Condition: Finer hair or heavily processed/colored hair requires lower heat settings than coarser or virgin hair.
- Test Strand: If unsure, test the heat setting on a small, inconspicuous strand underneath the topper first.
Table: Recommended Heat Settings (Approximate)
| Hair Condition | Recommended Max Temperature (°F) | Recommended Max Temperature (°C) | Notes |
| Fine / Processed | 250 – 300°F | 120 – 150°C | Very delicate, use minimal heat. |
| Normal / Healthy | 300 – 350°F | 150 – 175°C | Usually sufficient for styling. |
| Coarse / Resistant | 350 – 380°F | 175 – 195°C | Use with caution, monitor hair response. |
Note: Always start lower and increase only if needed. Never exceed 400°F (200°C).
Step 3: Select Appropriate Tools
- Material Matters: Opt for styling tools with ceramic, tourmaline, or titanium plates/barrels. These materials provide more even heat distribution and glide smoothly through the hair, reducing snagging.
- Adjustable Heat Settings: Ensure your tools have variable temperature controls, allowing you to select a safe setting. Avoid tools with only on/off or low/high settings.
- Size Appropriateness: Choose barrel sizes (curling irons) or plate widths (flat irons) suitable for the length and desired style of your topper.
Step 4: Technique Matters
- Ensure Hair is Dry: Never apply heat tools to wet or damp topper hair. Allow it to air dry completely or use a blow dryer on a low heat/cool setting with a heat protectant.
- Work in Sections: Divide the topper hair into manageable sections. This allows for more controlled and even heat application.
- Smooth, Quick Passes: When using a flat iron, glide it smoothly down the hair section without stopping. For curling irons, wrap the hair and hold for only a few seconds (typically 5-10 seconds depending on heat and hair type). Avoid repeated passes over the same section if possible.
- Maintain Tension: Keep gentle tension on the hair section as you style for smoother results.
- Styling Direction: Style the hair in the direction you want it to fall naturally.
Step 5: Cool Down and Set
- Allow Hair to Cool: After curling, let the curls cool completely before touching or brushing them. You can gently cup a warm curl in your hand or use a clip to hold its shape while it cools. This helps the style set and last longer.
- Finishing Products: Once cool, use a light-hold hairspray or finishing serum sparingly if needed.
By treating your human hair topper with care during heat styling, you preserve its integrity, appearance, and value. Following this protocol minimizes damage and maximizes styling versatility, ensuring your topper remains a beautiful and reliable hair enhancement solution for as long as possible.
🔍 Looking for a specific size, base, or hair color? Order a fully personalized toupee now!
Mistake 3: Neglecting Proper Topper Placement and Security
Even a perfectly blended and beautifully styled topper can look unnatural or cause discomfort if it’s not placed correctly and secured properly. This mistake can lead to embarrassment from slippage, an artificial appearance, and even potential damage to your existing hair or scalp.
Consequences of Poor Placement and Security
Failing to master topper placement and secure attachment can result in several undesirable outcomes:
- Unnatural Appearance: A topper sitting too high, too low, crooked, or looking bulky at the attachment points immediately signals that you’re wearing a hairpiece.
- Discomfort and Irritation: Clips digging into the scalp, excessive pulling on natural hair, or the base not sitting flush can cause headaches, soreness, and irritation.
- Risk of Slippage or Shifting: An insecurely attached topper can shift or even fall off during daily activities, leading to awkward situations. Wind or sudden movements can become sources of anxiety.
- Damage to Natural Hair: Clips that are consistently placed in the same spots or pulled too tightly can cause traction alopecia, a type of hair loss due to prolonged tension on the hair follicles.
- Base Wear and Tear: Improper handling during application and removal can strain the topper base and clips, reducing their lifespan.
Why Toppers Shift or Look Misplaced
Several factors contribute to placement and security issues:
- Incorrect Size or Base Shape: Choosing a topper base that is too large, too small, or doesn’t conform well to the shape of your head can prevent it from sitting flat and securely.
- Improper Clip Usage: Not engaging the pressure-sensitive clips correctly (failing to snap them shut securely) or attaching them to insufficient amounts of natural hair.
- Suboptimal Clip Placement: The built-in clips might not be positioned ideally for your specific pattern of hair loss or head shape. Sometimes, clips need to be repositioned or added.
- Oily Scalp or Hair Products: Excessive oil on the scalp or residue from styling products can make the natural hair slippery, preventing clips from gripping effectively.
- Insufficient Natural Hair for Grip: In areas of significant thinning, there might not be enough natural hair for the clips to anchor securely.
- Rushing the Application: Not taking the time to carefully position and secure the topper leads to errors.
The American Academy of Dermatology Association (AAD) notes that hairstyles imposing continuous pulling force on hair roots can lead to traction alopecia, underscoring the importance of gentle and secure, rather than overly tight, attachment methods for hairpieces.
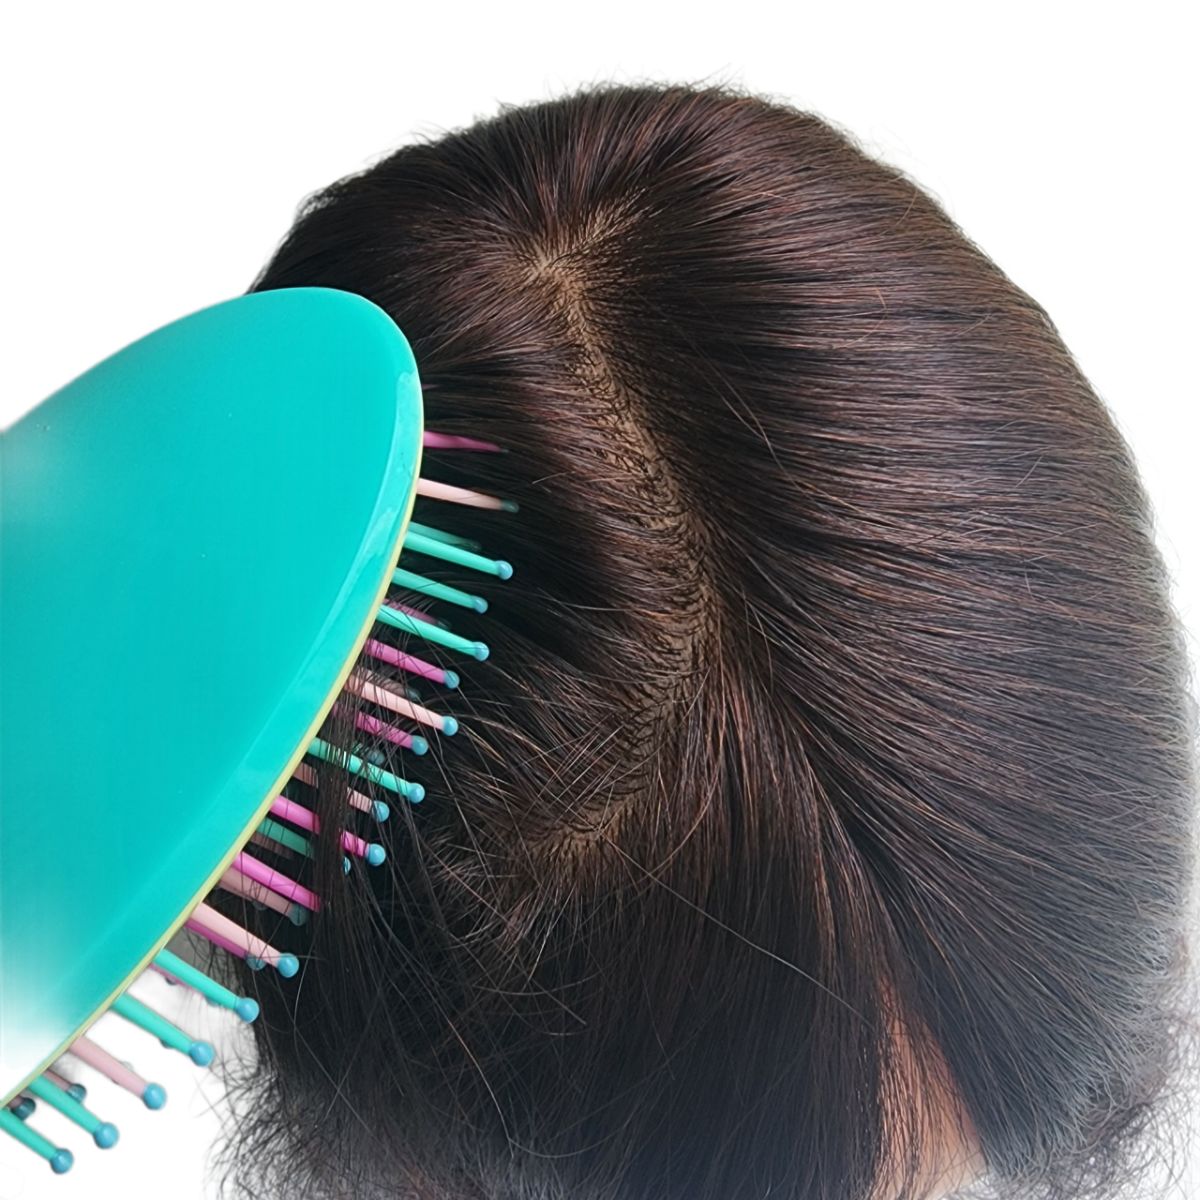
For a flawless look: Use the right Topper Styling Tools and achieve Voluminous Topper Styles for Topper for Thinning Hair
Phucthien’s Secure and Natural Placement Method
Achieving a secure fit that feels comfortable and looks natural is crucial. Follow Phucthien’s detailed steps for optimal topper placement and security:
Step 1: Prepare Your Natural Hair and Scalp
- Clean Base: Ensure your scalp and the natural hair where the clips will attach are clean and dry. Excess oil or product buildup can compromise clip grip. Consider using a dry shampoo lightly at the roots if oiliness is a concern, but avoid heavy buildup.
- Smooth Your Hair: Comb or brush your natural hair smoothly away from the intended placement area. If your hair is very fine, you might consider gently teasing the small sections where the clips will attach to create a more substantial base for gripping (do this gently to avoid damage).
Step 2: Identify the Optimal Placement Zone
- Reference Your Part: As mentioned in blending, align the topper’s part (if applicable) with your desired natural part.
- Hairline Positioning: Reconfirm the ideal distance from your natural hairline (typically 1/2 to 1 inch back). Use a mirror and experiment slightly to find the spot that looks most natural for your face shape and hairline.
- Contour Fit: Ensure the topper base contours as closely as possible to the curve of your head in the chosen position. It should lie flat without buckling or lifting significantly at the edges.
Step 3: The Clip-In Technique Refined
- Open All Clips: Before placement, make sure all the pressure-sensitive clips sewn onto the topper base are bent outwards (in the open position).
- Position the Topper: Hold the topper by the front and back edges and gently place it onto your head in the identified optimal zone.
- Secure Front Clip(s) First: Start by securing the clip(s) at the front edge. Slide the comb part of the clip firmly but gently under a small section of your natural hair, close to the scalp. Press down on the sides of the clip until you hear or feel it snap shut securely. Ensure it grabs enough hair to be stable but doesn’t pull uncomfortably.
- Secure Back Clip(s): While maintaining gentle tension to keep the topper flat, secure the clip(s) at the back in the same manner (slide, then snap shut).
- Secure Side Clips: Finish by securing the side clips, ensuring the topper lies smooth and flat against your head contour. The sequence (front-back-sides or front-sides-back) might vary based on personal preference and topper design, but securing the front first often helps with alignment.
- The ‘Scoop and Lock’ Motion: Think of sliding the open clip comb along the scalp slightly to gather hair before snapping it shut. This ensures a better grip than just pressing it down directly.
Step 4: Checking for Security and Comfort
- Gentle Tug Test: Once all clips are secured, gently tug on the topper from different angles (front, back, sides) to ensure it feels stable and doesn’t shift easily. It should feel snug but not painfully tight.
- Comfort Check: Wear the topper for a few minutes. Check for any specific points of pressure or pulling. If a clip feels uncomfortable, try releasing it and re-securing it slightly differently, perhaps grabbing a slightly different section of hair or angling the clip slightly.
- Mirror Check: Examine the placement from all angles in a mirror (use a handheld mirror for the back view) to ensure it looks flat, centered, and natural.
Step 5: Concealing Clips and Edges
- Utilize Natural Hair: As part of the blending process (Mistake #1), ensure your natural hair from the front hairline and sides is gently combed over the front edge and side edges of the topper base to help conceal them.
- Root Touch-Up Products (Optional): If the base or clips are slightly visible through thin hair at the part line, a light dusting of root touch-up spray or hair fibers that match your hair color can help camouflage them effectively. Apply sparingly.
- Consider Clip Repositioning: If you consistently struggle with security or comfort due to clip location, Phucthientoupee or a skilled stylist can often reposition or add/remove clips for a customized fit.
Diagram/Description Idea: Imagine a top-down view of a head. Mark the ‘ideal placement zone’ typically starting 1/2 inch behind the front hairline and extending back to cover the area of thinning. Indicate the common clip locations (e.g., front center, two sides, back center) and arrows showing the ‘scoop and lock’ motion for securing clips.
Mastering secure and comfortable placement might take a few tries, but it’s fundamental to wearing your topper confidently. By following these steps, you ensure your hair enhancement piece stays put, feels good, and looks impeccably natural throughout your day.
✨ A toupee shouldn’t just hide hair loss — make it a style statement!
Maintaining Your Topper’s Health and Style
Consistent maintenance is key to ensuring your human hair topper remains beautiful, comfortable, and lasts as long as possible. Think of it like caring for high-quality clothing or your own biological hair; neglect leads to deterioration. Incorporating a routine based on Phucthien’s recommendations will protect your investment and keep you looking your best.
Regular Washing Schedule: As mentioned, washing every 7-14 wears is a general guideline. Adjust based on your lifestyle, environment (dust, smoke), and product usage. If the hair feels heavy, looks dull, or loses its movement, it’s likely time for a wash.
Deep Conditioning Treatments: Since topper hair doesn’t receive natural scalp oils, it benefits immensely from periodic deep conditioning treatments. Use a conditioner specifically designed for human hair wigs/toppers.
- Frequency: Approximately once a month, or every 4-6 washes.
- Method: After washing and rinsing shampoo, apply the deep conditioner generously, focusing on mid-lengths and ends (avoiding the base/knots). Leave it on for the recommended time (often 15-30 minutes; some benefit from gentle, low heat). Rinse thoroughly with cool water.

Professional Maintenance: Even with excellent home care, professional servicing can revitalize your topper.
- Trimming: Just like natural hair, topper ends can become dry or split over time. A professional stylist experienced with toppers can trim the ends lightly to maintain health and shape without sacrificing significant length.
- Color Refresh: If your topper color fades over time due to sun exposure or washing, a professional colorist can refresh the tone or add subtle highlights/lowlights to restore its vibrancy and ensure it continues to match your natural hair. Phucthientoupee offers these services.
- Repairs: If clips loosen, the base shows wear, or minor damage occurs, professional repair services can often extend the topper’s life.
Gentle Handling: Always handle your topper gently. Avoid pulling, tugging, or stretching the base. Use wide-tooth combs for detangling, starting from the ends and working upwards. Support the base when brushing or combing.
Environmental Protection:
- Sun: Prolonged, direct sunlight can cause fading. Consider wearing a hat if you’ll be outdoors for extended periods. UV protectant sprays for hair can also offer some protection.
- Chlorine/Salt Water: Avoid swimming in chlorinated pools or salt water with your topper on, as these can severely dry out and damage the hair. If unavoidable, apply a leave-in conditioner beforehand and rinse thoroughly immediately after.
By integrating these maintenance practices into your routine, you actively contribute to the longevity and sustained beauty of your human hair topper, ensuring it remains a valuable part of your style and confidence.
💼 Whether for personal use or salon business, custom orders are always welcome.
Conclusion: Topper Styling Mistakes
Navigating the world of human hair toppers can initially seem daunting, but achieving beautiful, natural-looking results is predominantly about avoiding a few key styling mistakes. By understanding and correcting the three most common errors—improper blending, incorrect heat styling, and poor placement/security—you unlock the full potential of your hair enhancement piece.
Phuc Thien Toupee Co., Ltd
Design Brand: Royal Hair Vietnam
Office Address:
🏢 Room A909, Decapella Building
116 Luong Dinh Cua Street, An Khanh Ward
Thu Duc City, Ho Chi Minh City 700000, Vietnam
Factory Address:
🏭 No. 26/9, Street 57, Thuong Hamlet
Tan Thong Hoi Ward, Cu Chi District
Ho Chi Minh City 700000, Vietnam
Email:
✉️ phucthientoupeevn@gmail.com
Phone / WhatsApp:
📞 +84 933 901 196
Websites: